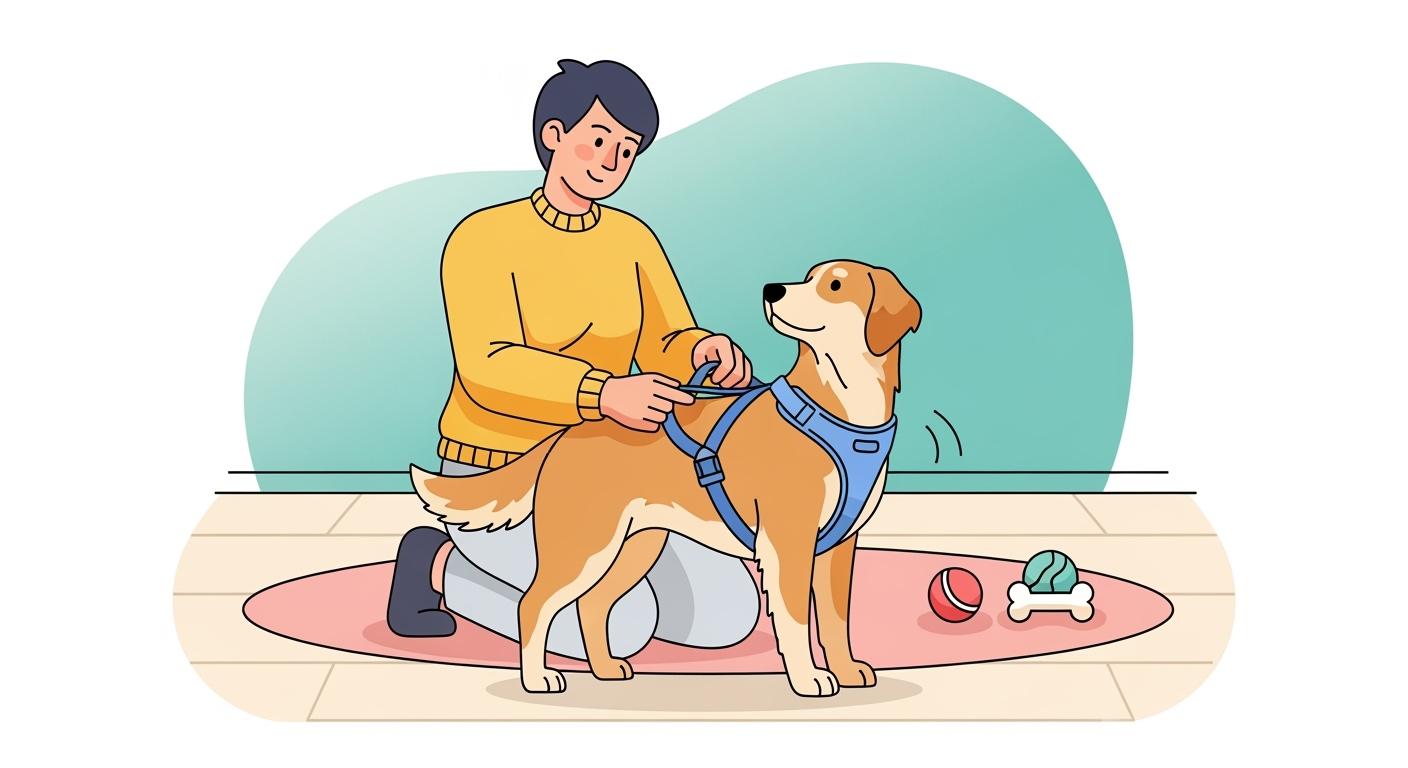
Learning how to put on harness dog starts with selecting the right style for your pup and gently securing it around their body. Ensuring a proper fit is essential for both comfort and safety.
- When you know how to put on harness dog correctly, the harness distributes pressure across the chest and shoulders instead of the neck.
- A good fit when you put on harness dog helps minimize strain and prevents rubbing or skin irritation.
Always check the harness type and fit before every walk to make sure your dog is comfortable and secure.
Key Takeaways
- Pick the right harness type for your dog. Think about what makes your dog comfortable and how they move. This helps the harness fit well.
- Always measure your dog’s chest and neck before you buy a harness. Use the two-finger rule to see if it is snug. This stops the harness from being too tight or loose.
- Check the harness for damage before every walk. Adjust it so it fits your dog well. This keeps your dog safe and comfortable.
Before you put on the harness
Identify harness type
You need to check the harness style before you begin. Harnesses come in several designs, each affecting your dog’s movement and comfort. Step-in harnesses work well for dogs that dislike gear going over their head. Over-the-head harnesses offer quick placement and stability. Multi-strap or dual-clip harnesses provide versatility for training and walking. The table below shows common harness types and their features:
| Type of Harness | Pros | Cons |
|---|---|---|
| Front-Clip Step-In Harness | Discourages pulling; ideal for training. | May restrict stride in active dogs. |
| Back-Clip Step-In Harness | Simple walking experience; easy leash attachment. | Less control for pullers; may encourage tension. |
| Dual-Clip Custom Harness | Versatile for training and casual walks. | Slightly heavier; needs correct leash management. |
| Soft Mesh | Lightweight and breathable; good for warm climates. | Less durable under heavy strain. |
| Padded Nylon | Sturdy and abrasion-resistant; good for strong pullers. | May retain heat in summer months. |
Find the right size and fit
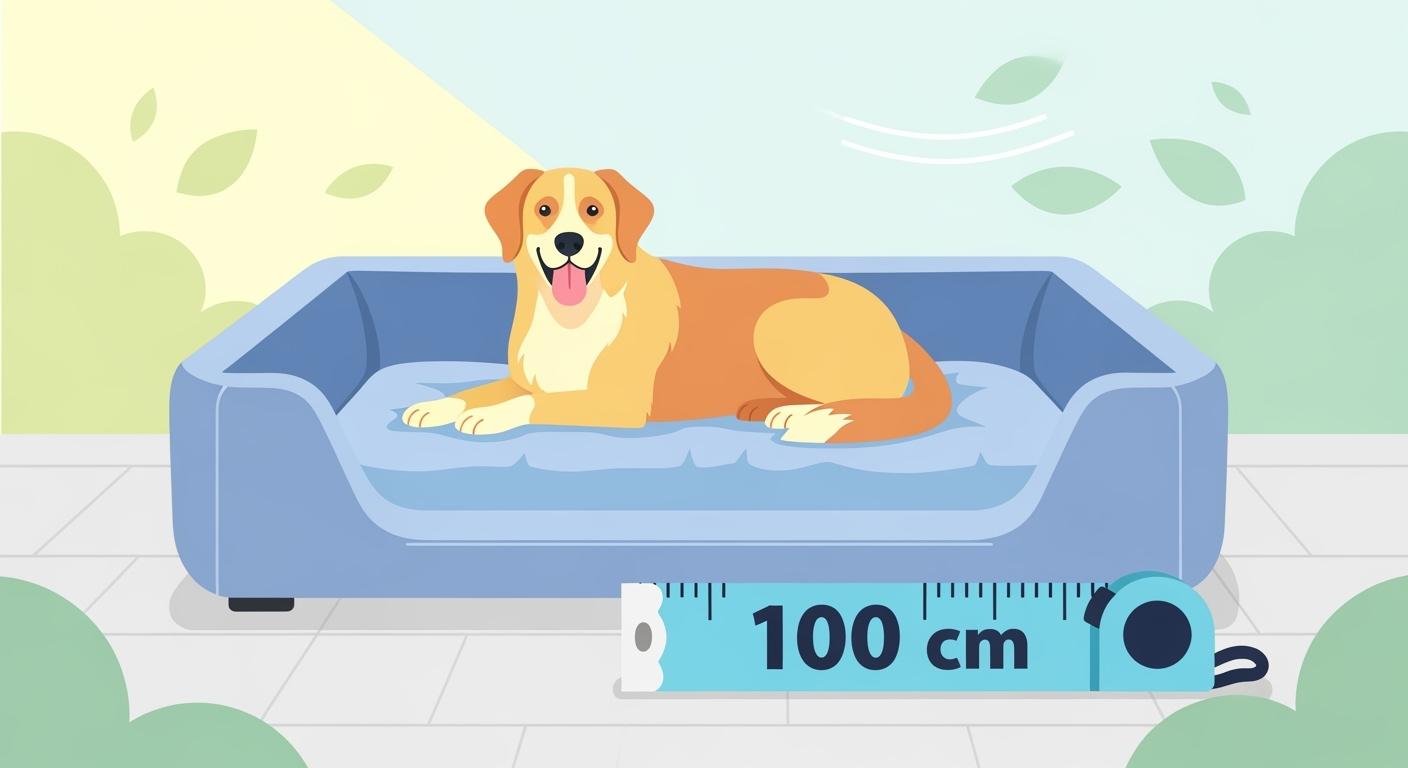
Fit matters for your dog’s posture and movement. You want the harness to support your dog’s body without restricting shoulder freedom. Use a soft tape to measure the chest girth at the widest part of the rib cage. Measure the neck at the base, making sure you can fit two fingers between the tape and your dog’s neck. This helps you avoid tightness and discomfort.
Adjust the harness so you can fit two fingers between any strap and your dog’s body. This keeps the harness snug enough to prevent slipping but comfortable for your dog.
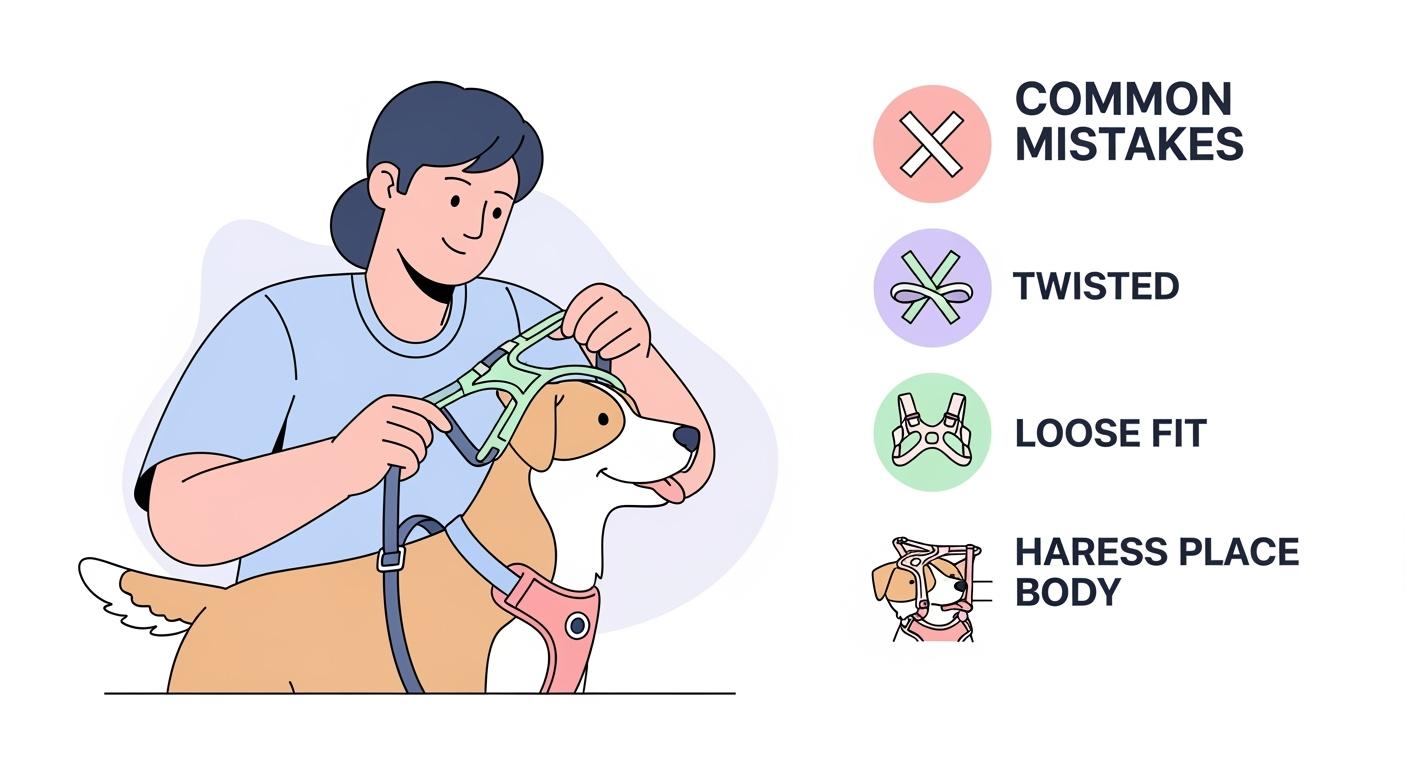
Tips to avoid sizing mistakes
Check for friction zones behind the elbows and along strap edges. If you see twisting or sliding, the harness may not fit correctly. Make sure the harness stays centered and allows your dog to move freely. Avoid sizing errors by double-checking measurements and using the two-finger rule. When learning how to put on harness dog, always confirm movement comfort and look for early signs of rubbing or irritation. This prevents returns and keeps your dog safe.
Step-by-step: how to put on harness dog
Step-in harness routine
When you want to know how to put on harness dog with a step-in style, follow these steps for a smooth and safe fit:
- Step 1,inspect the harness for any damage or worn parts. Replace if needed.
- Step 2,loosen all straps so the harness lays flat. Identify the front and the D-ring.
- Step 3,place the harness on the ground. Guide your dog to stand calmly over it. Use treats or gentle praise to keep your dog relaxed.
- Step 4,gently lift each paw and place them into the harness openings. Make sure the harness sits flat and untwisted.
- Step 5,bring the harness up and around your dog’s body. Fasten the buckles securely, checking that nothing pinches or twists.
- Step 6,adjust the straps. Use the two-finger check for snugness. The harness should support posture and allow free movement.
- Step 7,check that the D-ring sits centered on your dog’s back or chest, depending on the design.
- Step 8,attach the leash to the harness, not the collar. This helps distribute pressure safely and gives you better control.
- Step 9,let your dog walk indoors for a few steps. Watch for shifting, twisting, or signs of discomfort.
Tip: Practice indoors first and pair each step with treats. This helps your dog feel calm and positive about wearing the harness.
Over-the-head harness routine
If you use an over-the-head harness, the process is similar but starts differently. Here is how to put on harness dog with this type:
- Step 1,inspect the harness for frayed stitching or damaged buckles.
- Step 2,loosen all straps so the harness is easy to slip over your dog’s head.
- Step 3,stand beside your dog and gently guide the larger loop over their head. Make sure the D-ring or label faces upward.
- Step 4,bring the chest strap under your dog’s belly and fasten the buckle behind the front legs.
- Step 5,adjust the neck and chest straps. Use the two-finger check to ensure a snug but comfortable fit.
- Step 6,check that the harness sits flat and centered. The D-ring should rest at the base of the neck or chest.
- Step 7,attach the leash to the harness. Always use the harness-only attachment for better control and safety.
- Step 8,let your dog walk indoors. Watch for any shifting, twisting, or signs of rubbing.
Note: Always check for freedom of movement at the shoulders and elbows. Adjust if you see any restriction or discomfort.
Quick fit checklist table
Use this table to confirm a safe and comfortable fit every time you put on a harness:
| Check Item | Pass Sign | Fail Sign | Quick note |
|---|---|---|---|
| Shoulder movement | Dog walks freely, no restriction | Short stride, stiff walk | Adjust straps for full shoulder range |
| Friction/rubbing zones | No redness or hair loss | Red marks, hair loss, licking | Check behind elbows and strap edges |
| Strap centering | Harness stays centered in motion | Slides to one side, twists | Reposition and tighten evenly |
| Escape risk | Dog cannot back out or slip free | Dog backs out, harness loosens | Tighten straps, check fit after movement |
| D-ring position | D-ring sits at center back/chest | D-ring off-center or too low | Re-adjust for leash control and safety |
| Fasteners secure | All buckles and clips locked | Buckles pop open, straps slip | Replace worn parts, double-check before walk |
| Stop signs for discomfort | Dog moves easily, no pawing | Pawing, refusal to move, whining | Remove harness, check for fit or irritation |
Always check these points before every walk. A quick indoor test helps prevent problems outside.
Fit and safety checks
Spotting friction and rubbing
You want your dog to feel comfortable every time you use a harness. Friction often appears in sensitive spots. Common friction zones include the armpits, behind the ears, collar line, harness chest strap, and inner thighs.
| Friction Zone |
|---|
| Armpits |
| Behind Ears |
| Collar Line |
| Harness Chest Strap |
| Inner Thighs |
Check these areas for redness, hair loss, or licking. Watch your dog for signs of discomfort. Make sure the harness sits flat and does not ride up into the armpits. Adjust the straps so the tension stays on the chest, not the sensitive axilla area.
Tip: If you see any irritation, remove the harness and adjust the fit before the next walk.
Stability and escape checks
A stable harness keeps your dog safe. You should check that all straps lie flat and untwisted. Buckles must snap fully closed. Try the two-finger test under each strap. The D-ring should stay centered and upright. Attach the leash to the D-ring, not the collar. Watch your dog walk-look for a natural stride without hopping or stiffness. If the harness slides or twists, adjust the straps for a better fit.
If your dog backs out or escapes, tighten the straps and check for proper placement.
First walk test routine
Before heading outside, let your dog walk indoors with the harness. Look for these stop signs:
| Sign of Discomfort | Description |
|---|---|
| Rubbing Marks | Redness or irritation from the harness |
| Refusal to Move | Dog stands still or resists walking |
| Pawing at Closures | Dog scratches or paws at buckles or straps |
If you notice any of these, remove the harness and check the fit. Knowing how to put on harness dog helps you spot problems early and keep your dog happy on every walk.
Always test indoors first. Adjust as needed for comfort and safety.
| Issue | Likely Cause | Fix Now | Prevent Next Time |
|---|---|---|---|
| Refusal to move | Strap too tight or twisted | Loosen and reposition straps | Check fit before each walk |
| Friction/rubbing | Harness rides up or shifts | Adjust placement and loosen | Monitor friction zones closely |
| Strap twisting | Incorrect harness position | Lay straps flat, re-buckle | Practice harness routine slowly |
| Escape/backing out | Loose straps or poor fit | Tighten and center harness | Use two-finger check each time |
| Pawing at fasteners | Pinching or discomfort | Inspect for pinched skin | Smooth out straps, check edges |
| Fit mismatch | Wrong size or adjustment | Try different size or adjust | Measure before buying |
Mistakes, troubleshooting, and FAQs
Common mistakes table
| Mistake | Why it Happens | What it Causes | Better approach |
|---|---|---|---|
| Sizing by weight only | People skip measuring chest and neck. This can make the harness too loose. Dogs might escape. | Loose fit, escape risk | Always measure your dog’s chest and neck for a good fit. |
| Over-tightening straps | Owners want to stop slipping. They pull the straps too tight. This makes dogs uncomfortable. Dogs cannot move well. | Discomfort, restricted movement | Use the two-finger rule so the harness is snug but not tight. |
| Loose straps | People forget to check after adjusting. Straps get loose. The harness can twist or slip off. | Twisting, backing out | Check the fit again after your dog moves. |
| Ignoring twisting/sliding | Owners do not test the harness inside. The harness can slide or twist outside. This gives less control. | Harness shifts, poor control | Walk your dog indoors first. Adjust the harness if needed. |
| Straps too close to elbows | Chest straps are put in the wrong spot. Straps rub near the elbows. This can hurt your dog. | Chafing, rubbing | Keep straps away from your dog’s elbow joints. |
| Assuming harness prevents pulling | Owners do not adjust for behavior. Dogs keep pulling and feel strain. | Continued pulling, strain | Pick a style for training. Adjust the fit for your dog’s needs. |
Tip: Always check where the harness sits and how your dog moves before every walk.
Troubleshooting table
| Problem | Likely Cause | Fix Now | Prevent Next Time |
|---|---|---|---|
| Dog pulls harder | The harness does not fit right or is the wrong style. | Stop and adjust the harness. | Try a no-pull harness next time. |
| Harness twists | Straps are too loose. | Tighten the straps. | Check the fit before each walk. |
| Dog backs out | The harness is too loose. | Stop and put the harness on again. | Use a snug, escape-proof harness. |
| Rubbing marks | Straps are in the wrong place. | Move the straps or add padding. | Pick a soft, padded harness. |
| Leash tangles | The leash is too long or has too much slack. | Make the leash shorter. | Use a leash that is the right length. |
| Clip too heavy | The clip is too big for your dog. | Change to a lighter clip. | Match the clip size to your dog. |
| Handler loses grip | The handle is wet or too thin. | Dry your hands or use a better handle. | Pick a leash with a padded handle. |
Note: Quick fixes can stop discomfort and escapes. Always check the harness and leash before you go outside.
You need to check your dog’s harness every time you use it. Look at the quick tables to find problems early. A harness that fits well keeps your dog safe and comfortable. Careful fitting helps prevent discomfort and keeps walks smoother. In general, a well-fitted harness can reduce pressure on the neck compared with attaching a leash directly to a collar.
| Step | Description |
|---|---|
| Step 1 | Measure your dog’s girth to get the right size. |
| Step 2 | Adjust the harness so it fits snug and feels good. |
| Step 3 | Watch your dog for signs of discomfort on walks. |
- Measuring your dog helps you avoid mistakes with sizing.
- Most returns happen because the harness does not fit, so always check before you go out.
FAQ
How do you know if the harness fits your dog correctly?
You should check that you can slide two fingers under each strap. Your dog should walk easily without rubbing or twisting.
What should you do if your dog tries to back out of the harness?
Tighten the straps and check the harness position. Make sure the harness sits high on the chest and stays centered during movement.
How often should you check the harness for wear or damage?
Inspect the harness before every walk. Look for frayed straps, loose stitching, or broken buckles to keep your dog safe.