An escape proof harness dog setup works best when the neck opening stays close, the rear strap sits far enough back, and the harness stays calm under backward pressure. If your dog backs out at doors, freezes and twists, or slips free when startled, this page helps owners compare structure, fit, and walk testing so they can choose a safer harness style and confirm it in real use.
Note: A more secure harness can lower back out risk, but it usually works only when the harness shape, leash handling, and the dog’s stress level match each other.
Key Takeaways
- Extra coverage usually helps only when the neck opening, chest panel, and rear strap all stay stable after the dog starts moving.
- A three step test, indoor check, loaded check, then real walk check across three days, usually tells you more than labels or extra straps.
- If your dog keeps fighting the harness, shuts down, or panics during fitting, pain or fear can be part of the picture, so a veterinarian or a DACVB or IAABC professional may be the better next step.
When More Coverage Helps
Some dogs escape because the front opening sits too wide for their neck and shoulder shape, which is why comparing everyday harness options by front opening, rear strap placement, and adjustment range usually works better than trusting an escape proof label. If you want to compare broader dog harness options, start with the shape of the front opening and the location of the last strap, not chest padding alone.
A simple two strap harness often works for calm dogs that do not reverse hard. A three strap layout usually helps dogs that back out under sudden tension. Wider body coverage can help some dogs feel steadier, but it can also trap heat, crowd the shoulders, or shift if the chest panel is too tall.
Common Harness Layouts
Use this comparison as a starting point:
| Harness Layout | Why It Can Help | Feel in Use | Best Match | What to Watch |
|---|---|---|---|---|
| Two strap | Less bulk, easier shoulder freedom | Light, quick to fit | Calm walkers, low back out risk | Front opening can widen under reverse pressure |
| Three strap | Rear strap reduces escape space behind ribs | More secure when adjusted evenly | Dogs that back up or spin away | Rear strap can rub if it lands too far forward |
| Wide body | More contact area can limit twisting | Stable for some dogs, warmer for others | Broad chests, steady handlers, cooler weather | Extra coverage can crowd the shoulder or hold heat |
If your dog escapes by reversing in one fast motion, a three strap layout usually gives you a better margin than a simple chest and girth design. If your dog mostly shows discomfort, shortens stride, or overheats, a cleaner layout with a very accurate fit often works better than adding more material.
Testing Protocol for Escape Risk
Hands on fitting checks usually reveal problems before the first full walk, but the harness still needs a short progression test:
| Step | Timing | What to Do | Pass Signal | What to Watch |
|---|---|---|---|---|
| Indoor fit check | First fitting | Clip, adjust, then walk a few steps inside | Front stays low, straps stay flat | Neck gap, chest tilt, throat rise |
| Loaded check | Same day | Apply light backward pressure near a doorway or gate | Rear strap holds position, no widening at neck | Dog slips backward, panel lifts, harness rotates |
| Real walk check | Three days | Use normal walks with turns, pauses, and exits | Stable fit across real triggers | Heat buildup, rubbing, repeated escape attempts |
Tip: Reward based acclimation usually gives cleaner fit feedback, because a tense dog can stiffen, flatten the body, or reverse harder than usual.
Record for three walks before changing size or style: walk setting, trigger point, neck gap, side shift, and recovery after reset.
Fit Checks in Real Use
The most useful measurements are chest girth and neck size at the base of the neck. If you need a cleaner sizing baseline, use the steps for measure a dog for a harness before you compare size charts or add a backup clip.
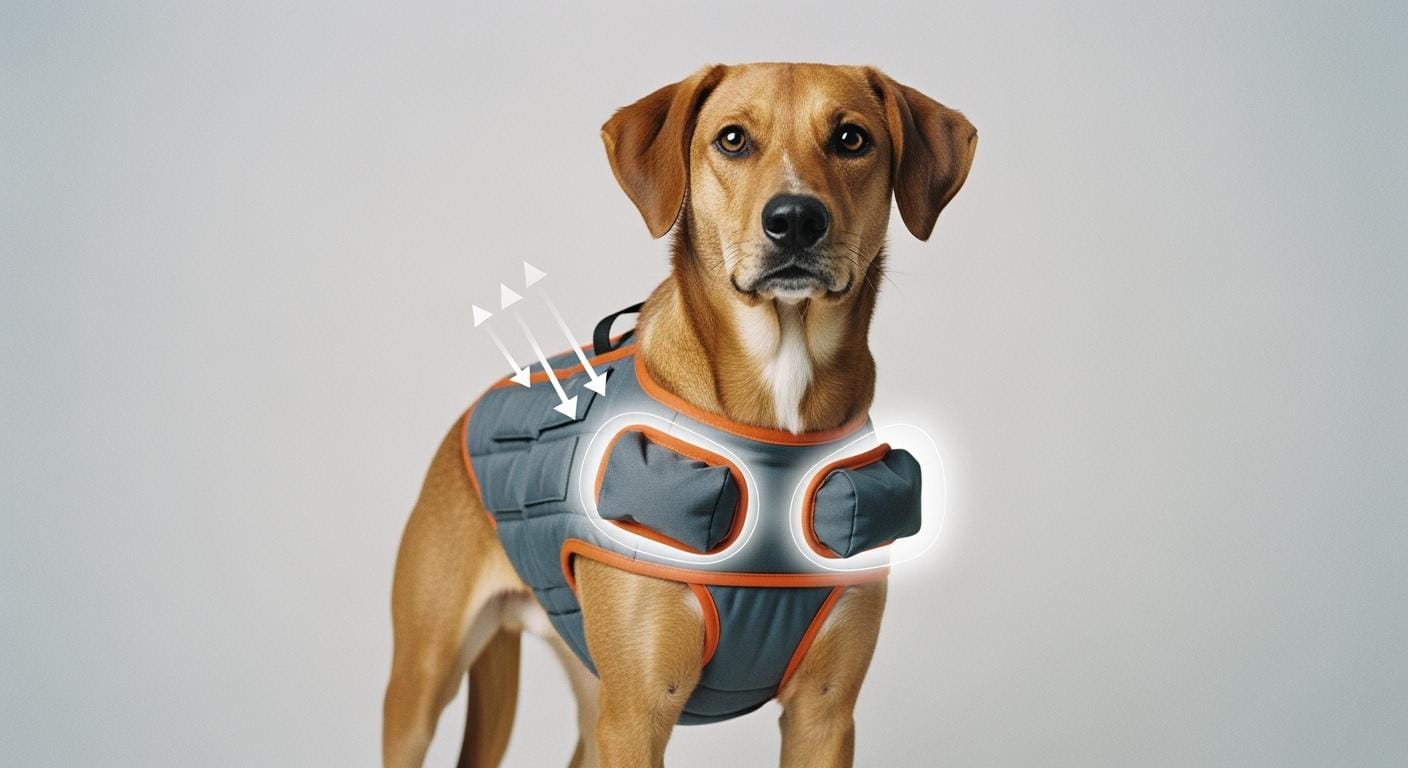
Main Contact Points
A secure fit depends on where each section lands on the body, not just how tight the straps feel.
| Area | Good Signal | Why It Matters | Main Limitation |
|---|---|---|---|
| Neck opening | Sits near the base of the neck without lifting | Too much space here creates the first escape gap | Over tightening can push pressure toward the throat |
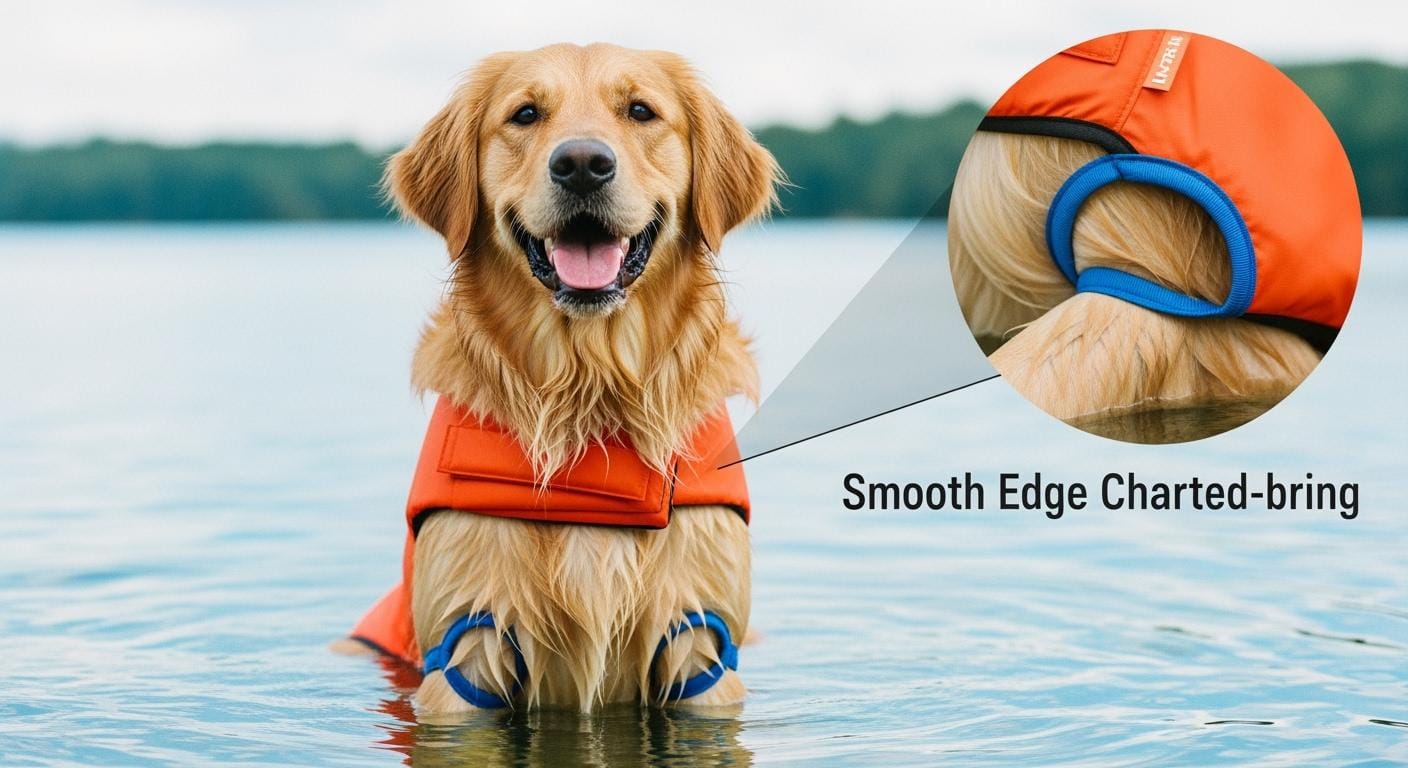
| Chest panel | Stays centered over the sternum | A centered front usually resists twisting better | A tall panel can interfere with shoulder reach |
| Rear strap | Lands behind the rib cage without drifting forward | This section usually decides whether reverse pressure opens a gap | Bad placement can rub the soft belly area |
| Side straps | Even length on both sides | Balanced tension keeps the harness from rolling | Uneven straps create side shift fast |
Pass and Fail Signals
| Check Item | Pass Signal | Fail Signal | Adjustment Direction | What to Watch |
|---|---|---|---|---|
| Neck fit | Opening stays close during a light back up test | Gap opens at the front | Shorten front adjustment or resize | Do not create throat pressure |
| Chest position | Panel stays centered through turns | Slides to one side | Rebalance both sides first | Rotation often means shape mismatch, not just looseness |
| Rear strap | Holds behind ribs on walks | Crawls forward after a few minutes | Refit or try a different layout | Forward drift reduces escape resistance fast |
| Movement | Dog walks, sits, and turns freely | Stride shortens or dog freezes | Lower the front or change style | Restriction can look like stubbornness |
If the harness passes while standing still but fails once the leash tightens, trust the moving test. A stable fit on real walks usually matters more than a snug feel in the living room.
Short Troubleshooting Map
| Symptom | Likely Cause | Fast Check | Improvement Plan | What to Watch |
|---|---|---|---|---|
| Dog backs out at doors | Front opening too wide or rear strap too far forward | Do a gentle reverse test at home | Refit neck opening, then reassess layout | Repeated success at escaping usually means a shape mismatch |
| Harness rolls sideways | Uneven side straps or chest panel too wide | Compare left and right strap length | Rebalance both sides, then retest on turns | Rolling often returns under leash tension |
| Dog scratches at harness | Rubbing, heat, or stress | Inspect skin after each walk | Reduce coverage or change material | Do not assume every scratch is a training problem |
| Dog stiffens or shuts down | Poor fit, pain, or fear | Watch gait and body language indoors | Pause use and get veterinary or behavior input if it continues | Pain and fear can look like noncompliance |
Note: A harness should support control, not create a treatment plan. If you keep seeing stiffness, yelping, or sudden refusal to walk, stop and rule out pain before you keep adjusting straps.
Failure Signs You Should Not Ignore
Early warning signs usually show up before a full escape. A dog that keeps pawing at the front, backs away when you bring the harness out, or turns the body sideways during leash tension is often telling you the setup is unstable, uncomfortable, or both.
- Neck gap that opens when the dog reverses
- Chest panel lifting toward the throat
- Harness drifting off center on corners
- Rear strap loosening after a few minutes
- Repeated back out attempts at doors or gates
If you are still refining application, the steps for put on a dog harness can help you confirm panel placement before you tighten anything. If the harness feels cooler and easier at first but keeps shifting later, compare that pattern with what happens in lighter harness layouts, because lower bulk and lower stability often travel together.
Disclaimer: Repeated escape attempts can come from fear, pain, or panic as well as fit. If the behavior escalates instead of settling after careful refitting, this becomes a medical or behavior question, not just a gear question.
Common Errors That Create Escape Space
Most fitting mistakes are small at first and obvious only after the dog starts moving.
- Placing the chest panel too high before buckling, which usually lifts pressure toward the throat
- Letting one side strap stay longer than the other, which usually creates roll and side drift
- Choosing the largest size that closes easily, which often leaves unused space at the neck opening
- Assuming more coverage is always safer, even when the dog overheats or shortens stride
- Skipping a backward pressure check before the first real walk
Tip: The most common mistake is buying for chest girth alone when the real escape point is the front opening around the base of the neck.
If you also want the leash length and clip direction to support steadier exits, a balanced harness and leash setup usually gives you better control than changing harness structure by itself.
An escape resistant harness is usually the better choice when your dog reverses fast, the last strap stays behind the ribs, and the front opening does not widen under pressure. A simpler harness is often the better choice when the dog needs shoulder freedom, cooler wear, and very predictable behavior on walks.
| Dog Pattern | Usually Better Match | Reason It Fits | What to Recheck |
|---|---|---|---|
| Fast reverse escape | Three strap layout | Rear strap can block back out motion | Rear strap placement after ten minutes |
| Calm everyday walker | Clean two strap layout | Less bulk, easier movement | Neck opening under light pressure |
| Broad chest, steady pace | Wide body layout | More surface contact can improve stability | Heat buildup and shoulder reach |
| Stress sensitive dog | Simpler design with gradual acclimation | Less handling and less material can reduce resistance | Body language during fitting |
Disclaimer: A harness can reduce escape risk, but it does not diagnose fear, pain, or reactivity. If those factors stay in the picture, equipment changes alone usually plateau.
FAQ
How do you know if an escape resistant harness really fits?
It usually fits when the front opening stays close, the chest stays centered, and the dog cannot create new space during a light reverse test.
Is a three strap harness always safer?
A three strap layout is often safer for dogs that back out, but only when the last strap lands behind the ribs and does not drift forward.
Can a wide body harness stop every escape?
Wide coverage can help some dogs, but it does not reliably prevent escape if the front opening is wrong for the dog’s neck and shoulder shape.
How often should you recheck the fit?
You should usually recheck before each walk and again after grooming, coat change, weight change, or a few early test walks.