You want your dog to walk comfortably and safely. Choose the right freedom no pull dog harness by measuring your dog’s chest and girth. Adjust the straps for a snug fit. Check harness features and placement. Always inspect the harness before each walk. Follow local rules and ask a veterinarian if you have health concerns.
Key Takeaways
- Measure your dog’s chest and neck accurately to ensure a proper harness fit. Use the two-finger rule to check strap tightness.
- Inspect the harness before each walk for wear and tear. Look for fraying, cracks, or broken parts to keep your dog safe.
- Choose the right clip position based on your dog’s behavior. Use the front clip for training and control, and the back clip for calm dogs.
Freedom No Pull Dog Harness: No Pull Function and Expectations
How Force Redirection Works
A freedom no pull dog harness helps you guide your dog by redirecting forward momentum, so you can turn and reset more easily. It does not stop pulling by force, and it cannot replace training and consistency. Many owners prefer a well-fitted harness because it can reduce pressure on the throat compared with a collar during pulling.
| Type of Restraint | Force Distribution | Impact on Trachea |
|---|---|---|
| Neck Collar | Concentrates pressure on the throat during pulling | Can increase pressure on the throat during pulling |
| Well-Fitted Harness | Distributes pressure across chest/shoulders | Reduces strain on trachea |
| Front-Clip Harness | Redirects momentum sideways | Safer and more effective for training |
Clip Positions Explained
There are different clip spots on a freedom no pull dog harness. The front-clip helps turn your dog if it pulls. The back-clip is good for calm dogs. Some harnesses let you use both clips. Head-collar styles fit around the dog’s nose. They work in a different way. Use this table to compare:
| Style | Best For | Control Level | Gait Impact |
|---|---|---|---|
| Front-Clip | Pullers, training | High | Minimal |
| Back-Clip | Calm walkers | Moderate | None |
| Dual-Clip | Versatile situations | Adjustable | Minimal |
| Head-Collar | Strong pullers | Very High | May affect gait |
Fit and Handling for Safety
Check the harness fit before every walk. Here are steps to keep your dog safe:
- Watch how your dog acts. See if your dog pulls, jumps, or tries to get out.
- Use a soft tape to measure your dog’s chest and neck.
- Make sure you can slide two fingers under each strap.
- Look for red skin or missing hair under the straps.
- Let your dog walk and sit. Make sure the harness does not stop movement.
Tip: A good harness should stay in the middle and not twist or move. If your dog looks uncomfortable, fix the fit or add padding.
The freedom no pull dog harness helps make walks safer. But you still need to train your dog. Always follow local rules. Ask your veterinarian if you have health questions.
Materials and Comfort for Everyday Walks
Webbing and Stitching Quality
For everyday walks, focus on durable webbing, reinforced stitching at stress points, and hardware that feels smooth and solid. Nylon or polyester webbing is common because it resists moisture and abrasion. If your dog runs hot, look for breathable panels in areas that do not rub the armpits.
| Material | Durability | Comfort |
|---|---|---|
| Breathable Mesh | Stops your dog from getting too hot | Lets air move through |
| Durable Nylon/Polyester | Stays strong against dirt and water | Feels okay, not super soft |
| Excessive Padding | N/A | Can make your dog hot and move around |
Padding and Rub Zones
Padding can help your dog feel better in the harness. Too much padding can make your dog hot or slip out of place. Make sure the chest strap sits on the sternum and stays in the middle. Keep straps away from the armpit rub zone. After walks, check for red skin or missing hair. If you see these, fix the harness or add more padding.
Tip: Always check the stitching and webbing for damage before every walk. Stop using the harness if you see cracks or broken parts.
Hardware and Adjustability
Hardware design matters for safety and comfort. Multiple adjustment points make it easier to fit different body shapes and keep the harness centered. Choose buckles and rings that close cleanly, do not rattle, and do not create sharp edges against the coat.
| Feature | Benefit |
|---|---|
| Multiple adjustment points | Lets you change the fit for puppies or dogs with different bodies |
| Durable materials | Keeps the harness strong and safe |
| Ergonomic design | Makes walks more comfortable and helps your dog move well |
| Inspection Step | Description |
|---|---|
| Check harness fit | Make sure the harness fits as your dog grows |
| Inspect for wear and tear | Look for broken straps or buckles that could make the harness unsafe |
Note: Follow local rules and ask your veterinarian if you have health questions. This guide does not replace medical advice.
Measuring and Sizing the Harness
Accurate Chest and Girth Measurement
You need to measure your dog carefully to get the right harness fit. Start when your dog stands naturally on a flat surface. Avoid measuring during excited or tense moments. Your dog’s posture can change and affect the results.
Follow these steps to measure your dog:
- Use a soft tape measure. Wrap it around the widest part of your dog’s chest, just behind the front legs. This is the chest girth. Keep the tape snug but not tight.
- Measure the neck at the base, where a collar would sit. Make sure you can fit two fingers between the tape and your dog’s neck.
- Write down both measurements. Double-check your numbers before you choose a harness size.
Tip: Always use the two-finger clearance rule. If you cannot fit two fingers under the harness straps, loosen them. If you can fit more than two fingers, tighten the straps.
Using Sizing Charts
Sizing charts help you match your dog’s measurements to the right harness size. Most charts list chest girth and neck girth ranges. Find your dog’s numbers and pick the size that fits both. If your dog is between sizes, choose the larger size for comfort.
Check the chart before every purchase. Dogs grow and change shape over time. Puppies need frequent checks. Adult dogs may need a new harness after weight changes.
Note: The freedom no pull dog harness works best when you follow the sizing chart and check the fit often.
Use-Case Matrix for Fit Choices
Different situations call for different harness setups. Use this matrix to find the best fit for your dog’s needs:
| Scenario | Best Setup | Avoid If | Safer Option |
|---|---|---|---|
| Daily walks | Two-finger clearance, centered | Straps too tight or loose | Adjust straps, check fit |
| Training sessions | Front-clip, snug fit | Harness slips or twists | Re-center, check movement |
| Outdoor adventures | Dual-clip, secure fit | Harness rubs armpits | Add padding, check placement |
| Puppy growth | Adjustable harness, frequent checks | Outgrown harness | Upgrade size, check often |
| Senior dogs | Easy-on design, soft padding | Harness restricts movement | Loosen straps, check gait |
Safety Reminder: Always inspect the harness before each walk. Look for fraying, cracks, or broken parts. Retire any harness that shows damage.
Fitting and Adjusting for Comfort and Safety
Pre-Adjustment Routine
You want your dog to feel comfortable and safe every time you use the freedom no pull dog harness. Start with a simple checklist before you clip in:
- Measure your dog’s chest and neck.
- Select the correct harness size based on your measurements.
- Lay out the harness and check that all straps line up smoothly.
- Slide the harness gently over your dog’s head.
- Buckle the sides securely.
- Check each strap for a snug fit. Use the two-finger rule under every strap.
- Let your dog stand and move. Watch for any signs of rubbing or pinching.
Tip: Always inspect the harness for fraying, cracks, or broken buckles before each walk. Retire any harness that shows damage.
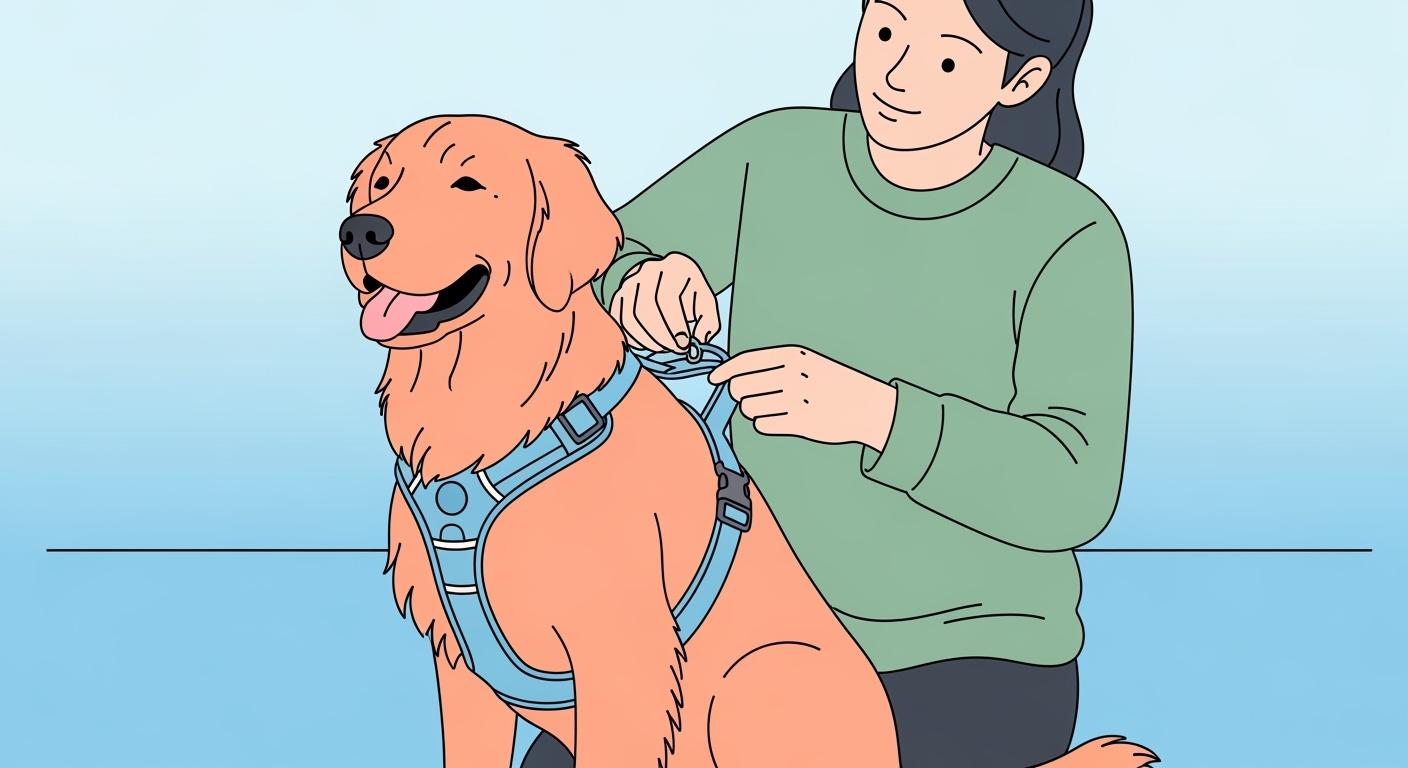
Proper Strap Placement
Strap placement makes a big difference in your dog’s comfort. Adjust the harness so the chest strap sits right on the sternum. Keep the harness centered. Avoid letting straps touch the armpit rub zone or press across the throat.
- Adjust all straps so you can slide two fingers underneath.
- Make sure there is no rubbing under the armpits.
- Check that the harness does not press on the throat.
Note: A centered harness helps your dog move naturally and prevents twisting or slipping.
Movement and Stability Checks
After you fit the harness, watch your dog walk and turn. Your dog should move with a natural gait. The harness must stay centered and not rotate or shift. If your dog shortens its stride or resists walking, adjust the straps. Check for signs of rubbing, restricted movement, or backing out.
- Observe your dog during a short walk.
- Confirm shoulder and elbow motion looks normal.
- Make sure the harness stays in place during turns.
- Stop and adjust if your dog shows discomfort.
Safety Reminder: Never ignore signs of discomfort. Adjust the harness or add padding if needed.
Pass/Fail Fit Table
Use this table to check if your harness setup passes the safety and comfort test:
| Check Item | Pass Signal | Fail Signal | Fix |
|---|---|---|---|
| Chest strap placement | Sits on sternum, stays centered | Slides off, twists, or shifts | Re-center, adjust straps |
| Armpit clearance | No rubbing or redness | Red skin, missing hair, rubbing | Loosen straps, add padding |
| Two-finger clearance | Two fingers fit under each strap | Too tight or too loose | Adjust for snug fit |
| Movement | Natural gait, easy turns | Short stride, resistance, limping | Loosen straps, check placement |
| Stability | Harness stays in place | Rotates, backs out, slips off | Tighten straps, check size |
| Wear and tear | No fraying, cracks, or broken parts | Damaged webbing or hardware | Replace harness |
Tip: Repeat these checks before every walk. Your dog’s comfort and safety always come first.
Troubleshooting and Common Mistakes
Causes of Rubbing or Escape
You may notice rubbing, slipping out, or freezing during walks. These problems often come from fit mistakes: straps that are too loose or too tight, a chest strap that sits too close to the armpits, or a harness that shifts off-center. Leash handling also matters: letting the dog reach full leash extension can increase sudden tension and twist the harness during turns. Re-center the harness, re-check the two-finger rule on every strap, and watch your dog’s gait for any sign of restriction.
Tip: Observe your dog during short walks. If you see limping or licking, check the harness right away.
Troubleshooting Table
| Symptom | Likely Cause | Fast Check | Fix |
|---|---|---|---|
| Worse pulling | Wrong clip point used | Leash twists or pulls | Switch to front-clip, re-center |
| Twisting leash | Clip not centered | Harness shifts sideways | Adjust straps, center harness |
| Armpit chafe | Strap in armpit zone | Redness, licking | Move strap, loosen fit |
| Harness rides up | Loose chest strap | Harness moves up neck | Tighten chest strap, check fit |
| Dog backs out | Loose belly strap | Harness slips off | Tighten belly strap, check size |
| Dog freezes | Harness too tight/loose | Dog stops or resists | Refit using two-finger rule |
| Clip access | Hardware blocked | Hard to attach leash | Adjust harness, clear clip area |
FAQ for Common Concerns
Q: Why does my dog try to escape the harness?
A: Loose straps or poor placement make escape easier. Tighten straps and check fit before every walk.
Q: How can I prevent rubbing or chafing?
A: Keep straps off the armpit zone. Use the two-finger rule and check for redness after walks.
Q: What should I do if my dog freezes or resists?
A: Pause, offer gentle encouragement, and refit the harness. Make sure the harness is not too tight or loose.
Q: How often should I check the harness?
A: Inspect the harness before every walk. Look for fraying, cracks, or broken parts.
You can keep your dog safe and comfortable by following these steps:
- Put the harness on and check that it sits flat.
- Adjust straps for a secure fit.
- Test the leash connection with a gentle tug.
- Watch your dog move and adjust if needed.
- Inspect the harness monthly for fraying or broken parts.
- Replace it right away if you see weakness.
FAQs
Does a no pull harness stop pulling?
You guide your dog with a no pull harness. It redirects force. You still need training. The harness does not guarantee your dog will stop pulling.
Should I clip to the front, back, or both?
You use the front clip for training and control. The back clip works for calm dogs. Dual clips give you flexibility. Choose based on your dog’s behavior.
How do I prevent rubbing?
You keep straps off the armpit zone. Use the two-finger rule. Check for redness after walks. Adjust the harness if you see signs of discomfort.