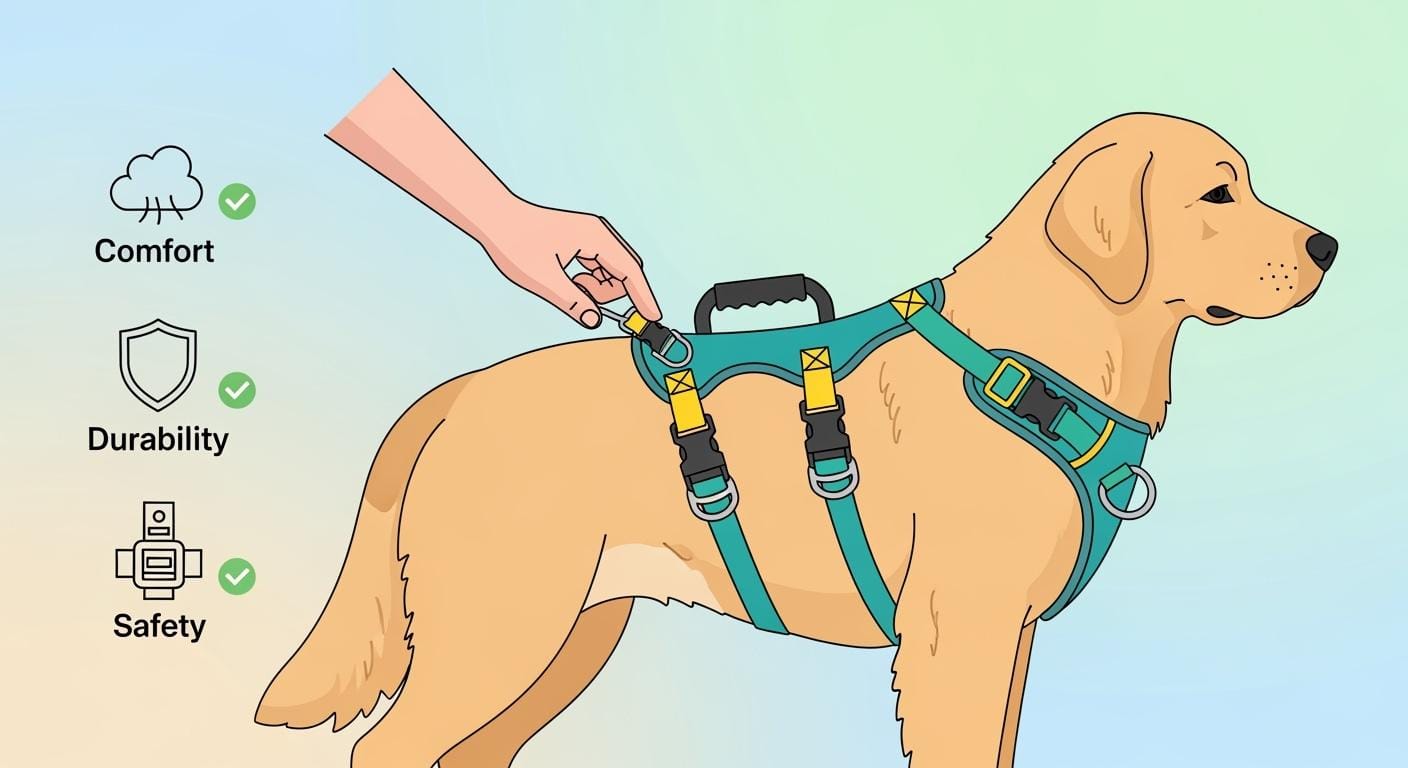
You can have problems if a tactical dog harness breaks at the hook-and-loop panels or patch spots. Weak grip, edges that come apart, and fast damage can make people send them back or complain. Mistakes with barcodes or labels can also break rules. To keep your brand strong and make sure every pet harness is good for export, you need to check how tough it is, where the label goes, and if the barcode scans right. A harness that fits well should pass all strength tests and follow the law for where it was made, what fibers it has, and how it can be tracked. Use this guide to know what is most important when you buy dog harnesses.
Compliance Issue | Description |
|---|---|
Country of Origin Marking | Must be easy to read and stay on for US imports. |
Textile Fiber Claims | Needs correct fiber type and name if needed. |
Traceability Information | Must have product ID and maker contact for EU rules. |
Safety Claims | Any safety claims must have proof when sold. |
Key Takeaways
Make sure hook-and-loop panels can open and close 3,000 times. This helps them last longer.
Clean hook-and-loop panels often. This stops dirt and pet hair from making them weak.
Use strong materials and good stitching. This makes the harness stronger and last longer.
Put barcodes on a flat, clear spot. This makes scanning easy and meets market rules.
Follow labeling rules for each market. This helps avoid shipping problems and rule issues.
Check harnesses carefully when you get them. This helps find problems early and lowers returns.
Test harnesses for shear strength. This makes sure they can hold the right weight and not break.
Talk clearly with suppliers about quality and testing. This helps keep the product good every time.
Why Hook-and-Loop Panels Fail on Tactical Dog Harnesses
Field Risks: Dust, Hair, Abrasion
You face many risks when you use a tactical dog harness in the field. The hook-and-loop panels on a harness can lose grip because of several factors:
Wear and tear from opening and closing the panels many times
Dirt, dust, and debris that stick to the hooks and loops
Pet hair that gets trapped in the loops
Abrasion from rubbing against rough surfaces
Pet hair, dirt, and debris can get stuck in the loops. This makes the panels less sticky and weakens the hold. Over time, you may notice the harness does not stay closed as well. You need to clean the panels often to keep them working. If you do not, the panels may fail before they reach the expected cycle count.
Most hook-and-loop fasteners on a dog harness are tested to last over 1,000 open-close cycles. With proper care, you can extend this lifespan. If you use the harness in dirty or rough conditions, you may see faster wear.
Return Causes: Patch Peel, Noise, Weak Hold
You want to avoid returns and complaints. The main reasons buyers return a harness include:
Patch peel: The hook-and-loop patch lifts or peels off during use.
Excessive noise: The ripping sound when you remove patches can startle dogs or wildlife.
Weak hold: The panels do not grip well, so the harness does not stay secure.
Noise is a common issue. Some customers do not like the loud sound when they open the panels. This can scare dogs or alert animals in quiet settings. If the harness does not hold tight, users may feel it is unsafe. These problems can lead to higher return rates and lower satisfaction.
Durability Control Points: Materials, Stitching, Edge Finish
You can improve the durability of a dog harness by focusing on three main control points:
Step 1: Choose Strong Materials
Use tough fabric for hook-and-loop panels. This helps the panels last longer.
Clean the panels often to remove dirt and hair. This keeps the grip strong.
Step 2: Use the Right Stitching
Box stitch spreads force over a large area. This makes the panel stronger and less likely to fail.
Bar tack stitching can also work well. It holds the panel tight but may increase abrasion at the edges.
Step 3: Finish the Edges Well
Make sure the edges of the panels do not fray. A clean edge finish stops the panels from coming apart.
You should always check these points during production and quality control. This helps you meet the durability target and reduce returns.
Failure Mode Table:
Buyer Symptom | Likely Root Cause | Spec or Test to Prevent It
Patch peels off | Weak stitching or poor edge finish | Use box stitch; inspect edge finish; Pass_Cycling
Panel loses grip | Dirt, hair, or low-quality materials | Specify strong fabric; require regular cleaning; Pass_Cycling
Noisy removal | Stiff hook material or poor pairing | Specify low-noise hook; test for acceptable sound level
Panel frays at edge | Unfinished or raw edge | Require edge binding or heat-seal; inspect finish
Panel does not hold weight | Insufficient shear strength | Test to ShearMin_25mmWidth or higher; Pass_Shear
Tip: Always request samples and test panels for at least 3,000 open-close cycles (CycleTarget_BuyerBaseline) before approving a new harness supplier.
If you want to set up your own quality checklist or need help with supplier communication, visit the StridePaw Request a Quote page.
Failure Mode Table: Buyer Symptom, Root Cause, Prevention Spec
It is important to know why hook-and-loop panels fail. Many buyers say lint, fur, and dirt collect on the panels. This makes the grip weak and the closure less safe. If you do not clean the hooks and loops, they may stop working well. Weak stitching or bad edge finish can also cause problems. These issues can make the harness fail early and get returned more.
The table below shows common problems, what causes them, and how to stop them. You can use this table to talk with suppliers and set clear rules for quality.
Buyer Symptom | Likely Root Cause | Spec or Test to Prevent It |
|---|---|---|
Patch peels off | Weak stitching or poor edge finish | Use box stitch; inspect edge finish; Pass_Cycling |
Panel loses grip | Lint, fur, debris, or low-quality materials | Specify strong fabric; require regular cleaning; Pass_Cycling |
Noisy removal | Stiff hook material or poor pairing | Specify low-noise hook; test for acceptable sound level |
Panel frays at edge | Unfinished or raw edge | Require edge binding or heat-seal; inspect finish |
Panel does not hold weight | Insufficient shear strength | Test to ShearMin_25mmWidth or higher; Pass_Shear |
Tip: Always ask for samples and test panels for at least 3,000 open-close cycles (CycleTarget_BuyerBaseline). Make sure the harness passes Pass_Cycling and Pass_Shear before you choose a new supplier.
Step 1: Look for lint, fur, and dirt on the panels when you check them.
Step 2: Check the stitching and edge finish for every group you get.
Step 3: Test if the panel can hold the right amount of weight for its width.
Step 4: Make sure the panels pass the cycle test without peeling, lifting, or fraying at the edge.
If you want a full checklist or need help talking to suppliers, visit the StridePaw Request a Quote page.
Tactical Dog Harness Export Pack Scope: US + EU/UK
Retail vs Logistics Scanability
You need to make sure every harness in your shipment scans fast and easy. In the US, you use UPC-A barcodes. In the EU and UK, you use EAN-13 barcodes. These codes help you track each dog harness from the warehouse to the store shelf. You must print the barcode at the right size. The BarcodeScaleRange is 80%–200%. The quiet zone must be at least 10X on each side. The bar height must be at least 22.85 mm. You should place the barcode on a flat, smooth area. This helps scanners read the code without mistakes. If you follow these rules, you will pass the Pass_Scan check at retail and in logistics.
Tip: Always test a sample batch for scanability before you ship. Scan the harness in both warehouse and store light.
Label Zones: Barcode, Legal, Instruction
You must set clear label zones on every tactical dog harness. Use these three zones:
Barcode Zone
Place the barcode and quiet zones on a flat, non-folded, non-textured area. This follows LabelZone_Barcode. Do not put the barcode near seams or folds.Legal Text Zone
Add a separate area for legal text. This includes country of origin, fiber content, and safety warnings. For the US, you must show the country of origin and fiber type. For the EU/UK, you must add traceability and maker contact. Follow LabelZone_LegalText for both.Instruction Zone
Give space for assembly, sizing, and fit instructions. You can add a QR code for extra help. This follows LabelZone_Assembly.
You should use a hangtag for the barcode and legal text. You can add a polybag for extra protection. Place the master carton label on the outside of the shipping box.
Process Owners: Product, Compliance, QA
You need to assign clear roles for each step:
Product Team: Sets the harness design, materials, and label layout. Checks that the pet harness fits the tactical dog harness market.
Compliance Team: Reviews all legal and barcode rules for each market. Makes sure the harness meets US and EU/UK laws.
QA Team: Tests every harness for scanability, durability, and label placement. Uses the Pass_Scan and Pass_Cycling checks.
Step 1: Product team sets up the harness and label plan.
Step 2: Compliance team reviews all label and barcode rules.
Step 3: QA team tests the harness for scanability and durability.
You can find more details and examples in the StridePaw tactical dog harness collection. If you want to set up your own export pack or need help with label rules, visit the StridePaw Request a Quote page.
Hook-and-Loop Quality Specs for Dog Harnesses
Pairing Logic for Use-Cases
You must pick the right hook-and-loop panels for each job. First, think about how people will use the harness. If patches will be changed a lot or the harness will be used outside often, pick panels that last for 3,000 open-close cycles. This helps the harness stay strong after many uses. If the harness will not be used as much, you can use panels with a lower cycle number. But always make sure they are tough enough for your needs.
Step 1: Write down the main ways people will use the harness.
Step 2: Pick hook-and-loop panels that match how much they will be used.
Step 3: Check with your supplier to see if the panels can last for 3,000 cycles.
Note: Always ask for samples and test them for your main uses before you buy a lot.
Edge Finish to Prevent Fray
You want every harness to look nice and last a long time. If the edges fray, the harness can break early and customers may not be happy. You should ask for a clean edge finish on all hook-and-loop panels. This can mean using edge binding, heat-sealing, or folding the seams. These ways help stop the panels from coming apart and keep the harness looking good.
Step 1: Ask your supplier to show how they finish the edges.
Step 2: Look at samples to check for loose threads or rough edges.
Step 3: Only choose harnesses with neat and strong edge finishes.
Tip: A strong edge finish helps your harness pass more checks and means fewer returns.
Stitch Patterns for Patch Panels
How you stitch the panels changes how strong the harness is. Some stitch patterns make the harness last longer. The Bartack X-pattern is very good for tactical gear. This pattern is also used in climbing and parachute harnesses, so it is strong for patch panels.
Stitch Pattern | Durability Comparison |
|---|---|
Bartack X-pattern | Used in climbing and parachute harnesses, so it is very strong for patch panels. |
Step 1: Tell your supplier to use the Bartack X-pattern for all patch panels.
Step 2: Ask for photos or samples of their stitching work.
Step 3: Test the finished harness to see if it is strong and lasts before you accept the order.
You can make sizing and fit better by making sure the panels stay in place and do not move around.
If you want to make your own harness quality checklist or need help talking to suppliers, visit the StridePaw Request a Quote page.
Validation Tests: Cycling, Shear, Contamination
Cycling Test: Setup and Pass/Fail
You need to check if each harness can handle repeated use. Start by setting up a cycling test. Open and close the hook-and-loop panels on the harness 3,000 times. This matches the CycleTarget_BuyerBaseline. Many industry fasteners can last up to 8,000 cycles, but you should always test for at least 3,000 cycles to meet export standards.
Step 1: Place the harness on a flat surface.
Step 2: Open and close the hook-and-loop panel 3,000 times.
Step 3: Watch for any peeling, lifting, or edge fray.
Step 4: If the harness meets CycleTarget_BuyerBaseline with no unexpected peel, lift, or edge-fray escalation, it passes. Use the Pass_Cycling statement for your records.
Tip: Always test a sample from each batch before you approve the shipment.
Shear Test: Method and Thresholds
You must check if the harness can hold weight when pulled. The shear test measures how much force the hook-and-loop panel can take before it slides apart. Use the correct width for your test. For a 25 mm wide panel, the minimum is ShearMin_25mmWidth, which is 15 lbf or 67 N.
Step 1: Attach the harness panel to a test rig.
Step 2: Apply force along the panel until it starts to slide.
Step 3: Record the force at which the panel fails.
Step 4: If the harness meets or exceeds the ShearMin threshold for its width, it passes. Use the Pass_Shear statement in your QC report.
Note: Always match the test width to your actual harness panel size.
Contamination Test: Dust, Hair, Reclosure
You want to know if the harness will still work after it gets dirty. The contamination test checks how well the hook-and-loop holds after you add dust or pet hair.
Step 1: Rub dust and pet hair into the hook-and-loop panel.
Step 2: Try to close and open the panel several times.
Step 3: Check if the harness still holds tight and does not peel off.
Step 4: Clean the panel and repeat the cycling test. The harness should still meet the CycleTarget_BuyerBaseline after cleaning.
If the harness fails to hold after contamination, ask your supplier to improve the materials or edge finish.
You can use these tests to set clear standards for your suppliers. Always include the numeric targets and pass/fail statements in your RFQ and QC checklist. For more help with test setup or supplier communication, visit the StridePaw Request a Quote page.
Dog Harness Barcode and Label Placement Rules
It is important to follow barcode and label rules. This helps you avoid problems and delays when shipping harnesses. You must use the right barcode type, print size, and label area. These steps make sure every harness scans well in stores in the US and EU/UK.
UPC-A vs EAN-13: Market Choice
You need to pick the correct barcode for each market. The US uses UPC-A barcodes. The EU and UK use EAN-13 barcodes. Each barcode has its own way of working and scanning.
Step 1: Identify Your Market
Use BarcodeSymbology_US: UPC-A for US stores.
Use BarcodeSymbology_EU_UK: EAN-13 for EU/UK stores.
Step 2: Assign the Correct Code
Work with your team to put the right barcode on each harness SKU.
Check that the barcode matches the market before printing.
Tip: Keep a master list of barcodes for each region. This helps you stop mistakes during production.
Print Size, Quiet Zone, Bar Height
Barcodes must be printed at the right size and with enough space. This helps scanners read the code quickly and without errors.
Step 1: Set the Barcode Size
Use BarcodeScaleRange: 80%–200% of the normal size.
The X-dimension must be between BarcodeXDimension_80pct (0.264 mm) and BarcodeXDimension_200pct (0.660 mm).
Step 2: Define the Quiet Zone
Leave a QuietZone_Min of at least 10X on both sides of the barcode.
The quiet zone should not have any text, pictures, or folds.
Step 3: Check the Bar Height
The bar height must be at least BarHeight_Min: 22.85 mm for both UPC-A and EAN-13.
Parameter | Requirement |
|---|---|
Barcode Symbology | UPC-A (US), EAN-13 (EU/UK) |
Scale Range | 80%–200% |
X-Dimension | 0.264 mm (min) – 0.660 mm (max) |
Quiet Zone | 10X (each side) |
Bar Height | 22.85 mm (min) |
Pass_Scan: Barcode scans well if you use QuietZone_Min and the right barcode for the market.
Placement Don’ts: Folds, Seams, Glare
Where you put the barcode label matters a lot. Bad placement can make scanning fail.
Step 1: Choose the Right Label Zone
Follow LabelZone_Barcode: Put the barcode and quiet zones on a flat, smooth part of the hangtag or package.
Do not put the barcode near seams, folds, or rough spots.
Step 2: Prevent Glare and Obstruction
Use matte or low-gloss labels to stop glare from store lights.
Make sure nothing covers or blocks the barcode, like straps or folds.
Step 3: Final Verification
Scan a sample harness from each batch with a store scanner.
Make sure every barcode passes the Pass_Scan check.
Note: If a barcode does not scan, look for problems with quiet zone, print contrast, or placement. Fix these before you ship.
Step-by-Step Summary for Buyers:
Pick the right barcode for your market.
Print the barcode at the correct size and X-dimension.
Make sure the quiet zone and bar height are big enough.
Put the barcode on a flat, clear spot.
Test scanning before you ship the harnesses.
If you want a full barcode and label checklist or need help with your dog harness order, visit the StridePaw Request a Quote page.
Receiving QC and Retail Assembly SOP
Incoming Checklist and AQL Sampling
You need a strong process to check every harness when it arrives. Start with an incoming checklist. This helps you find problems before the harness goes to stores. Use an AQL_Definition to set your sampling plan. This means you check a set number of harnesses from each shipment. You look for both major and minor defects.
Step 1: Count the harnesses in the shipment. Pick samples based on your AQL_Definition.
Step 2: Check each harness for strong closure, neat stitching, and correct barcode placement.
Step 3: Mark any harness with a closure that fails the shear or cycling test as a Defect_Major_Definition.
Step 4: Mark harnesses with small flaws, like loose threads or smudged print, as a Defect_Minor_Definition.
Step 5: Record your results and share them with your supplier.
Tip: Always keep records of your checks. This helps you track quality over time.
Store Assembly Checkpoints
You want every harness to look good and work well on the shelf. Store staff should follow simple steps to assemble and display each harness.
Step 1: Remove the harness from its packaging. Lay it flat.
Step 2: Check that all hook-and-loop panels close tightly and do not show fraying.
Step 3: Make sure the barcode is easy to see and scan. Avoid placing the harness so the barcode folds or hides.
Step 4: Attach any hangtags or instruction cards in the right spot.
Step 5: Place the harness on the display rack. Check that it looks neat and ready for customers.
Note: If you see a harness with a barcode that does not scan, mark it as a ScanFail_Definition and set it aside for review.
Return Triage: Fit, Closure, Scan
You need a clear plan for handling harness returns. Use these steps to sort and review returned harnesses.
Step 1: Check the fit. Make sure the harness matches the size on the label.
Step 2: Test the hook-and-loop closure. If it does not hold or shows early wear, mark it as a Defect_Major_Definition.
Step 3: Scan the barcode. If it does not scan, mark it as a ScanFail_Definition.
Step 4: Record the reason for each return. Share this data with your supplier to improve future orders.
Always use clear steps for returns. This helps you find patterns and fix problems fast.
If you want a full QC checklist or need help with your harness order, visit the StridePaw Request a Quote page.
RFQ Template and Supplier Scorecard for Quality
RFQ Checklist: Hook/Loop, Stitching, Tests, Packaging
You need a simple RFQ checklist to help your supplier know what you want. This stops mix-ups and keeps your harness orders the same every time. First, write down your main needs for hook-and-loop panels, stitching, strength tests, and packaging.
Step 1: Say the hook-and-loop panel must last 3,000 open-close cycles (CycleTarget_BuyerBaseline).
Step 2: Ask for box or Bartack X-pattern stitching on all patch panels.
Step 3: Tell your supplier to use edge binding or heat-sealed edges so the panels do not fray.
Step 4: Request test reports that show the panel meets ShearMin for its width.
Step 5: Make sure all barcodes scan well (Pass_Scan) and follow the label zone rules.
Step 6: Check that packaging has a hangtag with barcode and legal text, plus a master carton label.
Tip: Always put these points in your RFQ template. This makes it easier to check harness quality when you get them.
Scorecard: Durability, Consistency, Label Accuracy
You can use a scorecard to see how your supplier does over time. Focus on three things: durability, consistency, and label accuracy.
Durability: Test if the harness passes Pass_Cycling and Pass_Shear. Look at reports about hardware strength and material quality.
Consistency: Check for even stitching, neat edges, and panels that look the same on every harness.
Label Accuracy: Make sure each barcode scans and matches the right market. Check that legal and instruction labels are in the correct spots.
Good ways to score suppliers include checking their quality steps, looking at material standards, and asking for compliance papers. You should also ask for emergency test results if your harness has quick-release features.
Spec Request Checklist Table: Requirement, Supplier Ask, Receiving Verification
Use this table to help you talk to your supplier and check harnesses when they arrive:
Requirement | What to ask the supplier for | How to check when you get it |
|---|---|---|
Hook-and-loop durability | Pass_Cycling (3,000 cycles, no peel/lift/fray) | Cycle test sample panels to CycleTarget_BuyerBaseline |
Shear strength | Pass_Shear (meets ShearMin for panel width) | Shear test panels to ShearMin_25mmWidth or higher |
Edge finish | Edge binding or heat-seal, no raw edges | Look at all panel edges for fray or loose threads |
Stitching | Box or Bartack X-pattern on patch panels | Check stitch pattern and strength on each harness |
Barcode/label | Pass_Scan (correct symbology, size, quiet zone) | Scan barcode, check placement, check label zones |
Packaging | Hangtag with barcode/legal, master carton label | Make sure all packaging matches your order |
Note: You can read more about sizing and fit in the StridePaw harness sizing blog and learn about QC steps in the StridePaw compliance blog.
Unit-Economics Example:
If you lower your return rate from 5% to 2% by catching Defect_Major_Definition problems (like closures failing ShearMin or CycleTarget_BuyerBaseline), your gross margin gets better. For every 1,000 harnesses, you save 30 units from returns. This means you have more harnesses to sell and lose less money.
You can use this checklist and scorecard to make your supplier relationships better and keep your brand safe. For a full RFQ template or help with your next dog harness order, visit the StridePaw Request a Quote page.
You need to set clear rules for every tactical dog harness you buy. Focus on hook-and-loop durability, barcode placement, and quality checks. Use the same numbers and checklists for every harness order. This helps you talk with suppliers and check each pet harness for safety. A well-fitted harness keeps your standards high and lowers returns. For more help, review the StridePaw dog harness collection or contact us for a quote.
FAQ
What is the minimum hook-and-loop durability you should require?
You should require a minimum of 3,000 open-close cycles. This matches CycleTarget_BuyerBaseline. Always ask your supplier to test and confirm this before production.
How do you verify barcode placement on tactical dog harnesses?
Check that the barcode sits on a flat, non-folded area. Make sure the quiet zone is clear. Scan the barcode with a retail scanner to confirm Pass_Scan.
Which barcode type do you need for US and EU/UK markets?
Use UPC-A for the US market. Use EAN-13 for EU and UK markets. Assign the correct barcode to each harness before printing.
What is the best way to prevent fraying on hook-and-loop panels?
Ask your supplier for edge binding or heat-sealed edges. Inspect samples for loose threads. Only accept harnesses with clean, finished edges.
How do you handle harnesses that fail the closure or barcode scan test?
Mark harnesses that fail as Defect_Major_Definition or ScanFail_Definition. Record the issue. Share results with your supplier for improvement.
What documents should you request from your supplier?
Request test reports for cycling and shear strength. Ask for barcode print proofs. Require packaging samples with all label zones shown.
Where can you get help with RFQs or compliance questions?
Visit the StridePaw Request a Quote page. You can ask for templates, checklists, or direct support from the StridePaw team.