Consistency helps you see results in dog training. A dog training harness gives you more control and helps you guide your dog. But a harness does not replace training. You might wonder how to choose the right harness. It is important for safety, comfort, and progress. Many veterinarians and trainers suggest using a harness. It can help dogs with breathing problems. The harness spreads pressure on the chest and shoulders, not the throat. A harness fits well for nervous or young dogs. It also lowers the chance of slipping out on walks or outdoor trips. You can do this with easy steps and tips. Stop using the harness if your dog feels pain, gets hurt, or seems upset. Ask a veterinarian or trainer for help if you have problems.
Key Takeaways
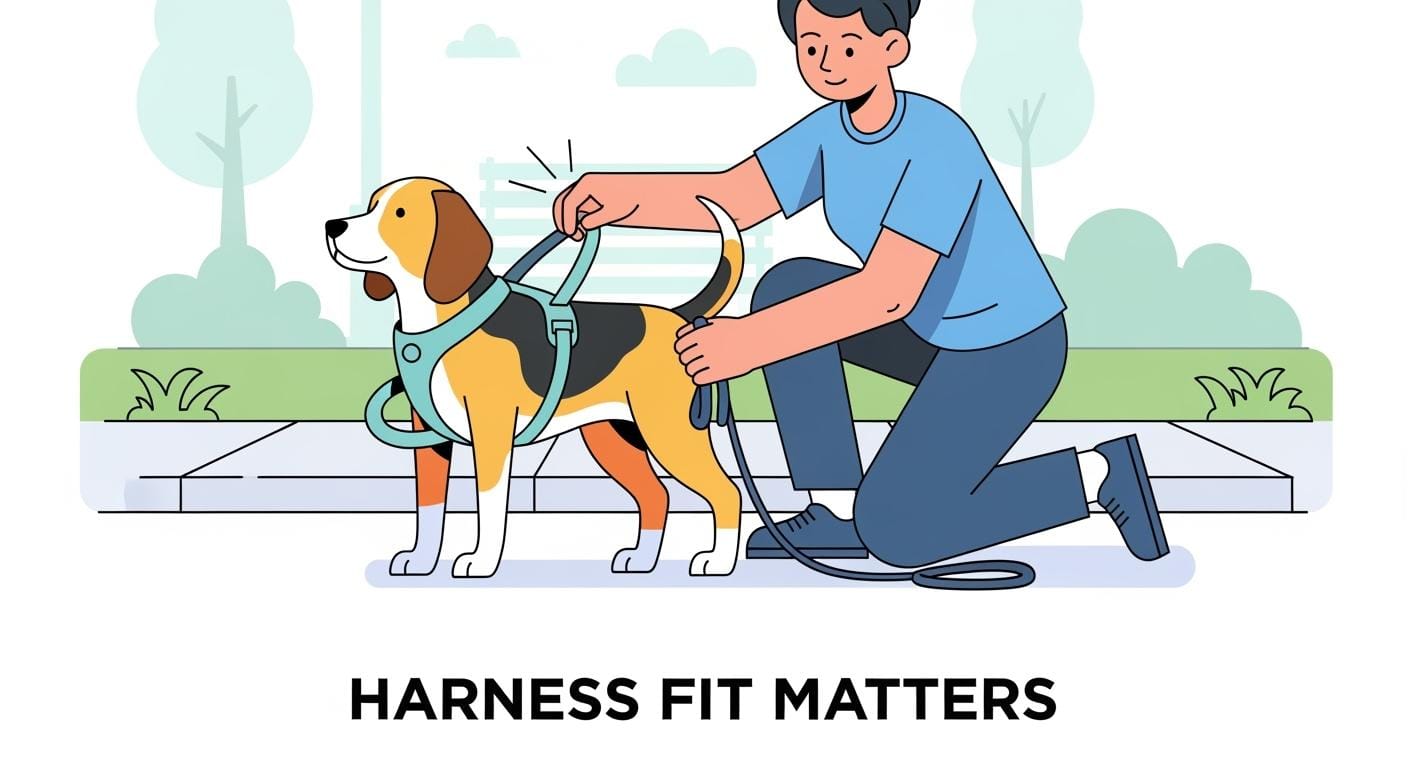
A harness that fits well keeps your dog safe and comfy on walks and during training.
Pick the best harness type for your dog’s behavior and training needs so you can control your dog better.
Always look at the harness fit before you use it to stop discomfort and make sure it works well.
Give your dog treats and praise to help them get used to wearing a harness.
Ask a veterinarian or trainer for help if your dog seems hurt or upset when using a harness.
What a Dog Training Harness Can and Cannot Do
Control Support vs. Behavior Change
You might expect a dog harness to solve pulling or jumping right away. In reality, a harness gives you better control and helps you guide your dog. It does not change your dog’s behavior by itself. You still need to teach your dog what you want. Use treats, praise, and practice to help your dog learn. The harness supports your training, but it cannot replace your effort or patience.
Tip: Use short, fun training sessions with your harness. Reward your dog for walking calmly by your side.
Fit and Handling vs. Extra Padding
You may see many types of harness with extra padding or fancy features. Focus first on fit and handling. A harness that fits well keeps your dog safe and comfortable. Check that the chest strap sits below the throat and the straps do not rub the armpits. Make sure your dog can move its shoulders freely. Extra padding can help, but it does not fix a poor fit. Always check the fit before each walk.
Good fit means:
Two fingers fit between harness and dog
Chest strap stays centered
No rubbing or pinching
When to Pause for Fear or Reactivity
Some dogs feel nervous or scared when you put on a new harness. Watch for signs like shaking, hiding, or trying to escape. If your dog shows fear or tries to slip out, stop and take a break. Never force the harness on. If your dog shows pain, limping, skin injury, or distress, stop using the harness. Ask a veterinarian for help with pain or skin problems. For fear or reactivity, a qualified trainer can give you tips for handling and safety.
Safety note: A harness supports your training, but it cannot guarantee outcomes. Always stop use if your dog shows pain or distress.
Dog Training Harness Types and Their Benefits
Picking the right harness helps your dog stay safe and comfy. It also makes training easier for you. There are many harness types you can buy. Each one has special benefits. Some work better for certain dogs or training styles. Knowing the main types helps you choose what fits your dog and your goals.
Body harnesses are the most common for training. They help keep your dog safe and comfortable. These harnesses lower neck strain and help stop escapes.
Other types are choke chains, head halters, electronic collars, and pinch collars. These are not used much for daily training. They can be less safe and less comfortable.
Nylon is a popular harness material. It costs less, works well, and comes in lots of styles.
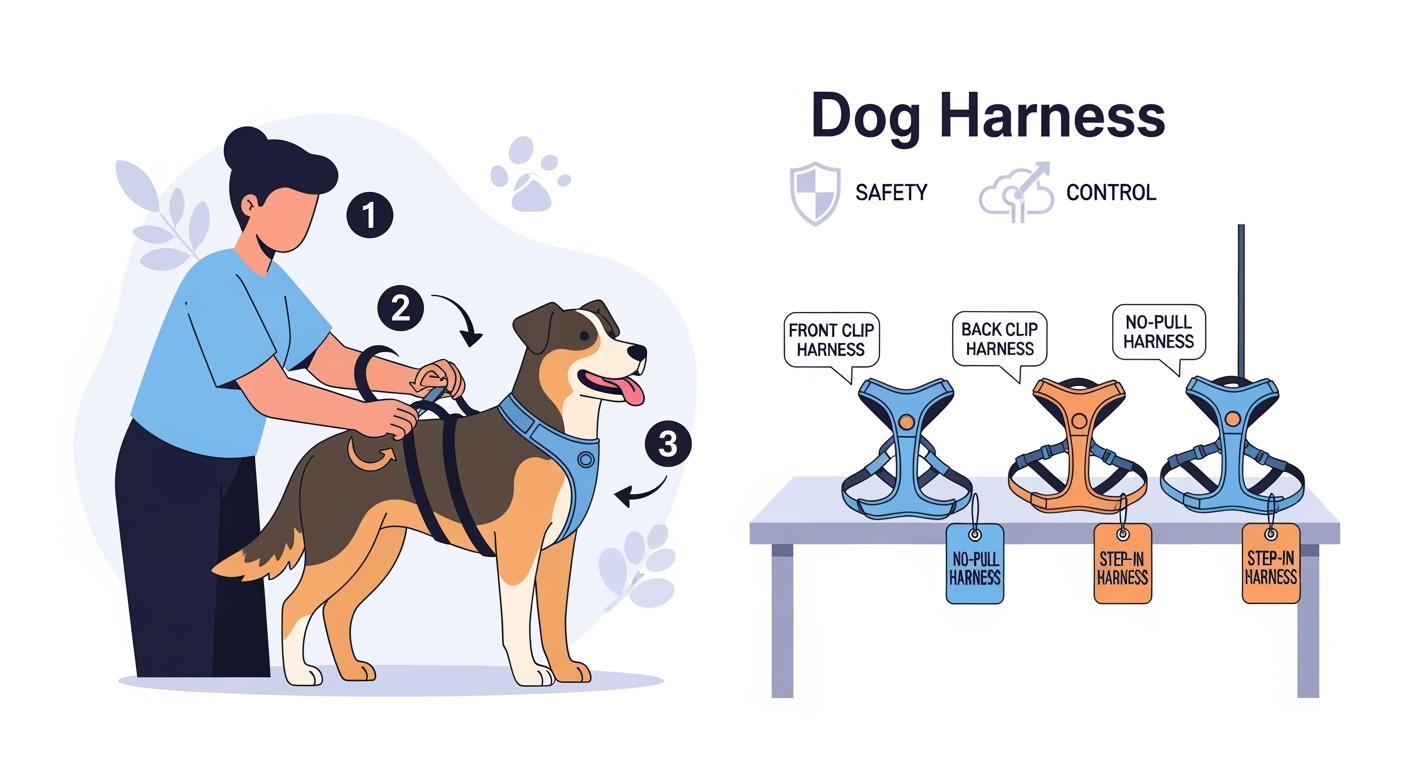
Front Clip Harness: Pros and Cons
A front clip harness has a leash hook on the chest. This design helps stop pulling. When your dog pulls, the harness turns them toward you. This helps you train your dog to walk nicely.
Many people and vets say front clip harnesses lower pulling better than martingale collars.
Always check the fit. If it does not fit right, it can twist or hurt your dog.
Studies show front clip harnesses change how dogs move their joints. Watch your dog’s walk and fix the fit if needed.
Tip: Use a front clip harness for training and walks when you want more control. Always make sure it fits before you go out.
Back Clip Harness: When It’s Best
A back clip harness has the leash hook on the back. It sits between the shoulders. Most dogs find this type comfy. It works well for calm walks.
Back clip harnesses let dogs move freely. They are simple to put on and adjust.
Some dogs pull more with this type. It does not turn them toward you.
Back clip harnesses are good for calm dogs or dogs that do not pull much.
Note: If your dog pulls hard, try a no pull harness or a dual clip harness for better control.
Dual Clip Harness: Control to Comfort
A dual clip harness has leash hooks on the front and back. You can pick which one to use.
Use the front clip for training and stopping pulling.
Use the back clip for easy walks or when your dog listens well.
Dual clip harnesses let you switch between control and comfort. You can change your plan based on your dog’s needs.
Safety reminder: Always check the fit. Watch for pain, limping, skin problems, or if your dog keeps escaping. Stop using the harness if you see these signs. Ask a vet for help with pain or skin issues. Ask a trainer for help with fear or safety.
Comparison Table: Types, Pros, Cons, Best Use
Here is a table that compares the main harness types. It shows the good points, bad points, and best uses for each.
Option | Pros | Cons | Best For |
|---|---|---|---|
Front Clip | Can help redirect pulling, supports training effectiveness, improves control | May twist if fit is poor, affects joint movement | Dogs learning loose leash walking, strong pullers |
Back Clip | Comfortable for steady walking, easy to use, allows freedom of movement | May allow more pulling leverage for some dogs | Calm dogs, daily walks, dogs with good leash manners |
Dual Clip | Supports control to comfort plan, flexible for training and walking | Can be bulkier, requires more adjustment | Dogs with changing training needs, owners who want versatility |
No Pull | Discourages pulling, easy to manage strong dogs | May not fit all dog sizes | Training for larger breeds, escape prevention |
Use this table to compare harness choices. Pick the one that fits your dog best. Always look for good fit, comfort, and safety. Harnesses help you control your dog, lower neck strain, and stop escapes. Nylon harnesses last long and feel good for your dog.
Recommendations: Pick a harness that fits your dog’s size and behavior. Make sure you can adjust it. The harness should not press on the throat or rub the armpits. Use advice from trainers and vets for the best results.
Fit Fundamentals for the Right Harness
Choosing the right harness for your dog means you need to focus on fit, safety, and enhanced comfort. You want your dog to enjoy walks and training while lowering risk of injury. A proper fit helps you guide your dog and keeps them secure. You should prioritise comfort and adjustability when you select a harness.
Chest Strap Height and Throat Safety
The chest strap should sit below your dog’s throat, not press against it. If the strap rides up, your dog may cough or show discomfort. You want the harness to stay centered during movement. Always check that the leash attachment does not drift off to one side. This helps you avoid throat pressure and supports safer posture.
Armpit Clearance and Chafing Prevention
Straps must sit behind the front legs, not cut into the soft armpit area. If the harness rubs or pinches, your dog may try to escape or show skin irritation. You can prevent chafing by scanning for hotspots after walks. Look for redness or hair loss near the armpits and adjust the fit if needed.
Shoulder Freedom and Movement
Your dog needs to move its shoulders freely. Straps should not cross the point where the front leg swings forward. If the harness restricts movement, your dog may limp or resist walking. You want to see smooth, natural motion during walks and training.
Tips: Match the harness to your dog’s build and size. Choose breathable materials for enhanced comfort. Consider adjustability for growing or energetic dogs. Reinforced hardware adds durability for active routines.
Fit Point Table: What Good Looks Like
Fit Point | What Good Looks Like | Warning Signs | What to Adjust |
|---|---|---|---|
Chest Strap Height | Sits below throat, stays centered | Rides up, presses throat | Lower strap, check centering |
Armpit Clearance | Straps behind front legs, no rubbing | Redness, hair loss, chafing | Loosen or reposition straps |
Shoulder Freedom | No straps crossing shoulder point, free motion | Limping, stiff walk, resistance | Adjust strap path, check fit |
Overall Fit | Two fingers fit at contact points, no pinching | Pinching, slipping, escape | Adjust for snug, secure fit |
You should always check fit after a few wears and after grooming. Stop using the harness if your dog shows pain, limping, skin injury, distress, or repeated escape attempts. Consult a veterinarian for pain or skin issues. Ask a qualified trainer for help with fear, reactivity, or handling safety. Harnesses support training but cannot guarantee outcomes.
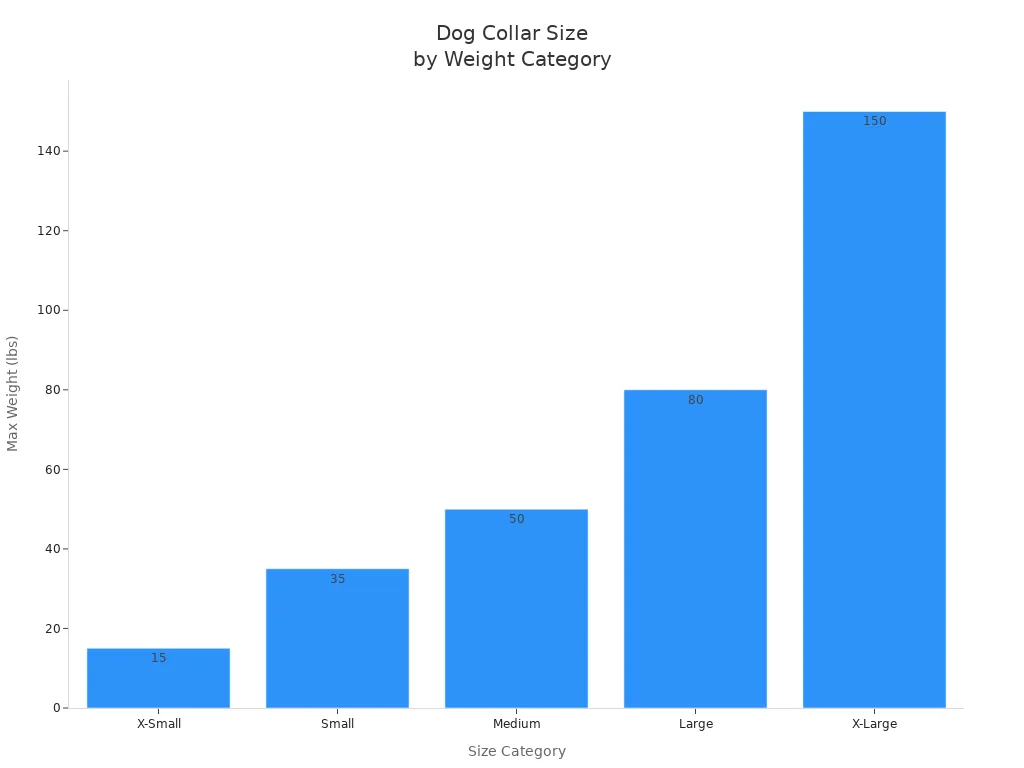
Sizing and Measurement Rules for Dog Harnesses
Measuring Chest and Neck Correctly
You want your harness to fit your dog well. Start with a soft measuring tape. Keep your dog standing and calm. Measure the neck where a collar sits, just above the shoulders. Wrap the tape snug to the fur, but do not compress. Next, measure the chest at the widest part, just behind the front legs. Always check that you can fit two fingers under the tape. This helps you avoid a harness that is too tight or too loose. If your harness uses a back length, measure from the neck base to the tail base. Recheck measurements every few weeks, especially for puppies.
Tips: Take measurements when your dog is relaxed. Double-check for thick fur. Use the tape snug rule for best results.
Between Sizes and Adjustability
Dogs often fall between standard harness sizes. If your dog is between sizes, choose the harness that fits the chest best. Look for adjustability in the straps. Many harnesses offer a buffer of 2-4 in (5-10 cm) for fine tuning. If your harness has a fixed chest strap, you may need a girth extension. Adjustable harnesses help you get a tailored fit and improve training effectiveness. Always recheck the fit after grooming or coat changes.
Size | Girth Measurement (in/cm) | Chest Measurement (in/cm) |
|---|---|---|
Small | 23-28 / 58-71 | Up to 22 / 56 |
Medium | 28-33 / 71-84 | Up to 24 / 61 |
Large | 30-39 / 76-99 | Up to 26 / 66 |
Strap Width and Buckle Bulk by Dog Size
Strap width and buckle size affect comfort and durability. Small dogs do best with straps 0.6-0.8 in (1.5-2.0 cm) wide. Medium dogs need 0.8-1.0 in (2.0-2.5 cm). Large dogs require 1.0-1.5 in (2.5-3.8 cm). Wider straps help distribute pressure and support escape prevention, but should not block shoulder movement. Buckle bulk should match your dog’s size for easy use and safety.
Measurement Table: What, How, Why
What to Measure | How to Measure | Why It Matters |
|---|---|---|
Neck girth | Wrap tape at collar spot, snug to fur, no compression | Ensures harness sits comfortably, avoids choking |
Chest girth | Measure widest part behind front legs, tape snug, two finger check | Prevents slipping, supports escape prevention |
Back length (if needed) | Measure from neck base to tail base | Needed for step-in or tactical harness fit |
Strap width | Match to dog size: 0.6-1.5 in (1.5-3.8 cm) | Balances comfort, durability, and training effectiveness |
Adjustability | Look for 2-4 in (5-10 cm) extra on chest straps | Allows for growth, coat changes, and fine tuning |
Recommendations: Always follow sizing guidelines for safety and comfort. A well-fitted harness supports training and no pull dog harness routines. Stop use if your dog shows pain, limping, skin injury, distress, or repeated escape attempts. Consult a veterinarian for pain or skin issues. Ask a qualified trainer for help with fear, reactivity, or handling safety. Harnesses support training but cannot guarantee outcomes.
Training Use Cases and Harness Features
Loose Leash Walking and Daily Practice
You want your dog to walk calmly next to you. A front clip harness helps you guide your dog. It encourages good walking habits. The no-pull design works well with treats and praise. This helps your dog learn better habits. You and your dog will enjoy walks more. The harness spreads pressure on the chest. This gives you more control and lowers injury risk. Your daily walks become safer.
Tips: Take short walks with your harness. Give treats when your dog stays close. Check the fit often to keep your dog comfy.
Strong Pullers and Consistent Handling
If your dog pulls hard, you need more control. A dual clip harness lets you use the front or back clip. The front clip helps stop pulling. The back clip is good for steady walks. Wide straps, like 1.0-1.5 in (2.5-3.8 cm), spread pressure for big or strong dogs. Always check the fit and adjust the harness. This stops slipping and keeps your dog comfortable.
Nervous Dogs and Slip Risk
Some dogs get nervous or try to escape on walks. A harness with escape prevention features helps keep your dog safe. Snug chest straps and secure buckles work best. Harnesses that spread pressure lower choking risk. They help nervous dogs feel safer. Always look for red spots after walks. Adjust the fit if you see problems. Stop using the harness if your dog has pain, limps, or gets hurt. Ask a vet for help with pain or skin problems. Ask a trainer for help with fear or safety.
Decision Table: Training Goal, Features, What to Avoid
Training Goal or Context | Best Harness Features | What to Avoid |
|---|---|---|
Loose leash walking | Front clip, no-pull design, adjustable straps | Tight fit, straps pressing throat |
Strong pullers | Dual clip, wide straps (1.0-1.5 in / 2.5-3.8 cm), reinforced hardware | Thin straps, poor adjustability |
Nervous or anxious dogs | Escape prevention, even pressure distribution, secure buckles | Loose fit, heavy buckles, throat pressure |
Daily practice and comfort | Breathable material, easy adjustability, chest-centered fit | Overly bulky harness, poor strap placement |
Harnesses help you train and handle common problems. Always check and adjust the harness for comfort and safety. Harnesses do not promise results. Stop using the harness if your dog has pain, limps, gets hurt, or tries to escape.
Step by Step Guide to Fitting the Right Harness
A well-fitted harness helps you guide your dog safely and supports your training goals. You can follow these steps to make sure your harness fits well and keeps your dog comfortable. This guide will help you avoid common mistakes and improve your daily routine.
Adjustment Order for Even Tension
You want to start with a calm dog. Let your dog sniff the harness and offer a treat. Pick a quiet time, such as after play or a nap. Position your dog to stand or sit in a stable area. Follow these steps for a smooth fitting process:
Open all straps to their largest setting before you begin.
Slip the harness over your dog’s head or guide their legs into the step-in loops, depending on the style.
Buckle all straps securely.
Tighten each strap so you can fit two fingers between the strap and your dog’s body. The harness should feel snug, not restrictive.
Walk your fingers around the harness to check for tight spots or twisted straps.
Make sure the harness sits flat against the chest and back. The D-ring should be in the correct spot for leash attachment.
Tip: Take your time with the initial fitting. Recheck the fit regularly, especially for growing puppies or dogs who gain or lose weight.
Fit Tests in Motion: Walk, Sit, Turn
After you adjust the harness, you need to test the fit during movement. Let your dog walk around the house for a few minutes. Watch how your dog moves. Try these fit tests:
Two-finger rule: Slide two fingers under the harness at key contact points. If you can fit three or more fingers, the harness is too loose.
Centering rule: The chest area should stay centered during a short walk. If the harness slides toward one shoulder, adjust the straps.
Rotation cue: Attach the leash and walk your dog. If the leash point drifts off center quickly, the fit or strap layout needs fixing.
Slip test: Apply gentle backward pressure. Your dog should not be able to slip their shoulders through the harness.
Check for comfort by watching your dog sit, turn, and walk. Look for signs of restriction, limping, or resistance. If you see redness or hair loss near the armpits, loosen or reposition the straps.
Practice Routine to Reduce Resistance
Some dogs resist wearing a harness at first. You can help your dog get used to the harness with a simple practice routine:
Let your dog sniff and explore the harness before putting it on.
Offer treats and praise during each step.
Put the harness on for short periods indoors before going outside.
Practice walking, sitting, and turning with the harness on.
Gradually increase the time your dog wears the harness.
If your dog startles or backs up, increase slip risk by checking the fit and style. Choose a harness with escape prevention features and secure buckles. Repeat the acclimation routine until your dog feels comfortable.
Worked Scenarios
Scenario A: Dog pulls and harness twists or rides into armpits
Your dog pulls hard during walks. The harness twists and rides up into the armpits. You need to correct the sizing, clip strategy, and handling habits.
Check the chest and neck measurements. Make sure the harness matches your dog’s size.
Use the two-finger rule to adjust the straps for a snug fit.
Try a front clip strategy to help redirect pulling.
Watch for twisting or bunching. Adjust the harness so it sits flat and centered.
Practice loose leash walking and reward your dog for calm behavior.
Scenario B: Dog startles and backs up, increasing slip risk
Your dog gets nervous and tries to escape by backing up. The harness may slip off if it is too loose.
Run the slip test by applying gentle backward pressure. The harness should stay secure.
Choose a harness style with escape prevention features.
Check the fit around the chest and neck. Adjust for a snug, secure fit.
Use treats and praise to help your dog feel safe.
Repeat the acclimation routine to reduce resistance and escape attempts.
Parameter and Value Table: Fit and Safety
Use this table to guide your fitting routine and check for safety:
Parameter | Target range or option | Why it matters |
|---|---|---|
Chest measurement | widest chest, behind front legs | Primary sizing baseline |
Neck measurement | where collar sits | Comfort and stability cue |
Tape snug rule | snug, no fur compression | Prevents false small readings |
Harness type | overhead, step-in, front-clip, dual-clip | Changes feel and handling |
Clip strategy | front, back, dual | Changes control and rotation risk |
Fit check | two finger rule | Reduces pinch and rub risk |
Chest strap height | avoid throat pressure | Comfort and safer posture |
Armpit clearance | straps behind front leg | Helps prevent chafing |
Shoulder freedom | avoid crossing shoulder point | Reduces restriction risk |
Centering rule | stays centered in motion | Flags poor adjustment |
Rotation cue | leash point drifts off center | Flags layout or fit issue |
Slip test cue | gentle backward pressure check | Signals fit or style change needed |
Width cues | 0.6-1.5 in (1.5-3.8 cm) | Comfort feel and durability cue |
Adjustability buffer | 2-4 in (5-10 cm) chest range | Fine tuning and coat changes |
Re-check routine | after a few wears and coat changes | Prevents gradual misfit |
Safety reminder: A harness supports your training, but cannot guarantee outcomes. Stop use if your dog shows pain, limping, skin injury, distress, or repeated escape attempts. Consult a veterinarian for pain or skin issues. Ask a qualified trainer for help with fear, reactivity, or handling safety.
Retail and Wholesale Notes for Dog Harness Assortments
Product Page Language and Fit Tests
Your product page should help buyers pick the right harness. Give clear sizing details and easy measuring steps. This helps lower returns. Fit tips, like the two-finger rule, let buyers check the harness before using it. Use simple words and show pictures of harnesses on different dogs. Remind buyers to measure both the neck and chest. Tell them to compare their dog’s size to the brand chart.
Factor | Impact |
|---|---|
Clear sizing information | Fewer wrong-size returns |
Fit and use instructions | Better safety and more correct use |
Step-by-step measuring guide | Helps buyers pick the right size |
Two-finger rule reminder | Makes sure the harness fits well |
Tip: Add a fit test checklist to your product page. This helps buyers check the harness fits before going outside.
Spec Checklist: Adjustability, Edges, Hardware
When you choose harnesses for your store, check these things:
Measure the neck and chest, then look at the brand chart.
Think about the main use: training, hiking, car rides, or walks.
Pick where you want the leash to clip: front, back, or both.
Find harnesses with straps you can adjust in width and length.
Check the material: mesh for hot days, neoprene for comfort, metal for strong hardware.
Make sure buckles are strong and tested.
Read reviews about size and how long the harness lasts.
For travel, see if the harness is crash-tested.
Get a handle if you need to lift your dog.
Safety note: A harness helps with training but does not promise results. Stop using it if your dog has pain, limps, gets hurt, or tries to escape. Ask a vet for pain or skin problems. Ask a trainer for help with fear or safety.
Return Reduction: Size Chart and Fit Script
Returns happen when buyers get the wrong size or do not know how to fit the harness. You can lower returns by giving a clear size chart and fit script. Show how to measure the neck and chest. Remind buyers to use the two-finger rule. Offer online try-on tools or samples if you can. Share what you learn with makers to help improve harnesses.
Reason for Returns/Exchanges | Ways to Lower Returns |
|---|---|
Sizing issues | Clear size chart, fit script, measuring guide |
Wrong gifts | Gift guide, easy exchange policy |
Product didn’t fit or work as expected | Step-by-step fit instructions |
Product didn’t match description | Real product photos and details |
OEM and ODM Explained
OEM means Original Equipment Manufacturer. Use OEM if you want your own harness design and full control over how it looks and works. This takes more time and money, but gives you a special product. ODM means Original Design Manufacturer. Pick ODM if you want to sell a ready-made harness you can change a little. ODM is faster and costs less, but the harness is not only yours.
Category | OEM | ODM |
|---|---|---|
Development Time | 2–6 months | 1–4 weeks |
Tooling Cost | High | Little or none |
MOQ | 500–5,000+ units | 300–1,000 units |
Unit Cost | Higher | Lower |
Note: Pick OEM for full control and your own brand. Choose ODM for speed and less risk.
Picking the right harness type and making sure it fits well helps your dog feel good and do better in training. You can stop common mistakes by using the step-by-step guide and looking at the tables. Experts say a harness that fits right spreads weight across the body, keeps the trachea safe, and does not block movement. Check the fit often and adjust it to keep your dog safe and happy.
Remember: A harness helps with training but does not promise results. Stop using it if your dog has pain, limps, gets hurt, seems upset, or tries to escape a lot. Ask a vet for pain or skin problems. Ask a trainer for help with fear or safety.
Give treats and praise to make the harness a good thing.
Put the harness on the same way each time.
Be patient so your dog learns to like the harness.
FAQ
How do I know if my dog’s harness fits correctly?
Check that you can fit two fingers between the harness and your dog at all contact points. The chest strap should sit below the throat and stay centered. Watch for rubbing, slipping, or signs of discomfort. Adjust as needed for safety and comfort.
Can I leave a harness on my dog all day?
You should remove the harness when your dog is resting or unsupervised. Long wear can cause rubbing or skin problems. Always check for redness or hair loss after walks. Stop use if you see pain, limping, or distress. Consult a veterinarian for skin issues.
What harness type works best for strong pullers?
A dual clip harness gives you more control. Use the front clip to help redirect pulling. Wide straps, 1.0-1.5 in (2.5-3.8 cm), help spread pressure. Always check fit and adjust for comfort. No harness can guarantee results. Training and patience matter most.
How often should I check the harness fit?
Check the fit after a few wears, after grooming, or if your dog gains or loses weight. Look for signs of discomfort or slipping. Adjust the straps for a snug, secure fit. Safety tip: Stop use if your dog shows pain, limping, or repeated escape attempts.
Can a harness stop my dog from escaping?
A well-fitted harness lowers escape risk, but no harness can guarantee prevention. Use the slip test: apply gentle backward pressure. The harness should stay secure. Choose escape prevention features for nervous dogs. Consult a trainer for help with fear or reactivity.