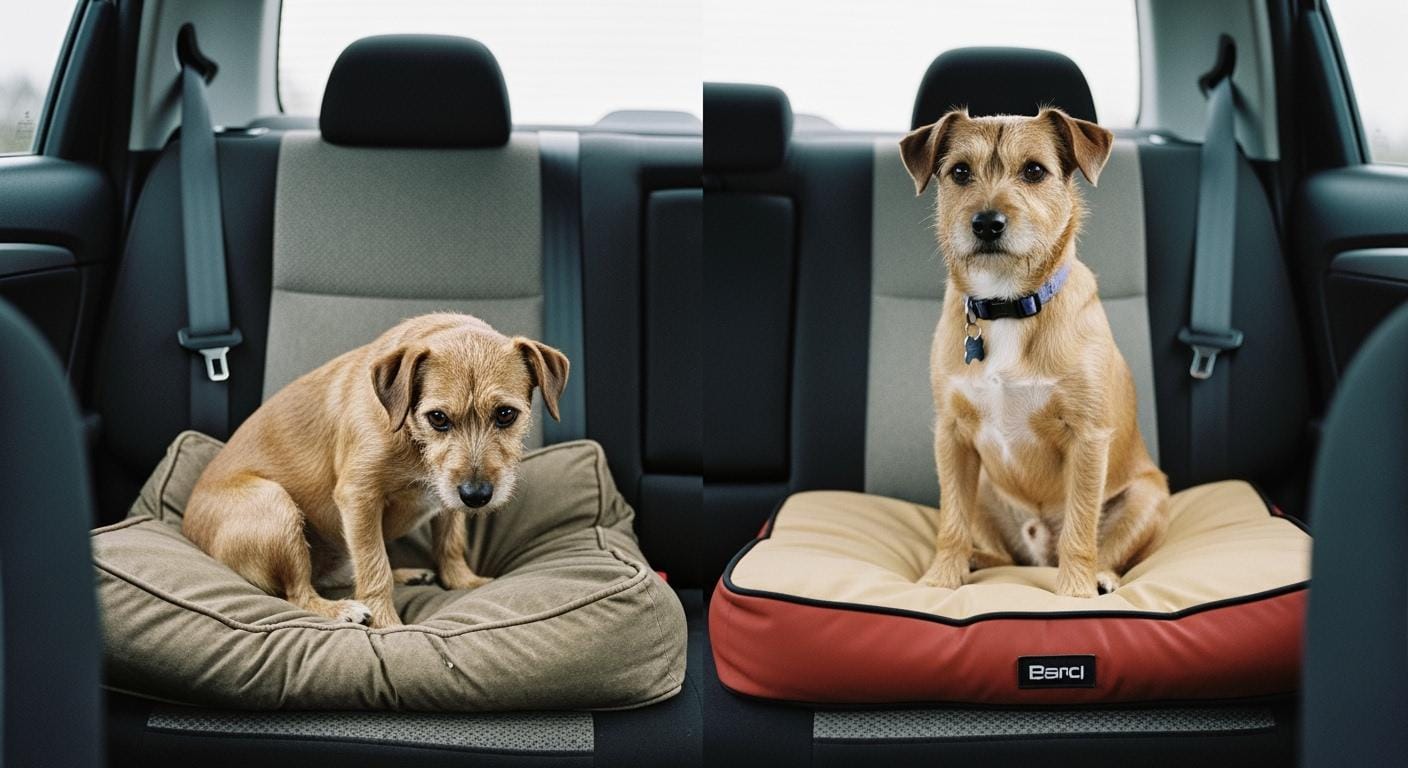
Dog car seat safety depends much more on restraint function than on soft padding or tall side walls. A setup can look neat in the driveway and still fail when the belt path is twisted, the tether is clipped to the wrong point, or the seat shifts under load. What matters most is whether the system keeps your dog in a controlled position when the car stops hard.
If you are still deciding between restraint types, the comparison of car seats, seat belts, and carriers gives the broader tradeoffs before you get into setup details. This article is for checking whether the setup you already have is doing the job it is supposed to do.
What actually protects a dog in the car
Comfort is not the same as restraint
Soft walls, thick cushions, and elevated platforms can make a seat more pleasant on a calm ride, but they do not manage crash forces by themselves. Protection comes from the way the seat is anchored to the vehicle, the way the harness spreads load across the chest and shoulders, and the way the tether stays flat and correctly routed from start to finish. Those are the parts worth inspecting every time.
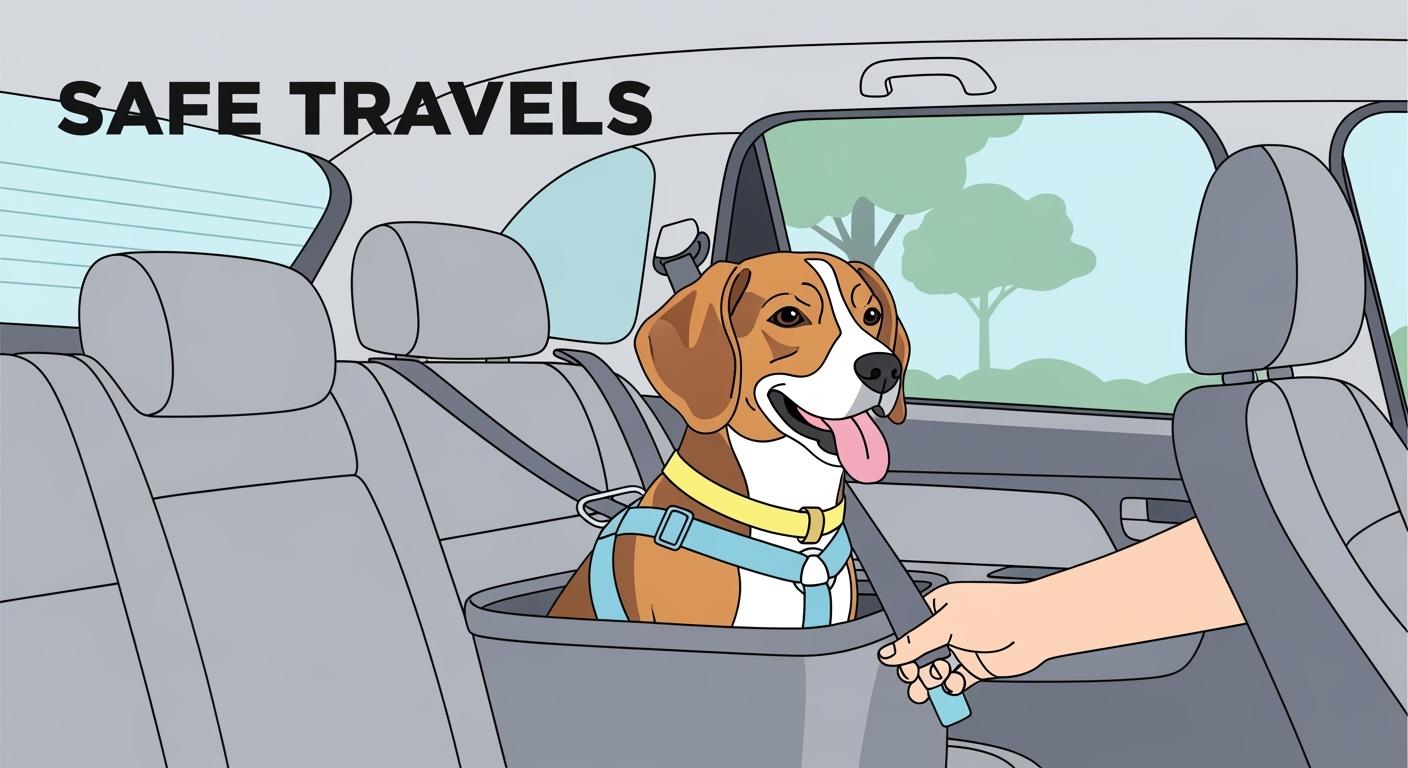
Tip: A tether should clip to the chest attachment point on a full body harness, not to a collar. Neck loading can turn a moderate stop into a serious injury.
Features that are worth checking
When a restraint setup works well, it usually looks boring. The base stays planted, the belt path stays flat, the buckle remains reachable, and the dog cannot lunge far enough forward to build dangerous slack. If you are still choosing a restraint rather than checking an installed one, the broader dog car seat safety overview covers selection and installation in more detail.
| Feature | Why it matters | What to watch |
|---|---|---|
| Independent crash test record | Shows the restraint was evaluated under dynamic load instead of only casual fit checks | Look for a named third party program instead of marketing language alone |
| Full body harness design | Spreads force across the chest and shoulders instead of concentrating it at the neck | Make sure the tether uses the chest attachment point |
| Metal connection hardware | Connection points usually tolerate load better when hardware is solid and unworn | Check for cracks, bends, or fraying before each trip |
| Flat restraint path | A flat belt or anchor path loads more evenly during a sudden stop | Trace the full path and remove twists before buckling |
| Short, controlled tether length | Less slack usually means less forward travel before the restraint engages | Watch for extra movement when the dog shifts or leans forward |
| Harness fit that stays snug | A loose harness can rotate or let the dog move outside the restraint zone | Check for gaps, pinching, or forward slide once the dog settles in |
What crash testing can and cannot tell you
Independent crash testing matters because it asks a different question than everyday comfort testing. It can show whether a restraint stays together and limits movement under severe deceleration. It cannot rescue a bad installation. Even a better-tested restraint loses most of its value when the tether is clipped to a collar, the seatbelt is routed through the wrong slot, or the buckle cannot lock the way it should.
How the main restraint types differ
Booster seats, bed style seats, and crash-tested harnesses solve different problems. Smaller dogs may ride comfortably in a booster, but elevation is mainly a comfort feature. A bed style seat may feel calmer for a dog that wants a resting surface, yet the walls still do not replace active restraint. If verified restraint performance matters most, a well-fitted harness usually offers the clearest safety logic.
| Type | What it does well | Where it falls short | Best fit |
|---|---|---|---|
| Booster style seat | Keeps a small dog contained and elevated for visibility | The raised platform does not create crash protection on its own | Small dogs on shorter rides when the tether setup is correct |
| Bed style seat | Gives a dog a stable resting surface and some lateral containment | Walls do not replace a secure tether and many models lack independent testing | Calm dogs that settle down and need comfort more than elevation |
| Crash-tested harness | Focuses restraint load across the body and can offer the most defensible safety case | Setup errors can undo most of the benefit | Medium to large dogs or any setup where restraint performance comes first |
Check the setup before every drive
Start with the seat, belt path, and tether
The base should feel anchored before your dog gets in. Press down on the seat and push it side to side. If it rocks or drifts, the installation needs work before anything else. Then trace the full belt or anchor path with your eyes and hands. A twist that looks minor in the driveway can create a real weak point under load.
Harness fit matters just as much as seat installation, and problems with chest plate position, strap angle, or overall tension usually come back to the same fit points covered in this dog harness fit and sizing checks.
Once the harness is on, clip the tether to the chest point, not the collar and not a casual back clip. Then check buckle access. If the buckle is hidden behind a wall or jammed under the seat frame, the setup is not ready yet even if everything else looks tidy.
A quick pass-fail check before leaving
| Check item | Pass sign | Problem sign | First fix |
|---|---|---|---|
| Base stability | No obvious shift under firm hand pressure | Seat rocks or slides | Retighten the belt or anchor and retrace the routing path |
| Belt path | Belt lies flat through the correct slot | Twist, bunching, or wrong path | Remove the twist and reinstall before driving |
| Tether attachment | Clipped to the chest point on the harness | Clipped to a collar or the wrong loop | Reconnect it before the dog moves again |
| Buckle access | Reachable and able to lock cleanly | Blocked by fabric, frame, or seat wall | Reposition the seat and confirm the buckle still locks |
| Harness tension | Snug without pinching and with minimal forward slack | Visible slack or harness rotation | Shorten the tether and readjust the straps |
| Dog placement | Rear seat with restraint engaged | Front seat placement or free movement | Move the setup to the rear seat before driving |
On longer trips, these checks still matter at every stop because slack can change after your dog shifts around. That is why the seat belt safety checks for long drives and rest stops focus on rechecking the restraint between driving segments instead of assuming the original setup stays perfect all day.
Where dog car seat safety usually breaks down
Belt routing and tether slack
Most real-world setup failures start with routing, not with the seat itself. A twisted seatbelt cannot spread force evenly. A tether that takes a longer path than it should gives the dog more distance to travel before the restraint catches. That extra movement can raise the force at the moment everything goes tight.
Some fit issues are subtle, especially when a harness looks snug at first but still slides, rotates, or leaves too much room once the dog settles in, which is the exact problem covered in this dog car seat belt harness fit checks and common errors.
The rear seat still needs active restraint
The rear seat is generally the better place for a dog because it keeps the dog away from front airbag deployment zones. That does not mean the dog is automatically protected. A dog in the rear seat can still be thrown forward during a sudden stop if the restraint system is loose, badly routed, or missing entirely.
Rear placement helps, but active restraint is what limits movement. A seat that is simply placed on the rear bench without a solid belt path is still just a movable object.
Common mistakes that reduce protection fast
The biggest mistake is still the simplest one: clipping the tether to a collar. After that, the usual problems are slack that never got corrected, a harness that no longer fits the dog’s current size, and a buckle that looked usable during setup but becomes hard to reach once the seat is loaded.
Tip: If a setup needs force or awkward hand angles just to reach the buckle, treat that as a real safety problem, not as a minor inconvenience.
When the setup already feels wrong
| Symptom | Likely cause | Fast check | Fix |
|---|---|---|---|
| Seat wobbles on turns | Loose anchor or poor routing | Push the empty seat side to side | Reinstall and tighten the path evenly |
| Dog moves outside the restraint zone | Too much tether slack or a loose harness | Pull the tether and harness separately | Shorten slack and refit the harness |
| Buckle is hard to engage | Seat wall or frame blocks access | Try buckling with the dog out of the seat | Reposition the seat or change the layout |
| Tether clips to the wrong point | Wrong attachment used during loading | Look at the clip location before departure | Move it to the chest point on the harness |
| Straps look worn | Heat, age, or repeated load has damaged the material | Inspect webbing and hardware by hand | Replace damaged components before the next drive |
| Dog slips out of position often | Harness size or tether length no longer matches the dog | Check current chest fit and overall slack | Refit or replace the restraint |
Early warning signs are easier to catch than fix on the road
A stable base should feel anchored
A stable seat does not just sit in place when the dog is calm. It resists sideways pressure before the dog gets in and still feels planted after the dog’s weight shifts onto it. If the base drifts during loading, the setup needs to be reset before you start moving.
Watch buckle access and movement during the drive
If the buckle becomes blocked after the seat is installed, the restraint is already compromised. If the dog starts leaning over the edge, stepping outside the restraint zone, or twisting enough to build slack, that usually points to setup problems before it points to behavior problems.
| Setup condition | Buckle access | Typical dog movement | Risk level |
|---|---|---|---|
| Flat installation with short controlled tether | Clear and reachable | Dog stays inside the restraint zone | Lower when the harness fit is also correct |
| High walls with narrow buckle space | Often partly blocked | Moderate roaming is still possible | Higher if the tether is awkward to use |
| Loose fit or long tether | Variable | Dog moves forward or sideways too easily | Higher regardless of seat style |
Know when the gear no longer fits the job
Frayed stitching, cracked buckles, bent metal, or a harness that no longer fits the dog’s current body are all reasons to stop trusting the setup. Differences in wall height, base shape, and tether layout become obvious across common pet car seat designs when the current seat no longer matches your dog’s size or riding style.
If you replace the seat but keep the same harness, the fit still needs a fresh look. New seat dimensions can change tether angle, buckle access, and the amount of forward travel available before the restraint engages.
Final takeaways on dog car seat safety
Dog car seat safety is really about reducing movement in a hard stop, not about making the seat feel cozy in the driveway. A well-routed belt path, a correctly fitted harness, and a short tether connected to the chest point do more for protection than cushion thickness or wall height ever will.
- Check the base, belt path, buckle, and tether before every drive.
- Treat collar attachment, visible slack, and blocked buckle access as immediate setup failures.
- Replace worn gear and refit the harness whenever the dog’s size or the seat layout changes.
FAQ
How often should you check a dog car seat setup?
Check it before every drive because a restraint that was correct yesterday can still shift, loosen, or twist before the next trip.
Is the rear seat always the safest place for a dog?
The rear seat is usually the better location, but it only helps when the dog is actively restrained with a correctly installed setup.
Does a booster seat protect a dog better than a harness?
Not necessarily. A booster can help with comfort and containment for smaller dogs, but a well-fitted harness usually offers the clearer restraint logic when crash protection is the main concern.
What if the harness looks snug but the dog still moves too much?
That usually means the tether is too long, the harness is rotating under load, or the seat layout is letting the dog travel too far before the restraint engages.