Dog leashes most often fail at stitched connections and hardware. You can protect your dog’s safety by making quick checks of these stress points before every walk.
If you spot any weakness in the load path, replace the leash right away.
- You do not need special skills to inspect a leash.
- Quick inspections help you avoid accidents and keep walks safe for everyone.
Key Takeaways
- Look at your dog’s leash before every walk. Check the clip, stitching, and webbing for any damage.
- Pay close attention to the clip attachment loop and handle junction. These parts get the most stress and can break without warning.
- Get a new leash right away if you see any damage. Even small problems can cause accidents on walks.
- Pick leashes made from strong materials like biothane for longer use and safety. Stay away from fancy parts that might make the leash weaker.
- Make leash safety part of your routine. Checking often and replacing early keeps your dog safe and makes walks fun.
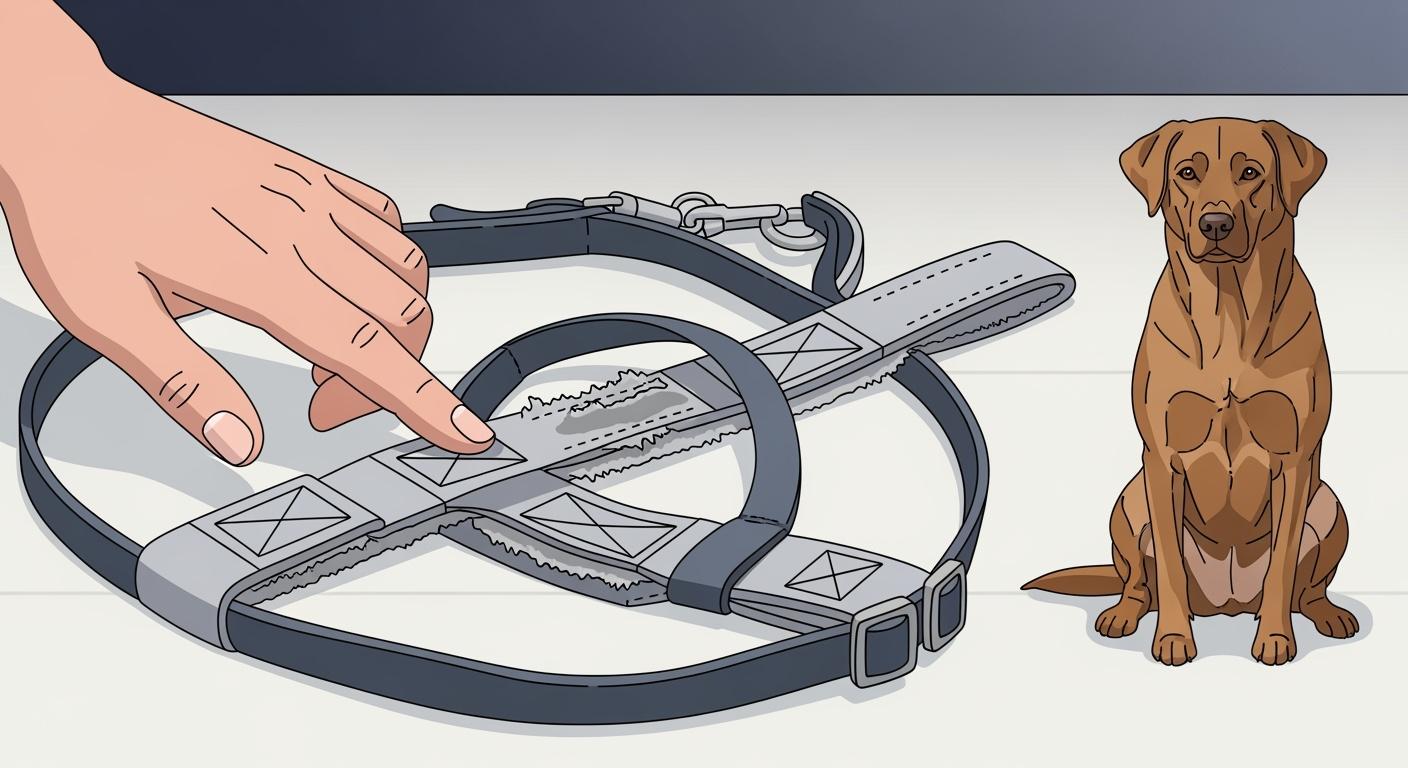
Dog leashes stress points and failure risks
Load path and force zones
You need to know where the most stress happens on dog leashes. The load path is the route that force travels when your dog pulls, lunges, or stops suddenly. The highest-risk stress points include the clip attachment loop, the first bend behind the clip, the handle junction, and any added rings or traffic handles. These areas face the most force and wear. You should check the stitching and webbing at these spots. Clip strength matters most at the attachment loop, where the leash connects to your dog’s collar or harness. If the clip strength drops, the leash can fail without warning. The handle junction also needs strong stitching and durable materials to resist stress from your grip.
Common failure modes
Dog leashes can fail in several ways. Fraying or tearing often starts at the edges or folds, especially near the clip or handle. Dirt and grit can build up in these areas, causing extra stress and weakening the materials. You may see broken or missing stitches in the load path. Clips can stick or misalign, which reduces clip strength and increases risk. Rings and traffic handles add new stress points and can create weak spots if not reinforced.
Note: Inspection routines reduce risk, especially when leashes are exposed to grit, water, or UV.
“Over 30% of leash-related injuries in dogs occur due to equipment failure. Regular inspection and care of retractable leashes reduce risks significantly.” — Dr. Linda Peterson, DVM
- Deterioration of materials like nylon under consistent training pressure can lead to fraying or tears.
- Accumulation of dirt and grime can cause mechanical wear, leading to unexpected failures.
Hidden dangers and exposure risks
Some damage is hard to see. Hidden abrasion inside folds or under stitching can weaken the leash even if it looks fine. Grit, salt, and UV exposure can break down materials and reduce strength over time. You may not notice thinning or deep abrasion until the leash fails. Clip strength can drop if corrosion or burrs form on the hardware. Always check for these hidden risks before each walk. If you spot any stress or weakness in the load path, replace the leash. Regular inspection helps you catch problems early and maintain durability.
Durability factors: materials and construction

Webbing and hardware choices
Picking the right material for your dog leash is important. Each material has its own strengths and weaknesses. Some are stronger, last longer, or feel better to hold. The table below shows how nylon and biothane compare:
| Material | Lifespan (with regular wet use) | UV Resistance | Weight When Wet | Comfort and Safety Considerations |
|---|---|---|---|---|
| Nylon | 6–12 months | Moderate – degrades in sunlight | Increases significantly | Becomes stiff and rough when wet, can cause skin irritation |
| Biothane | 2–5 years | High – resistant to sun damage | No change | Remains flexible and smooth when wet, does not irritate skin |
You can also look at different leash types and how they are made. The table below helps you compare them:
| Option | Best Use | Advantages | Disadvantages | Key Points (Failure Modes & Inspection) |
|---|---|---|---|---|
| Heavy-duty nylon webbing | Daily walks, strong dogs | High strength, affordable | UV and water degrade over time | Check for edge abrasion, fading, and stiff spots |
| Polyester webbing | Outdoor, wet conditions | Better UV and water resistance | Slightly less strength than nylon | Inspect for fraying, especially at folds |
| Coated waterproof leashes | Water sports, mud | Easy to clean, resists rot | Can be slippery when wet | Look for cracks, peeling, and hardware rust |
| Rope leashes with joints | Hiking, large breeds | Flexible, strong, comfortable grip | Joints can loosen, absorb water | Test knots, check for fuzzing and joint movement |
| Leashes with locking carabiner connectors | High-risk, escape-prone dogs | Secure attachment, high load rating | Heavier, more expensive | Inspect carabiner action, look for burrs or misalignment |
When picking hardware, check the load rating and make sure it is safe. The chart below shows how much weight different leash clips can handle:
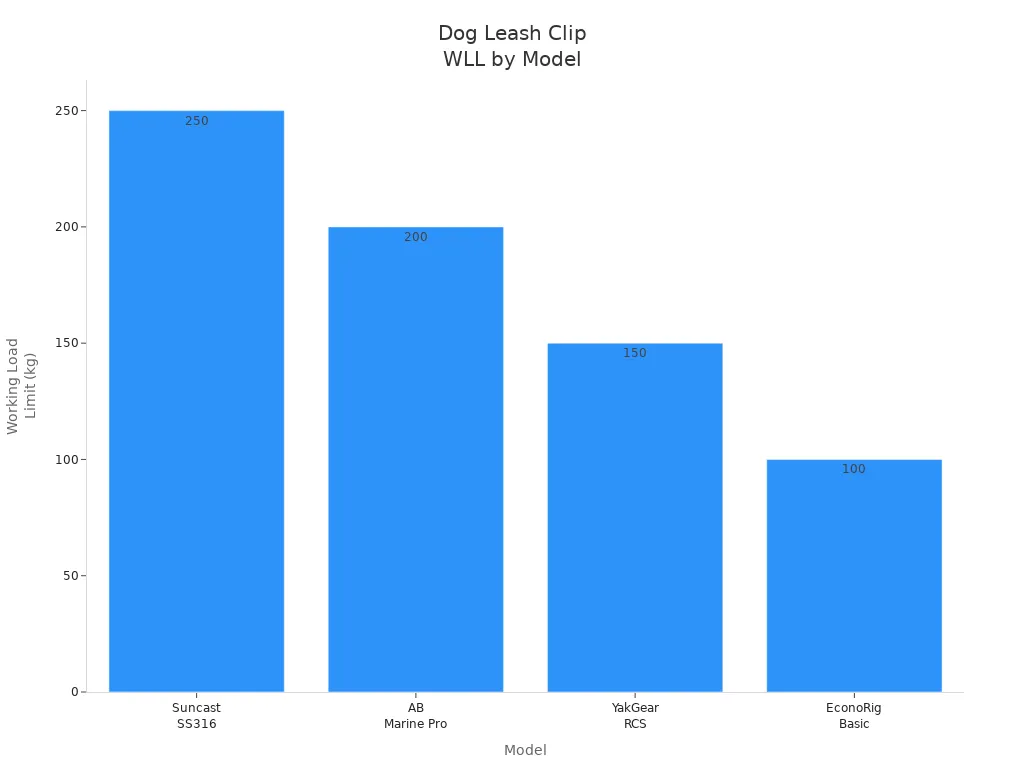
Pick hardware with clear ratings and avoid decorative parts in the load path. If you buy for a business, ask suppliers for relevant compliance documentation and test reports for your target market.
Stitching and reinforcement
Stitching keeps the leash together at important spots. Look for extra stitching at the clip, handle, and rings. Double or box stitching makes the leash stronger and safer. If you see any broken or missing stitches, get a new leash. Leashes made to standards like ASTM D6775 and MIL-W-5625 are more reliable.
Hardware safety and misuse
Check hardware for problems like sticking, rust, or not lining up right. Only use hardware with clear load ratings. Do not use clips or connectors for things they were not made for. Fancy hardware may look cool but can break under pressure. Always rinse hardware after it gets dirty or salty and dry it well.
Tip: Keep leashes out of the sun and away from heat. Do not let your dog chew on the leash because teeth marks can make it weak.
Taking care of your leash helps it last longer. For nylon, rinse after salt or mud, use mild soap for stains, and let it air dry. For leather, wipe off water, use conditioner, and store it in a cotton bag. Rope leashes can be rinsed or washed in a machine.
Durability checklist and retire-now rules
Quick inspection routine
You can stop most leash problems by checking it before every walk. First, find the load path. This is where force moves from your hand to your dog. Pay close attention to the highest-risk stress points. These are the clip attachment loop, the first bend behind the clip, the handle area, and any extra rings or traffic handles.
Follow this checklist to check for durability:
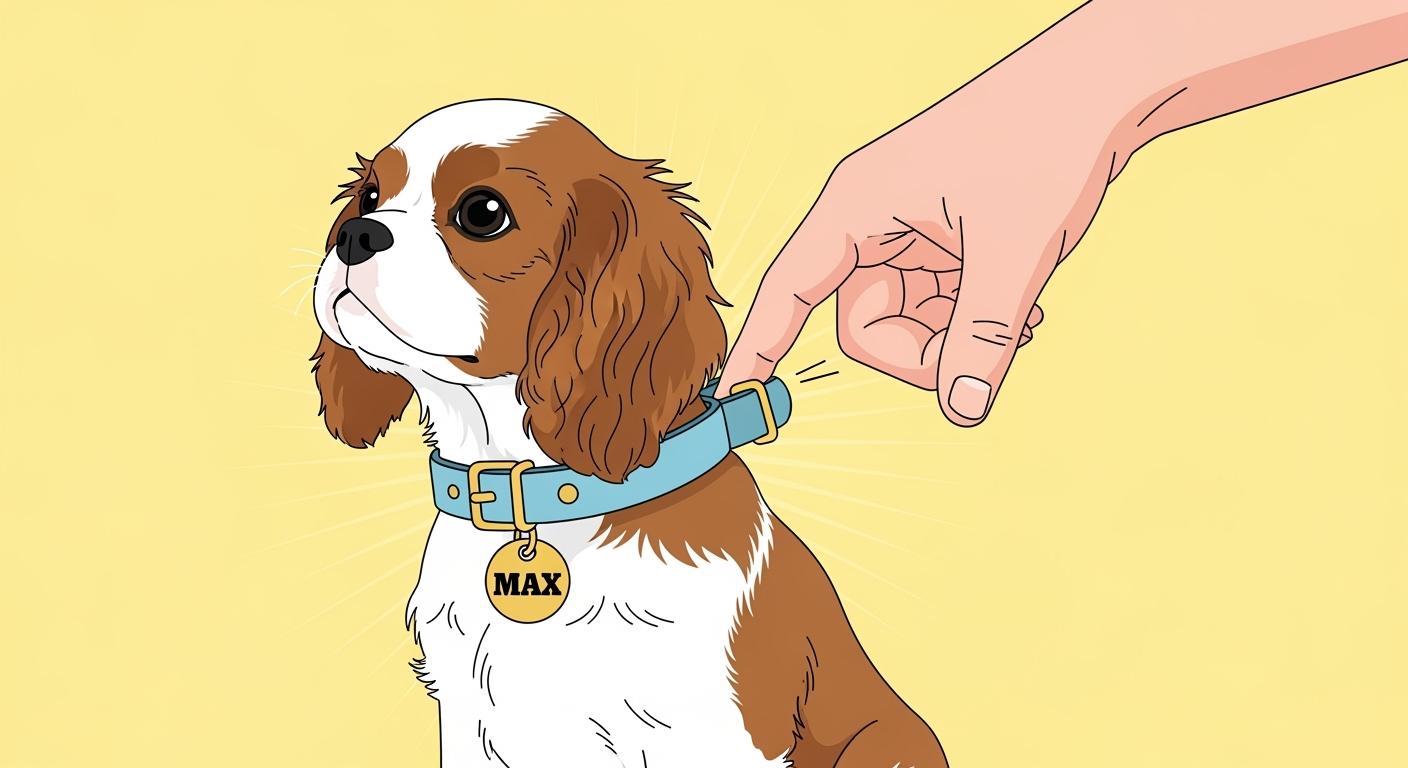
- Attachment Points: Check for cracks, rust, or parts that do not line up. These issues can make the leash break if your dog pulls.
- Strap Junctions: Look for loose threads or seams coming apart. Good stitching should be tight with no spaces.
- Adjusters: Make sure they stay in place and are not broken. If adjusters are loose, the leash may not fit right.
- Webbing: Look for cuts, fraying, or thin spots. Even strong webbing can wear out, so check every edge and fold.
- Abrasion Zones: Feel for rough seams or thin fabric. These spots can hurt your dog’s skin or break when pulled.
Here is a table to help you remember what to check:
| Inspection Area | Key Checks | Importance |
|---|---|---|
| Attachment Points | Cracks, rust, alignment | Keeps your dog safe when pulling |
| Strap Junctions | Loose threads, seams coming apart | Stops the leash from breaking suddenly |
| Adjusters | Stay tight, not broken | Makes sure the leash fits right |
| Webbing | Cuts, fraying | Stops the leash from wearing out |
| Abrasion Zones | Thin fabric, rough seams | Keeps your dog from getting hurt |
Tip: Bend and pull each part gently to find hidden damage. Look closely at the stitching under stress. If you see broken or missing threads, get a new leash.
Pass/fail signals for stress points
You need clear signs to know if a leash is safe. Use these danger signs to help you decide:
- Broken or missing stitches at any connection point
- Deep cuts, worn spots, or thin webbing at edges or folds
- Clips or swivels that stick, do not line up, or close slowly
- Sharp edges, rust, or bent hardware
- Rust that changes how the clip fits or moves
If you see any of these problems, the leash is not safe. Do not try to fix or patch a weak load path. Always pick quality dog accessories with strong stitching and tested hardware for the best safety.
When to replace your leash
Replace your leash right away if you see any danger signs. Do not wait for it to break. Even small problems can cause accidents. If you are not sure, clean the leash and check again. If the problem is still there, get a new leash.
Here is a simple checklist to help you decide:
- Stitching at connection points: Any broken or missing thread means replace.
- Webbing edges and folds: Cuts, deep wear, or thin spots mean replace.
- Handle area: Loose or broken stitching means replace.
- Clips and swivels: Sticking, not lining up, sharp edges, or rust mean replace.
- Secondary components: Extra rings or traffic handles with loose stitching or wear mean replace.
- Environmental accelerators: Salt, dirt, or sun can make problems worse. Clean, dry, and check again.
- Care methods: Rinse after use, dry well, and keep out of sun and heat.
Safety-first: Never try to fix or sew over a damaged load path. Always use a new leash if you find a problem.
Common misconceptions and solutions
Many people think a leash is fine if it does not look torn. But hidden damage can make even quality dog accessories weak. Metal hardware is not always safe. Rust, sharp edges, or parts that do not line up can make the leash break. Some people ask if they can fix a leash themselves. If you see broken threads, sharp edges, cuts, or sticky hardware, you should get a new leash, not fix it. Water can hurt materials by making them swell, stiff, or worn inside. If you see any of these signs, replace the leash instead of fixing it.
B2B Note: Regular checks and clear rules for retiring leashes lower accident rates and make customers happier.
Pick solutions that focus on safety and durability. Look for quality dog accessories with strong stitching and good hardware. Replace your leash as soon as you see a problem. This habit keeps you and your dog safe.
Fit, alternatives, and buyer guidance
Fit vs not a fit
You want a leash that matches your dog’s needs and your use case. Use these criteria to check if a leash is a good fit:
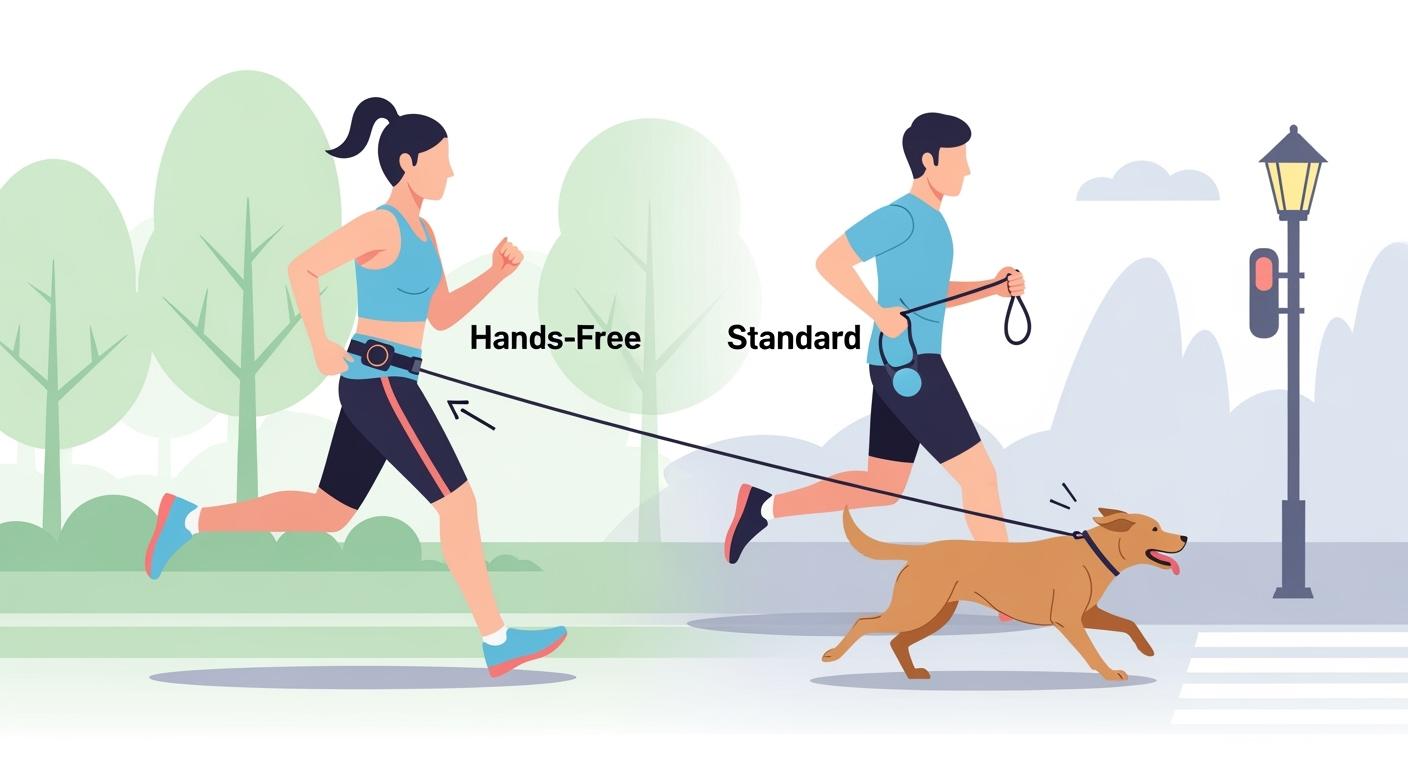
- The leash type matches your activity (daily walk, training, or emergency).
- The leash fits your dog’s behavior. If your dog pulls hard, choose a stronger leash.
- The leash feels comfortable and safe for both you and your dog.
- The leash distributes pressure well and does not cause discomfort.
- The hardware and webbing match the dog’s size and strength.
Not a fit 🟥:
- Not a fit if the leash uses light hardware for a strong or lunging dog.
- Not a fit if the leash has decorative add-ons that create weak points.
- Not a fit if you cannot follow a cleaning routine for frequent salt, sand, or mud exposure.
Alternatives for high-risk use
If your leash is not a fit, you have options:
- Choose a leash with heavy-duty webbing or rope, like those used in rescue or handling situations.
- Pick a model with a locking connector or carabiner to prevent accidental release.
- Add a backup safety line for extra security in high-risk environments.
- Use a double-ended leash with adjustable slip loops and snap clips for better control.
These alternatives give you more durability and safety when you need it most.
Buyer note and next steps
Buyer Note: Show close-up photos of attachment stitching and hardware on your product pages. Name the webbing and hardware class. Include a retire-now checklist. This helps reduce returns and builds trust.
User Note: Always check your leash before each walk. Replace it at the first sign of wear to keep your dog safe.
A single failure—like a buckle that breaks or a D‑ring that pulls loose—can have serious consequences for your customer and their pet. This can also create real liability for your brand.
If you want more details, request a quote, sample, spec sheet, or contact us for guidance.
You keep your dog safe by checking the leash before every walk. Use the durability checklist to find problems early. Get a new leash if you see any damage.
Look at the clasp before each walk and check the whole leash every month. If you see any weakness, replace the leash right away.
Picking strong leashes and checking them helps stop injuries. It also helps your dog learn better. The attachment point is important for safety and comfort.
- Pick the leash type that fits your needs.
- Try using a harness for more control.
- Practice leash skills with your dog often.
- Make leash safety part of your daily habits.
FAQ
How often should you check your dog leash for wear?
You should check your leash before every walk. Look closely at the clip, stitching, and webbing. Monthly, do a full inspection by bending and pulling each part to find hidden damage.
What is the load path on a dog leash?
The load path is the route where force travels from your hand to your dog. It includes the clip attachment loop, the first bend behind the clip, the handle, and any added rings or traffic handles.
Can you repair a damaged leash?
You should not repair a leash if the load path is damaged. Replace the leash instead. Patching or sewing over weak spots does not restore full strength or safety.
What materials last longest for dog leashes?
| Material | Durability | Care Needed |
|---|---|---|
| Biothane | High | Easy to clean |
| Nylon | Moderate | Rinse and dry |
| Polyester | High | Rinse and dry |
Choose materials that match your dog’s activity and environment.
Why do clips and hardware fail?
Clips and hardware can fail from rust, grit, or misalignment. You should check for smooth action, no sharp edges, and no sticking. Replace hardware that does not work properly.