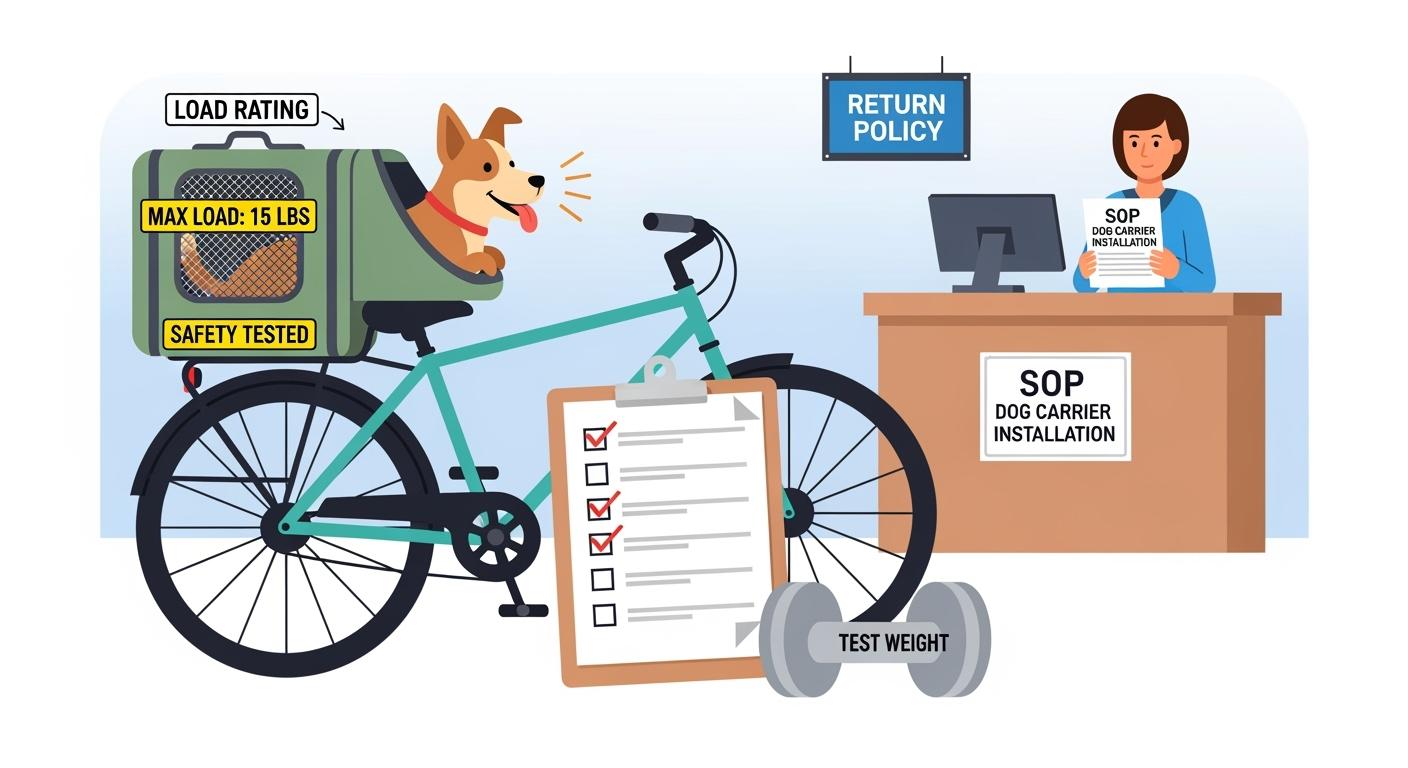
You want your dog carrier for bike to be very safe. You also want to stop expensive returns. Most problems happen because of mounting issues. Fastener failures and torque loss are also common. These problems can make the bike unstable. They can also put your pet in danger. This can lead to restocking costs. You can stop these problems by checking RL, MC, and label rules. The table below lists common standards for pet carrier products in the US and EU. Use checklists and SOPs to test each dog bike basket carrier. Test dog bike carrier backpacks too. Also test bike dog trailers and bike specific pet carriers. Check pet bicycle front carriers and custom adjustable ventilated dog bike baskets. Test dog bicycle baskets and snoozer sporty pet bicycle baskets before you sell them.
Compliance Standard | Region |
|---|---|
ISO 9001 quality management standards | US |
Airline carry-on regulations (FAA) | US |
CE certification | EU |
UL testing | US |
Key Takeaways
Check the Rated Load and Mount Class before you use the dog carrier on your bike.
Use a parts checklist to make sure all pieces are there and not broken before you put it together.
Tighten fasteners to the right tightness so they do not come loose or break when you use the carrier.
Do tests that copy real-life use to make sure the carrier stays steady and safe when forces push or pull on it.
Put clear labels with RL, MC, and safety warnings so people use the carrier the right way and follow rules.
Look at the edges and straps to see if they are sharp or weak to keep your dog safe and the carrier strong.
Use a good quality control plan to find problems early and stop returns.
Try a small test order of carriers first so you can find problems before selling a lot.
Why dog carrier for bike mounts fail
Buyer symptoms: wobble, tilt, missing parts
You may notice a wobble or tilt when you mount a dog carrier for bike. Sometimes, you find missing parts in the box. These problems can show up during assembly or after your first ride. You might see the carrier shift to one side. You may hear rattling or feel the carrier move when you turn. Some buyers report that the carrier detaches from the bike. Others find that the fasteners loosen after a short time. You may also see gaps between the carrier and the bike rack. These symptoms can make you worry about the safety of your dog. They can also lead to returns and extra costs for your business.
Tip: Always check for all parts before assembly. Use the parts checklist in your spec pack to avoid surprises.
Root causes: load path, torque, labeling
You can trace most failures to three main root causes. First, the load path may not match the intended mount class (MC). If you choose the wrong MC, the carrier may not support the rated load (RL) safely. For example, a rear beam carrier has a lower RL than a seatpost-mounted beam. If you exceed the RL, the mount can bend or break.
Second, torque problems often cause fastener failures. If you do not tighten fasteners to the supplier’s recommended UTmax, they can loosen during use. If the fastener cannot reach the minimum failure torque (FTmin), it may fail under stress. Always use a calibrated torque wrench and follow the torque values in your spec pack.
Third, labeling errors can lead to misuse. If the RL or MC is missing or unclear, buyers may overload the carrier. Missing warning icons or traceability labels can also cause confusion. You must check that every carrier has clear RL, MC, and warning labels. This helps you meet safety rules and reduces the risk of returns.
Note: RL means the maximum total mass allowed in the carrier, including your dog and any items. MC sets the mounting category and limits for RL. Always match the RL and MC to your bike and use the correct test methods.
Buyer symptom | Likely root cause | Spec or test to prevent it |
|---|---|---|
Wobble or tilt | Wrong MC, low torque | Check RL/MC match, verify UTmax/FTmin |
Missing parts | Packing error | Use parts checklist, QC sampling (AQL) |
Fastener loosening | Under-torqued assembly | Torque test, use calibrated wrench |
Detachment | Overload, wrong RL/MC | RL/MC labeling, dynamic test (cycle target) |
Rattling noises | Loose fit, missing parts | Fit check, parts checklist, AQL sampling |
Bike dog carrier validation steps
Choose mount class and RL
Step One: First, think about how you will use the dog carrier for bike. Decide where you want to put it on your bike. You can pick a rear normal carrier, a rear beam, a seatpost-mounted beam, or a front carrier. Each MC can only hold a certain weight. For example, a rear beam carrier holds up to 10 kg. A seatpost-mounted beam can hold up to 27 kg. Write down your MC choice in your spec pack.
Step Two: Next, set the RL for your bike dog carrier. RL is the most weight the carrier can hold, including your dog and other things. Make sure the RL is not more than the MC limit. If your RL is less than 27 kg, add a warning that it is not for child-seat use. Put the RL on your product label and in your records.
Tip: Always make sure the RL and MC fit your bike and user. This helps stop overload and keeps the mount from failing.
Set torque and FTmin
Step Three: Now, find out the highest tightening torque (UTmax) for each important fastener. Also, set the lowest failure torque (FTmin). The FTmin should be at least 1.2 times the UTmax. This stops fasteners from coming loose or falling off.
Ask your supplier for the UTmax for every fastener. Write these numbers in your spec pack. Use a torque wrench to check if each fastener can reach FTmin without breaking. Write down the results in your QC checklist.
Note: Always use a torque wrench that is accurate within ±6%. This makes sure you use the right force and keep your dog safe.
Dynamic test setup
Step Four: Plan how you will test the dog bike basket carrier. You need to copy the real forces it will feel when used. Do both side-to-side and up-and-down tests. Side tests check if the carrier stays steady. Up-and-down tests copy bumps from the road.
Use a test load that matches your RL. Put the load in the middle of the carrier, within 5 mm. Spread the load over at least 70% of the platform. Keep the center of gravity within 40 mm above the platform. Do not let the load stick out more than 100 mm past the platform.
Use this table to help plan your dynamic test:
Test Type | Description |
|---|---|
Lateral Dynamic Testing | Checks side forces to make sure the carrier stays stable. |
Vertical Dynamic Testing | Checks up-and-down forces using a moving motion like real bumps. |
Test Duration | Each test lasts about 4 hours with no breaks. |
Load Application | The test load moves up and down in a set pattern. |
Frequency Range | The speed changes from slow (1 Hz) to fast (8 Hz). |
Compliance Requirement | The carrier must not break, crack, or bend out of shape during the test. |
Set your goal to 100,000 cycles for side tests. For up-and-down tests, run it for about 4 hours at the right speed for your MC. Write down all results and look for cracks, breaks, or bending.
Safety Reminder: If the carrier fails any part of the test, do not sell it. Test a new sample or change your design.
Spec Request Checklist Table
Requirement | What to ask the supplier for | How to verify at receiving |
|---|---|---|
Mount Class (MC) | MC info and how to mount it | Check the MC label and mounting parts |
Rated Load (RL) | RL label and test proof | Look at the RL marking and test paper |
UTmax and FTmin | Fastener info and torque test results | Use a torque wrench to check fasteners |
Dynamic Test Results | Full test report with cycle data | Read the report and check for damage |
Load Placement Compliance | How to put the load and photos | Watch load placement during sample test |
Warning Labels | Label pack with RL, MC, and warnings | Check labels for clear info and all warnings |
QC Sampling Plan | Sampling plan and defect types | Check sampling records and defect notes |
Traceability | Batch or lot number on product and box | Check traceability mark on every unit |
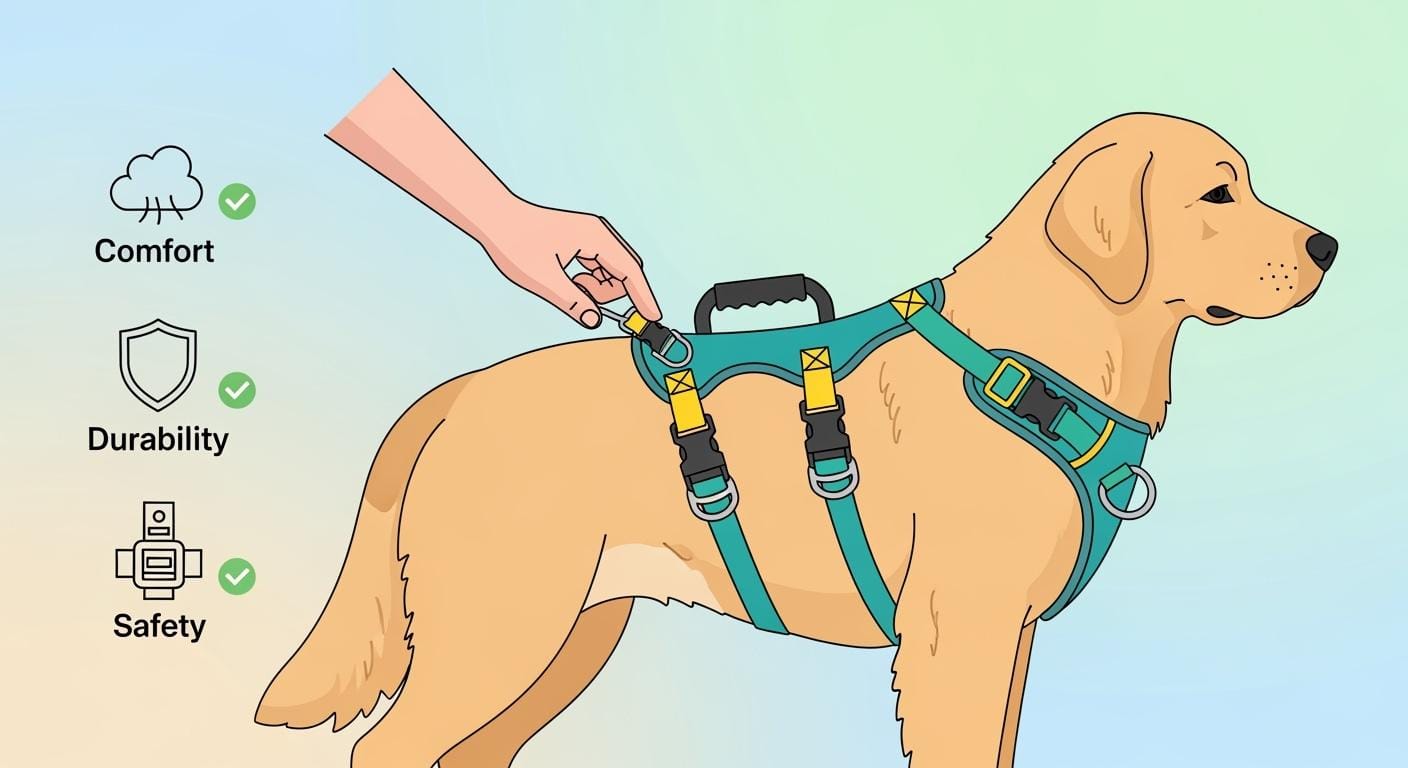
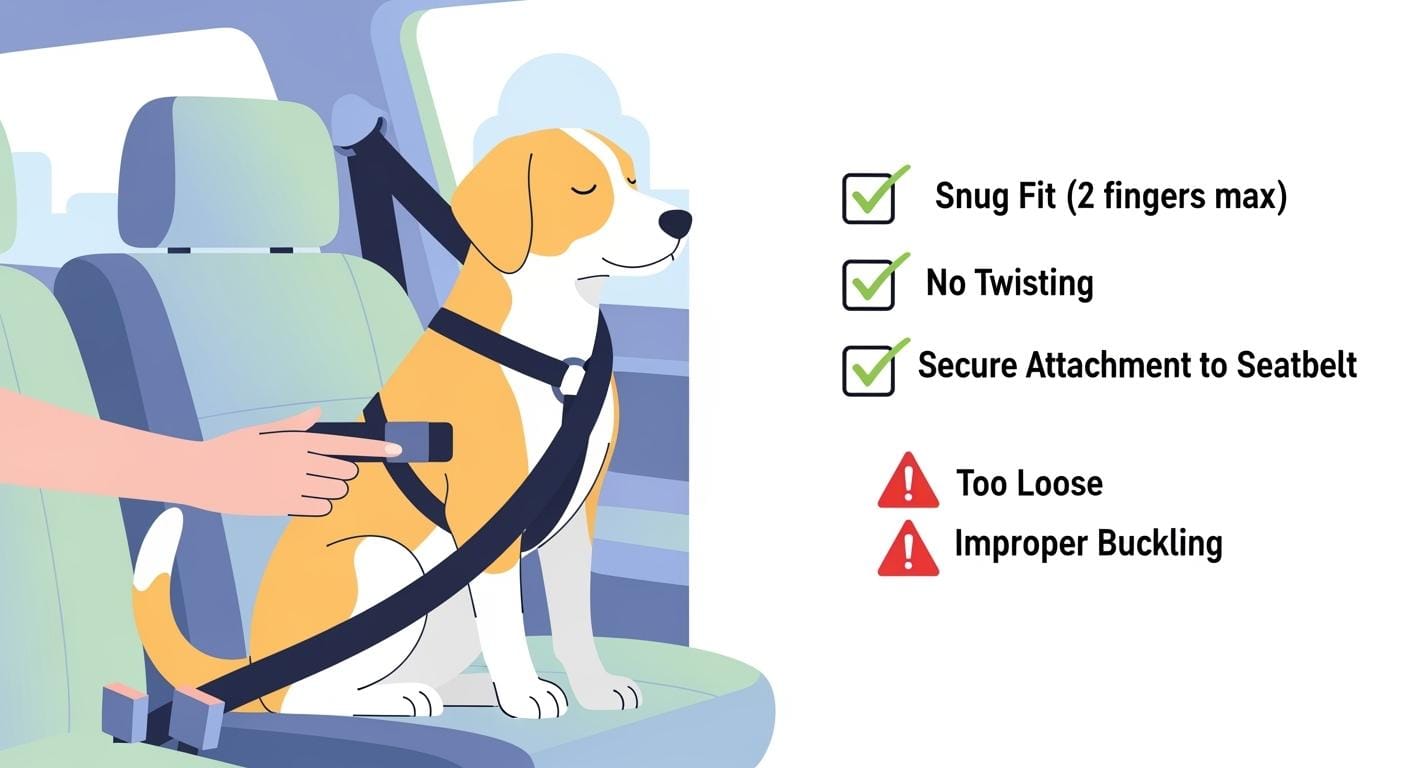
Edge and strap checks
You need to check all edges and straps before you approve any dog carrier for bike. Sharp edges can cut or scratch your dog. Loose straps can let the carrier move or fall off. You should run your finger along every edge. Look for rough spots or sharp corners. If you find any, ask your supplier to fix them.
Straps must hold the dog bike basket carrier tight to the bike. Pull each strap to make sure it does not stretch too much. Buckles and clips should lock without slipping. You should check that each strap can hold the RL without breaking. If you see fraying or weak stitching, mark it as a defect.
Tip: Use the Card’s RL/MC and UTmax/FTmin to justify the cost of better mounting hardware. Strong straps and smooth edges help prevent returns and keep your dog safe.
Edge and Strap Inspection Checklist
Item | What to Check | Pass/Fail Criteria |
|---|---|---|
Edge finish | No sharp or rough spots | Smooth to touch, no cuts |
Strap strength | Holds RL load, no stretch or tear | No visible damage, holds firm |
Buckle/clip action | Locks securely, easy to release | No slip, no jam |
Stitching | Even, no fraying or loose threads | Tight, no gaps |
QC sampling and receiving
You must set up a strong QC sampling plan when you receive dog carriers for bike. Use the Card’s AQL and defect definitions. This helps you catch problems before they reach your customers. You should inspect samples from each batch. Look for critical, major, and minor defects.
Check every unit for the right RL and MC labels. Make sure the fasteners meet UTmax and FTmin. Test the straps and edges as listed above. Count all parts and compare with the packing list. If you find missing or broken parts, record them as defects.
Note: Always use the Card’s sampling level and defect categories. This keeps your quality high and your return rate low.
QC Sampling Table
Defect Type | Example Problem | AQL Limit | Action if Found |
|---|---|---|---|
Critical | Mount detaches, safety risk | 0 | Reject batch |
Major | Fastener fails, strap breaks | 2.5 | Review supplier |
Minor | Cosmetic scratch, label smudge | 4.0 | Accept with note |
Pilot order and returns
You should always run a pilot order before you buy a large batch. Order a small number of dog bike basket carrier units. Test them with your team. Check mounting, straps, edges, and labels. Use the Card’s RL/MC and UTmax/FTmin to justify the cost of better mounting hardware.
Track how many units get returned. Record the reasons. Take photos and videos of any problems. This helps you spot issues early and fix them before a full launch.
Unit-Economics Example
Variable | Value (USD) | Description |
|---|---|---|
WP | 30 | Wholesale price per unit |
LC | 18 | Landed cost per unit |
GM | 12 | Gross margin per unit (WP – LC) |
RRbase | 8% | Baseline return rate |
RRimproved | 5% | Improved return rate after QC |
RC | 8 | Return handling cost per unit |
If you lower your return rate from 8% to 5%, you save $0.36 per unit in return costs. This increases your gross margin. Better edge and strap checks help you reach this goal.
Use the Card’s AQL and defect definitions. Use the Card’s RL/MC and UTmax/FTmin to justify the cost of better mounting hardware.
StridePaw Video: Mounting Check and Shake Test
Watch the StridePaw video for a step-by-step guide. You will see how to mount the carrier, run a shake test, and check torque. The video shows what to look for when you receive new units. You can find the video on the StridePaw product page.
StridePaw Mounting Check & Shake Test Video
(Video placeholder: Visit StridePaw for the full demonstration)
Tip: Use this video to train your team. It helps you spot problems early and reduce returns.
Load-rating labels and traceability
Label checklist: RL, MC, warnings
Check every label before selling your dog bike basket carrier. The label must show RL, MC, and warnings. RL tells you the most weight the carrier can hold. This includes your dog and other items. MC shows what kind of bike mount fits the carrier. Warning icons help users avoid mistakes. These icons should follow ISO 7000-style standards. Look for traceability info like batch or lot numbers. You can find this on the product or its box. Traceability helps you track each unit if there is a problem.
Tip: Use a checklist to make sure every label has RL, MC, warning icons, and traceability details. This keeps buyers safe and less confused.
US/EU warnings and traceability
Label rules are different in the US and EU. In the US, you must show where the product was made. Put this on the product or its box. Use English for this marking. The FTC wants proof for any claims about the product. Add clear contact info for your company. Traceability is not required by law, but it is smart to include.
In the EU, new rules start December 13, 2024. The GPSR makes traceability and contact info more important. Give safety info in languages people understand. Claims must be true and have proof. The label needs clear contact info for the maker or importer. Traceability is now required.
Topic | US Requirements | EU Requirements |
|---|---|---|
Country-of-origin marking | Must be on product or box | No single rule; safety traceability info needed |
Language | English for origin; instructions in English | Safety info in languages people understand |
Claims substantiation | FTC needs proof for claims | Claims must be true and have proof |
Contact information | Must have origin and traceability info | Must have clear contact info for maker/importer |
Traceability | Not required, but smart to include | GPSR makes traceability and contact info required |
Check your labels for both regions. This helps you follow all rules and keep products safe.
Pictograms and symbols
Use clear pictograms and symbols on every pet bicycle front carrier, dog bicycle basket, and snoozer sporty pet bicycle basket. ISO 7000-style icons help users understand warnings. This works even if they do not read the language. Use symbols for load limits, mounting steps, and safety warnings. Put these icons where users can see them easily. This helps stop mistakes and meets US and EU rules.
For more tips on safe labeling, visit the StridePaw blog: “Carrying Dog on Bicycle: Safety Tips Every Pet Retailer Should Know.”
Attachment and durability tests
Fit and anti-rotation
You need to make sure every carrier fits tightly and does not rotate during use. A secure attachment system uses multiple connection points. This keeps the carrier from slipping or tipping. You should check that the mounting brackets and fasteners hold the carrier steady on the bike frame or rack. Use static load tests to see if the carrier stays in place when you add weight. Try low-speed brake tests and rough-surface vibration tests. These tests show if the carrier moves or rotates when you ride.
Feature | Description |
|---|---|
Secure Attachment Systems | Carrier attaches tightly with several points to prevent slipping or tipping. |
Harness Tether and Containment | Strong tether clips to the harness to keep the dog inside. High sides or mesh windows add safety. |
Weight Limits and Size Guidelines | Match the carrier’s RL and size to the dog for safety and comfort. |
Practical Testing Methods | Use static load, brake, and vibration tests to check stability. |
You should always use a safety strap and a well-fitting harness. Attach the harness to the carrier’s safety strap. This helps keep the dog secure during the ride.
Load placement rules
You must follow strict rules for placing loads during testing. Place the test load at the center of the carrier, using the RL from your spec pack. Keep the load’s center of gravity within 40 mm above the platform. Spread the load over at least 70% of the platform area. Do not let the load stick out more than 100 mm past the platform edge. Use test-fill media, such as 40 mm balls with a mass of 24 g, and secure them so they do not move. These steps help you repeat tests and compare results.
Tip: Always match the RL and MC to your carrier and bike. This prevents overload and reduces the risk of failure.
Corrosion and outdoor checks
You need to check that all hardware and fasteners can handle outdoor use. Weather changes and road salt can cause rust and weaken parts. Use ISO 9227 NSS (neutral salt spray) to test for corrosion resistance. Expose the hardware to a 5% NaCl salt fog for the number of hours you set in your spec pack. After the test, check for binding, loss of structure, or cosmetic damage. The carrier should not show any functional problems.
Choose materials that can handle weather and frequent use. Look for reinforced stitching, durable zippers, and secure mounting brackets. A padded base helps absorb vibrations. Water-resistant or insulated carriers work best for different weather conditions.
For more merchandising and durability tips, visit the StridePaw blog: “Dog Basket for Bike: Merchandising Guide for Pet Stores”.
Retail assembly and QC SOP
Unbox and parts check
You should start by opening the box with care. Avoid sharp tools that could cut the carrier or straps. Lay all parts on a clean surface. This helps you see everything at once. Check each part for dents, scratches, or missing pieces. Look for the mounting hardware, safety strap, netting, and instruction sheet. If you see any damage, take photos and note the issue. This record helps with supplier feedback and return triage.
Open the box gently to protect the carrier.
Remove all items and place them on a table.
Inspect for shipping damage or missing parts.
Document any problems with photos.
Tip: Use your parts checklist from the spec pack. This step reduces assembly errors and helps you catch defects early.
Torque and shake test
After you confirm all parts, begin assembly. Attach the Rapid Bike Adapter to the handlebars. Use a ph2 Phillips screwdriver and an Allen key. Secure the object-carrier netting with screws and black rivets. Add the protective netting and insert the safety strap for extra stability. Attach the basket to the handlebars.
Check each fastener with a torque wrench. Make sure you reach the UTmax value for every critical bolt. This prevents loosening during use. After assembly, perform a shake test. Hold the carrier and gently shake it side to side and up and down. Listen for rattles or movement. The carrier should stay firm and not shift.
Assemble the adapter and basket as shown in the instructions.
Tighten all fasteners to the UTmax value.
Insert and secure the safety strap.
Shake the carrier to check for stability.
If you find any loose parts, re-torque and repeat the shake test. Record your results in the QC log.
Note: Always use a calibrated torque wrench. This ensures you meet the FTmin requirement and keep the carrier safe for pets.
Packaging and instructions
Before you close the box, check that all instructions and safety guides are inside. Include a setup guide with clear steps and diagrams. Add a safety checklist for the user. Remind buyers to keep dogs on a leash near wild animals or livestock. Suggest using soft, padded baskets for small dogs. Teach users to train their dogs to stay on the right side of the bike and follow basic commands.
Provide after-sales support information. Let buyers know how to contact your team for help. Ask for feedback to improve future products. Good instructions and support reduce confusion and returns.
Place the instruction manual and safety checklist in the box.
Add after-sales contact details.
Encourage feedback for product improvement.
For more assembly tips and product details, visit the StridePaw dog bike carrier product page.
Return SOP and triage
A strong return SOP helps you save money and make better products. You need a simple plan to handle returns and find out what went wrong. This section gives you easy steps for return triage. You will learn how to use return reason codes and ask for photos or videos for every case.
Return reason codes
You should use return reason codes to know why people send back dog carriers for bikes. These codes help you see problems and fix them quickly. Give each return a code. Write the code in your system. Look at the data every month to find patterns.
Here is a table with sample return reason codes you can use:
Code | Description | Action Required |
|---|---|---|
01 | Missing parts | Check packing and QC process |
02 | Mounting issue (fit/attachment) | Review MC/RL and assembly |
03 | Fastener problem (loose/broken) | Check UTmax/FTmin compliance |
04 | Labeling or warning missing | Update label pack and SOP |
05 | Cosmetic damage | Review packaging and handling |
06 | Corrosion or outdoor failure | Check ISO 9227 NSS results |
07 | Other (describe in notes) | Investigate and log details |
Tip: Use these codes in your return log. This makes it easy to share information with your supplier and QC team.
Train your team to pick the right code for each return. This helps you find the real problem and stop it from happening again.
Photo/video requirements
You need clear photos and videos for every return. This helps you see the problem and makes triage faster. Ask your team or customers to give:
At least two photos of the whole carrier (front and back)
Close-up photos of the problem (missing part, broken fastener, label, etc.)
Photo of the RL and MC label on the product
Photo of the mounting hardware and fasteners
Short video showing the problem (for mounting, fit, or movement issues)
You should add these steps to your return instructions. This helps you stop delays and arguments. Use the photos and videos to check if the problem is about RL, MC, UTmax, FTmin, or other spec pack items.
Note: Good photo and video records help you make your QC process better and support claims with your supplier.
You can find a sample return checklist and more SOP templates on the StridePaw resource page.
Collect all photos and videos before you approve a return.
Review each case with your QC and compliance team.
Use the data to update your spec pack and lower future returns.
If you follow these steps, you will have a safer, stronger dog carrier program and keep your return rate low.
RFQ template and supplier scorecard
When you want to buy dog carriers for bikes, you need a simple way to ask suppliers for details. You also need a way to compare them. This section gives you an RFQ checklist and a supplier scorecard. These tools help you pick the right product and lower your risk.
RFQ checklist: mount, RL, tests
Always send a detailed RFQ to your supplier. This helps you get the best carrier for your needs. Use the checklist below to cover all important points.
RFQ Checklist for Dog Carrier for Bike
Item | What to Request from Supplier | Why It Matters |
|---|---|---|
Mount Class (MC) | State the MC and show mounting instructions | Ensures fit and safety |
Rated Load (RL) | Show RL label and test proof | Confirms load capacity |
UTmax and FTmin | Give fastener specs and torque test results | Prevents loosening and failures |
Dynamic Test Results | Provide cycle target data and test reports | Checks durability |
Corrosion Test (ISO 9227 NSS) | Share salt spray test results | Proves outdoor readiness |
Label Pack | Show RL, MC, warning icons, and traceability | Meets US/EU rules (GPSR date) |
QC Sampling Plan (AQL) | Give sampling plan and defect categories | Controls quality |
Traceability | Show batch or lot number on product and box | Supports recalls and tracking |
Instruction Manual | Include clear assembly and safety instructions | Reduces user errors |
After-Sales Support | List contact info and support process | Helps with returns and feedback |
Tip: Attach this checklist to your RFQ email. Ask your supplier to fill out each item and send proof.
Scorecard: durability, QC, lead time
After you get quotes and samples, you need to compare suppliers. Use a scorecard to rate each one. This helps you choose the best partner for your business.
Supplier Scorecard for Dog Carrier for Bike
Criteria | Target/Standard | Supplier A | Supplier B | Supplier C |
|---|---|---|---|---|
RL/MC Compliance | RL and MC match spec | |||
UTmax/FTmin Results | Meets or exceeds requirement | |||
Dynamic Test (cycle target) | Passes 100,000 cycles | |||
Corrosion Test (ISO 9227 NSS) | Passes agreed hours | |||
Label Pack (GPSR date) | All labels present and clear | |||
QC Sampling (AQL) | Meets AQL for all categories | |||
Lead Time | ≤ 45 days (example) | |||
After-Sales Support | Fast and clear communication | |||
Price | Competitive and fair |
You can add more columns for other suppliers. Fill in the table as you check each quote and sample. Give each supplier a score or note for every item.
Note: Use this scorecard with your team. Review it before you place a big order. This helps you pick a supplier who meets your safety, quality, and delivery needs.
If you want more templates or examples, visit the StridePaw resource page or contact the StridePaw team.
You make your dog safer and get fewer returns when you follow each step. Use spec packs to check RL, MC, UTmax, and FTmin. Always look at every dog bike basket carrier for labels and strong mounting. Check pet bicycle front carriers for the right labels and tight fit. Test each pet bicycle front carrier, dog bicycle basket, and snoozer sporty pet bicycle basket. This helps keep your dog safe. Use checklists and SOPs in your QC process. Look at StridePaw resources and send the RFQ template to suppliers.
Safety begins with good checks and easy-to-follow instructions.
FAQ
What does RL mean on a dog carrier for bike?
RL stands for Rated Load. You see this number on the label. It tells you the maximum weight the carrier can hold, including your dog and any items.
How do I choose the right MC for my bike carrier?
You select MC, or Mount Class, based on your bike’s rack type. Check your bike’s carrier style. Match it to the MC listed in your spec pack. This helps you avoid overload.
Why do I need to check UTmax and FTmin during assembly?
You check UTmax and FTmin to make sure fasteners stay tight. UTmax is the highest torque you should use. FTmin is the lowest torque needed for safety. Use a torque wrench for accuracy.
What is the cycle target in dynamic testing?
Cycle target means the number of times you test the carrier’s movement. You use 100,000 cycles for side-to-side tests. This helps you see if the carrier stays strong over time.
How does AQL help with quality control?
AQL stands for Acceptable Quality Level. You use it to decide how many defects you allow in a batch. You set limits for critical, major, and minor defects. This keeps your quality high.
Why do I need ISO 9227 NSS corrosion testing?
You use ISO 9227 NSS to check if hardware resists rust. You expose fasteners to salt spray for a set time. This test helps you pick carriers that last outdoors.
What is the GPSR date and why does it matter?
GPSR date is December 13, 2024. After this date, you must follow new EU rules for traceability and safety labels. You update your label pack to meet these requirements.
How can I lower my return rate for dog carriers?
You follow the spec pack steps. Check RL, MC, UTmax, and FTmin. Use AQL for sampling. Run pilot orders. Train your team with videos and checklists. This helps you catch problems early.