You need good tools to fit dog armor for working and hunting dogs in the country. A good fit covers important parts and helps keep dogs safe during outdoor work. Talking clearly about safety and product testing helps customers trust you. The enablement kit gives you helpful things for sizing, safety, and training. You can use these tools to meet set rules and uses, which helps you earn customer trust and stop sizing problems.
Key Takeaways
Use the enablement kit to make sure dog armor fits well. A good fit keeps working dogs safe and comfortable.
Watch the video demo for easy steps on fitting dog armor. The video helps you avoid common mistakes.
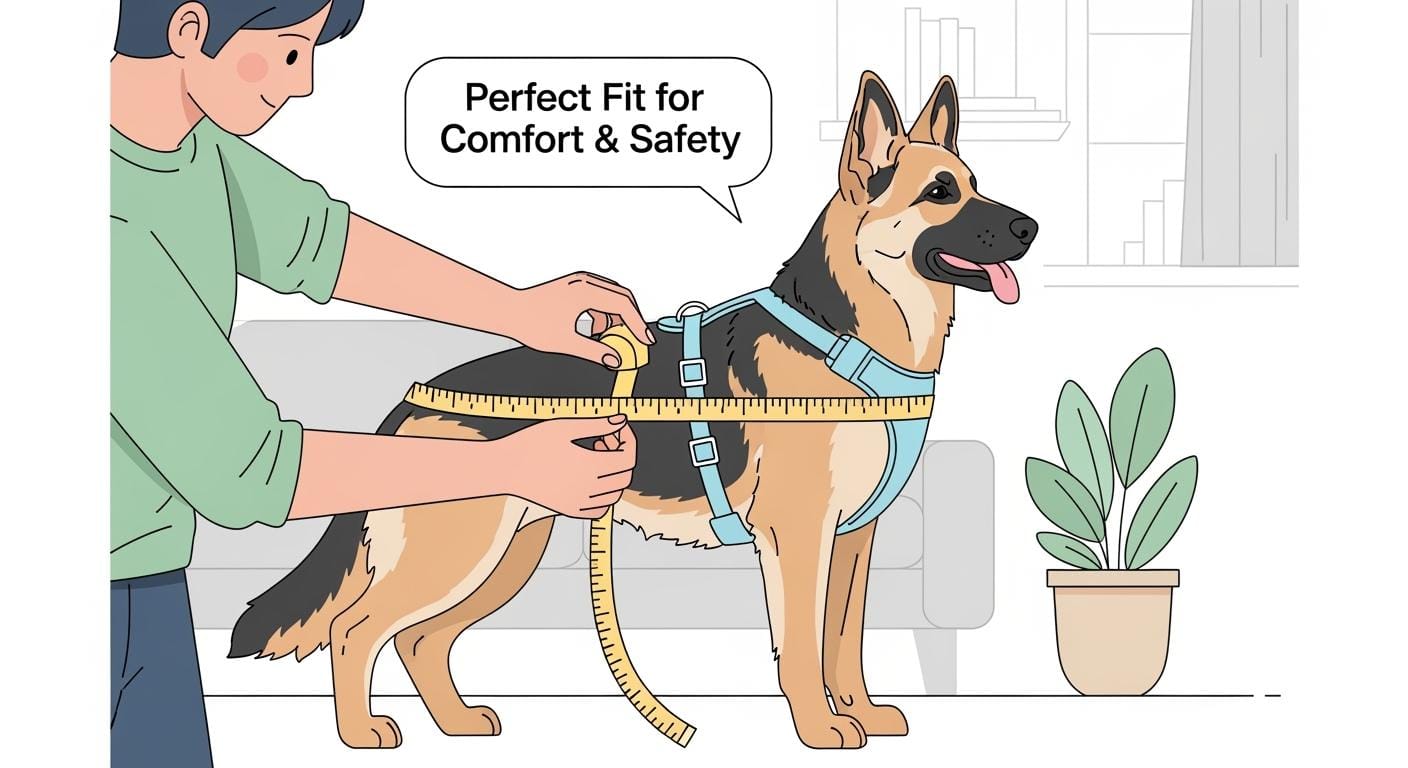
It is important to measure dogs correctly. Measure dogs while they stand. Follow the right steps to get a snug fit.
Use the documentation pack for clear sizing charts and fitting guides. This helps you make fewer mistakes and keeps customers happy.
Talk clearly about how dog armor should be used and what it cannot do. This helps build trust and sets fair expectations with customers.
Check dog armor before each use. Look for damage and make sure it fits right. This keeps dogs safe when they go outside.
Follow the rules for sizing and returns. This makes your work easier and helps stop arguments.
Keep training materials up to date. Make sure all staff know how to fit dog armor. Training often leads to better service and fewer problems.
Video Demo: Dog Armor Fitting and Measurement
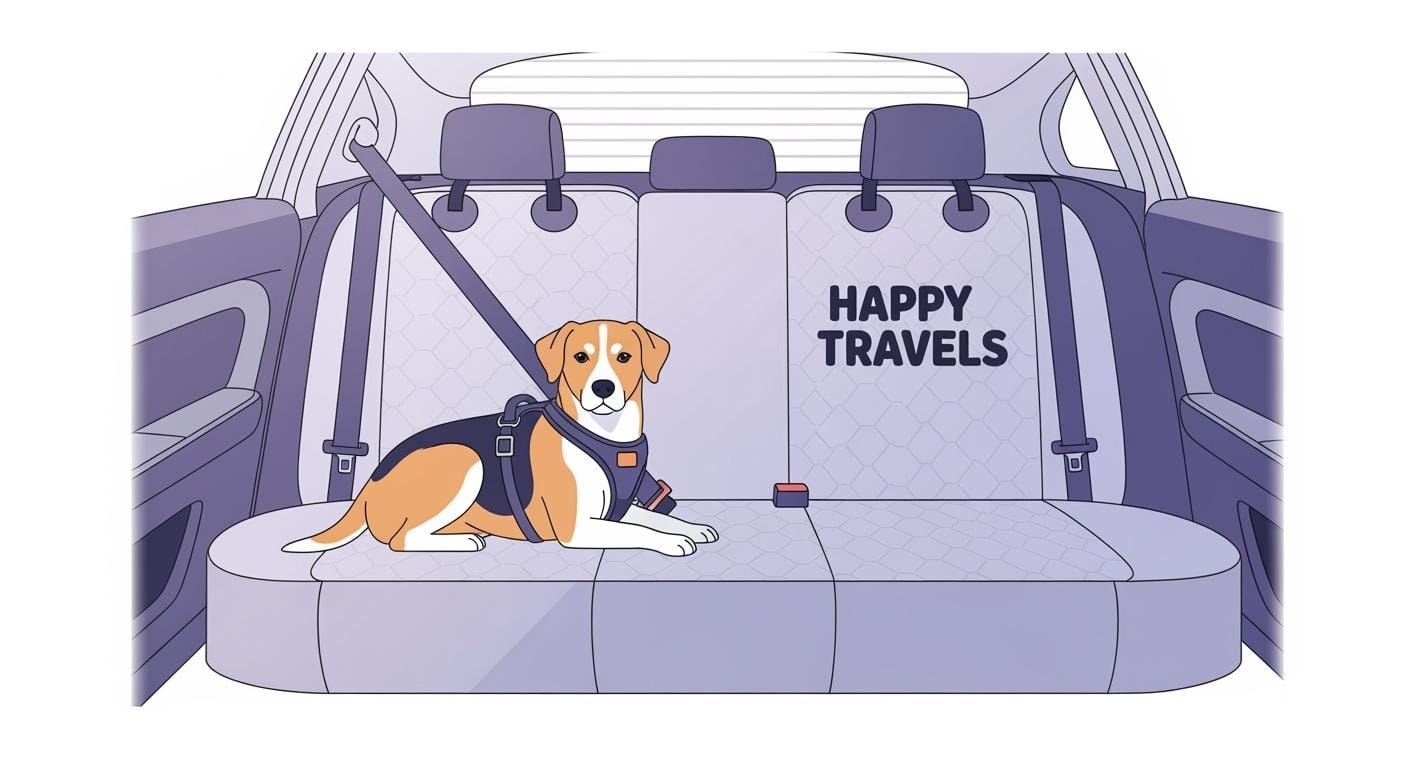
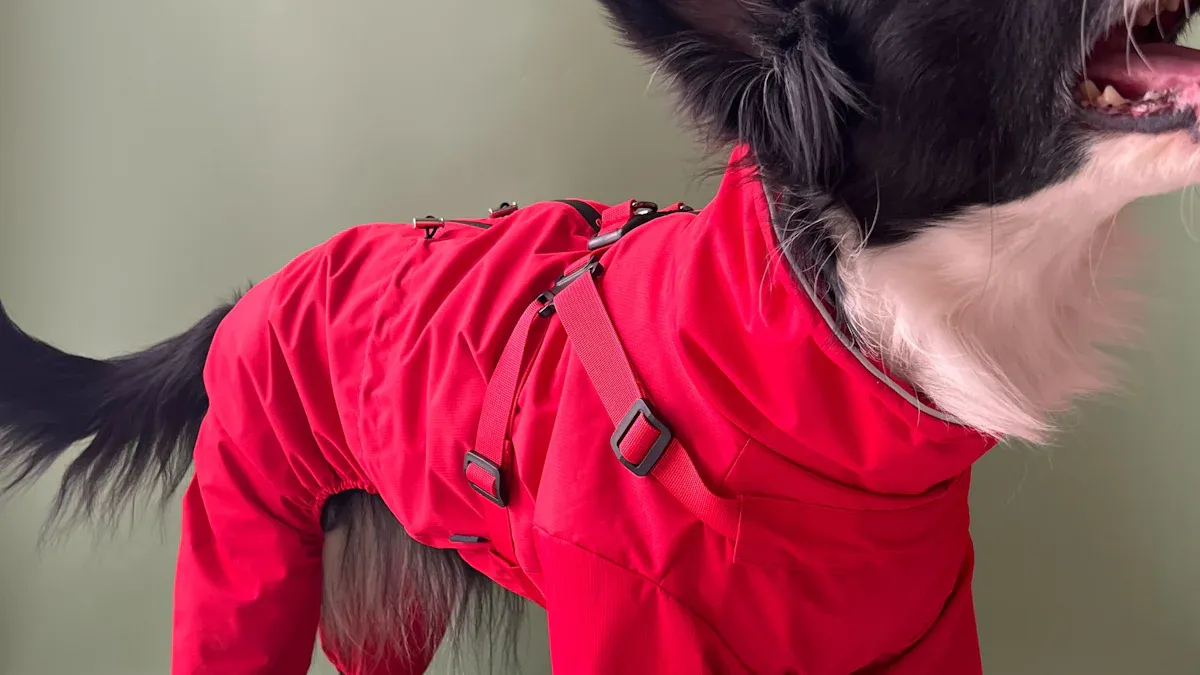
Wearing demonstration for working dogs
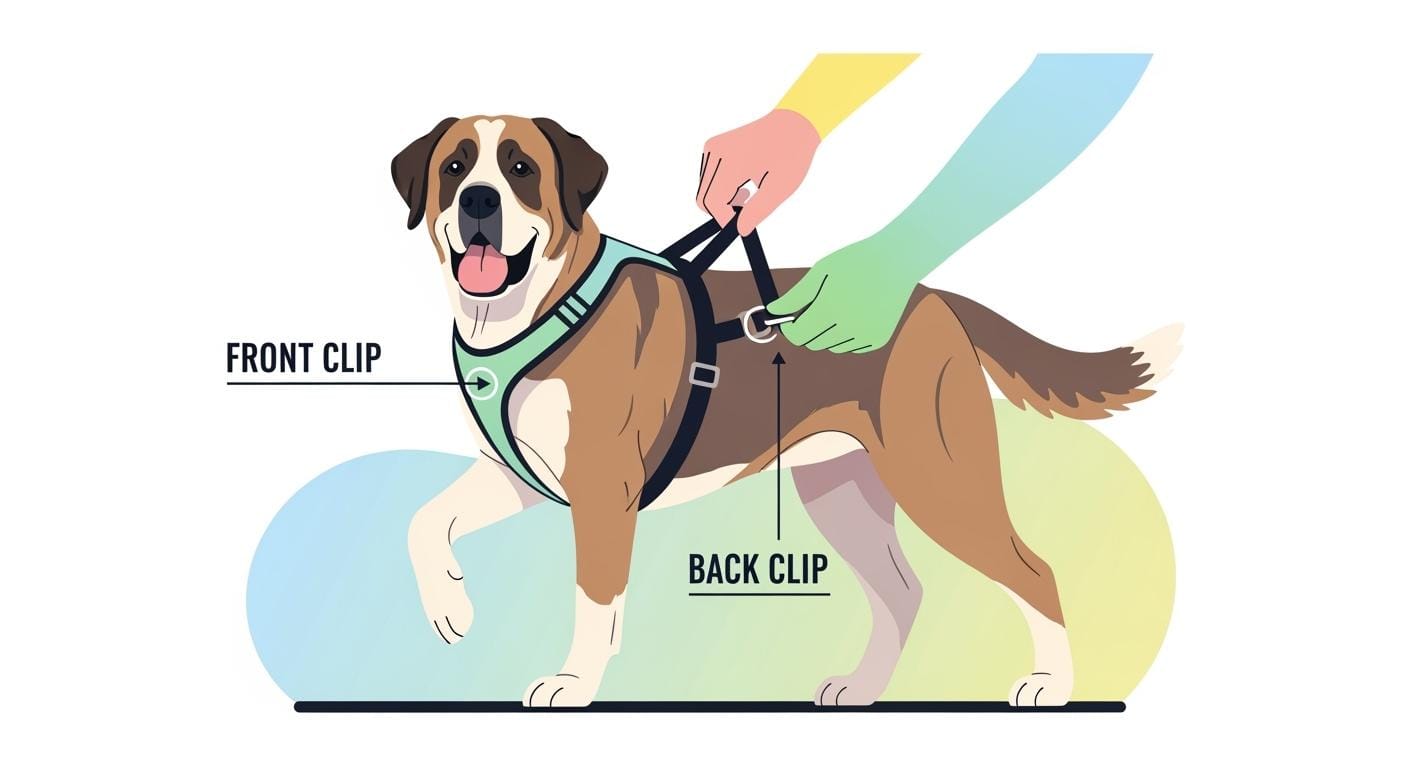
You want to see how dog armor fits on real working dogs. The video demo shows a dog standing calmly on a flat surface. You can watch each step as the handler puts the armor on the dog. The handler checks that the armor covers the chest, shoulders, and back. You see how the straps go around the body and how to adjust them for a snug fit. The video uses clear, close-up shots so you can spot the main fitting points. This helps you learn how to avoid gaps or loose areas that could affect safety. The demo uses neutral backgrounds and does not show any third-party logos or watermarks. You get a clear view of the process, which makes it easier to repeat these steps in your own shop.
Measurement process and tape placement
Accurate measurement is the first step to a good fit. The video shows you how to measure a dog while it stands. You use a soft tape measure and follow a set order. Start with the neck, then move to the chest, back, and waist. The handler places the tape flat against the fur but does not pull it too tight. You see how to read the tape in both inches and centimeters. The video highlights key points like the stifle, elbow, carpus, and tarsus. These points match the main fitting zones for dog armor. The table below lists the main topics covered in the fitting video:
Fitting Video Topics |
|---|
Stifle & Stifle Tarsus Fitting |
Elbow Fitting |
Carpus and Tarsus Fitting |
Prosthetics Fitting |
Toe-Up Fitting |
Hobble Vest Fitting |
You can pause the video at each step to check your own work. This helps you avoid common mistakes, such as measuring while the dog is sitting or using too much tape tension.
Documentation pack overview
The enablement kit includes a documentation pack to support your fitting process. You get printed and digital guides that match the video steps. Each guide uses simple diagrams and clear measurement instructions. The pack lists the defined criteria for fit and coverage. You find reminders about intended use and limitations, so you can explain these points to customers. The documentation also includes a quick reference card for sizing in both inches and centimeters, with one rounding rule per chart. You can keep these materials at your counter or share them with your team. This makes it easier to train new staff and reduce fitting errors.
Dog Armor Dealer Enablement Kit Overview
Key deliverables and file formats
You get a full enablement kit when you join the dealer network. The kit has digital files and printed guides. You find sizing charts, fit note cards, claims and disclaimer libraries, traceability datasets, and incident intake forms. Each file uses a simple format. You see version numbers and revision dates on every template. You can use these files on your computer or print them for your shop. The kit works for both US and EU buyers. Sizing charts show measurements in inches and centimeters. Each chart uses one rounding rule to keep numbers easy to read. You follow set rules for fit and coverage. The kit helps you explain intended use and limits to your customers.
Tip: Always look at the version number and owner field before using any template. This helps you avoid using old information.
Reducing sizing disputes and returns
You want to stop sizing disputes and returns. The enablement kit gives you tools for this. You use the sizing chart to measure dogs while they stand. You follow the measurement map and tape tension rules. You write down each measurement point using the naming convention. You use the fit note card to check mobility and coverage. You show customers the claims and disclaimer library. This helps you set clear expectations. You use the traceability dataset to track each sale and incident. You use the incident intake form if a problem happens. These steps help you fix issues fast and keep customers happy.
Standard Operating Procedure (SOP) for Sizing and Returns:
Measure the dog using the sizing chart in both inches and centimeters.
Write all needed fields on the sizing chart and fit note card.
Go over claims and disclaimers with the customer before sale.
Save traceability data for each transaction.
Use the incident intake form if a sizing or fit issue happens.
Check version and revision fields on all documents before use.
Dealer Enablement Kit Deliverables Table
You see a summary of the main assets in the table below. Each asset helps with a key part of your dealer workflow. You see the needed fields for each template, matching the Quick Reference Card.
Asset | Dealer Use | Required Fields (match Quick Reference Card) |
|---|---|---|
Sizing Chart | Measure and select dog armor size | Measurement points, units, rounding, revision/date/owner |
Fit Note Card | Check fit and mobility | Mobility, coverage, pressure points, reference code |
Claims/Disclaimer Library | Communicate intended use and limitations | Defined criteria, intended use, limitations, revision/date/owner |
Traceability Dataset | Track sales and incidents | Serial number, dealer ID, date, incident code, revision/date/owner |
Incident Intake Form | Record and escalate issues | Incident description, risk level, required action, revision/date/owner |
Note: Always use the newest version of each template. This keeps your records correct and supports compliance.
Quick Reference Card: Must-Have Fields for Dealer Enablement Kit Templates
Sizing Chart: Measurement points naming convention, units (inches/cm), rounding rule, revision/date/owner
Fit Note Card: Mobility check, coverage check, pressure points, reference code, revision/date/owner
Claims/Disclaimer Library: Defined criteria, intended use, limitations, revision/date/owner
Traceability Dataset: Serial number, dealer ID, date, incident code, revision/date/owner
Incident Intake Form: Incident description, risk level, required action, revision/date/owner
You use these fields to keep your records clear and consistent. You follow set rules for professional buyers in the US and EU. You use dog armor for supervised outdoor activity. You publish sizing in inches and centimeters. You avoid absolute claims and use defined criteria and intended use in all your communication.
Dog Armor Sizing Charts for Dealers
Measurement map and tape tension
You need to measure each dog while it stands on a flat surface. This helps you get the most accurate numbers for dog armor fitting. Always use a soft tape measure. Place the tape flat against the dog’s fur. Do not pull the tape too tight. If you use too much tension, you can get a smaller number than the real size. This can lead to a poor fit and less coverage. You should measure the neck, chest, back, and waist. Mark each point using the naming convention from the Quick Reference Card. Write down the numbers in both inches and centimeters. Use the same rounding rule for each chart. For example, round to the nearest half-inch or whole centimeter. This keeps your records clear and easy to compare.
Tip: Always measure while the dog stands. Avoid measuring when the dog sits or lies down. This helps you avoid errors and gives you the best fit.
Size set logic and overlap rules
You need to choose the right size set for each dog. Look at the sizing chart and find the range that matches your measurements. Some dogs fall between two sizes. In this case, use the “between sizes” guidance from the chart. Most charts tell you to pick the larger size if the dog is close to the upper limit. This helps you avoid tightness and keeps the dog comfortable. You should also check the overlap rules. Some sizes have a small overlap to cover dogs with special body shapes. Always check the fit note code for each size. This code tells you about special fit notes or exceptions. Write down the revision, date, and owner for each chart you use. This helps you keep track of updates and follow the latest rules.
If a dog measures between two sizes, pick the larger size.
Check the overlap area for special cases.
Use the fit note code to find extra guidance.
Record the revision, date, and owner for every chart.
Sizing Chart Field List
You must include all key fields on your sizing chart. This keeps your process clear and supports professional buyers in the US and EU. Use the checklist below to make sure you do not miss any important fields:
Measurement points naming convention (neck, chest, back, waist)
Units (inches for US, centimeters for EU)
Rounding rule (e.g., nearest 0.5 inch or 1 cm)
“Between sizes” guidance
Overlap rule and fit note reference code
Revision, date, and owner field
Note: Always use the latest version of the sizing chart. Check the revision and owner fields before you start. This helps you follow defined criteria and intended use.
You can copy this checklist into your dealer manual or quality control file. This makes it easy to train your team and reduce mistakes. Accurate sizing helps you fit dog armor better and keeps your customers satisfied.
Fit Notes for Rural and Field Use
Mobility and coverage checks
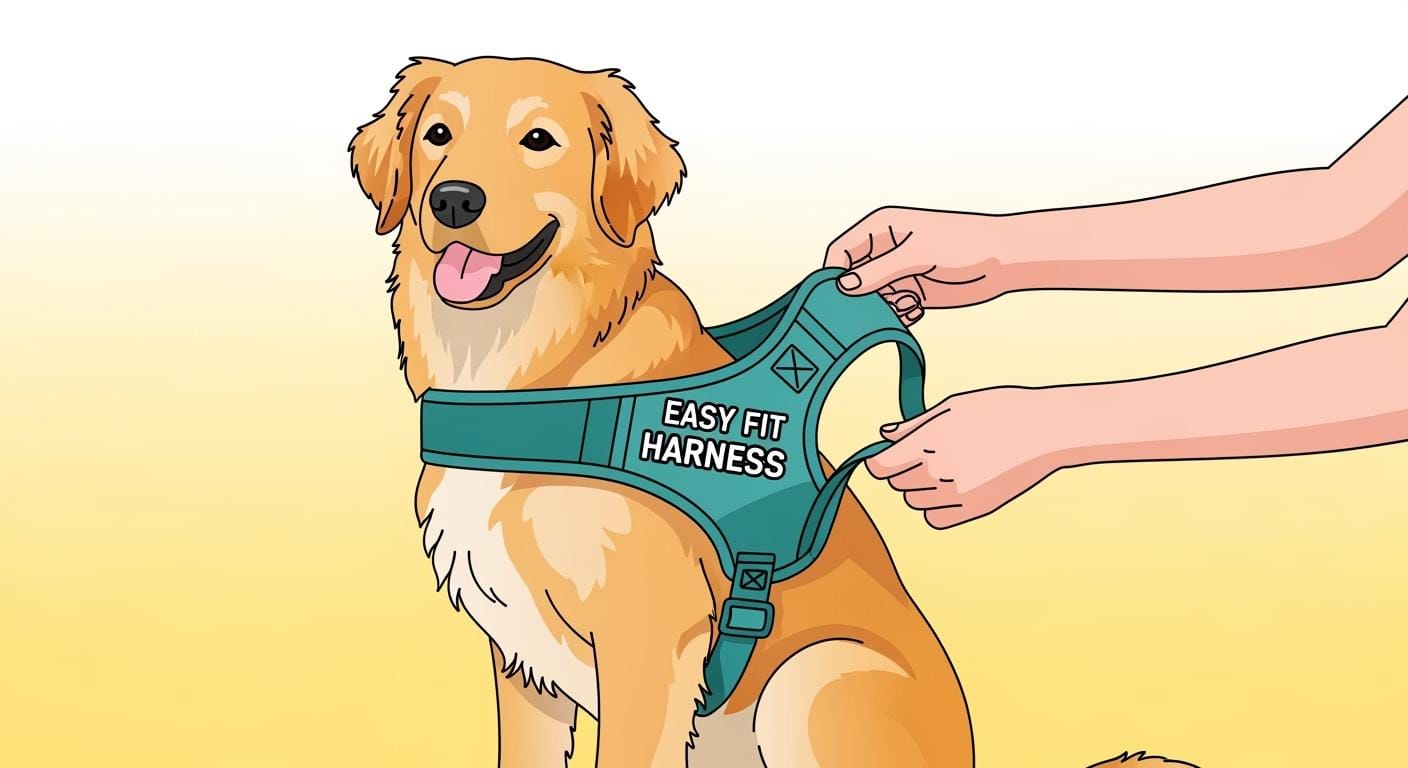
You want your dog to move freely and stay protected during outdoor work. Good fit notes help you check if the gear allows natural movement and covers the right areas. You should watch your dog walk, run, and turn while wearing the armor. Look for signs that the gear does not block the shoulders, hips, or legs. Make sure the armor sits flat and does not shift when your dog moves. You also need to check coverage. The armor should protect the chest, back, and sides without leaving gaps. If you see exposed areas, you may need to adjust the straps or try a different size.
The table below shows important fit features and why they matter for rural and field use:
Fit Feature | Why It Matters |
|---|---|
Tailored Cut | Lets your dog move easily |
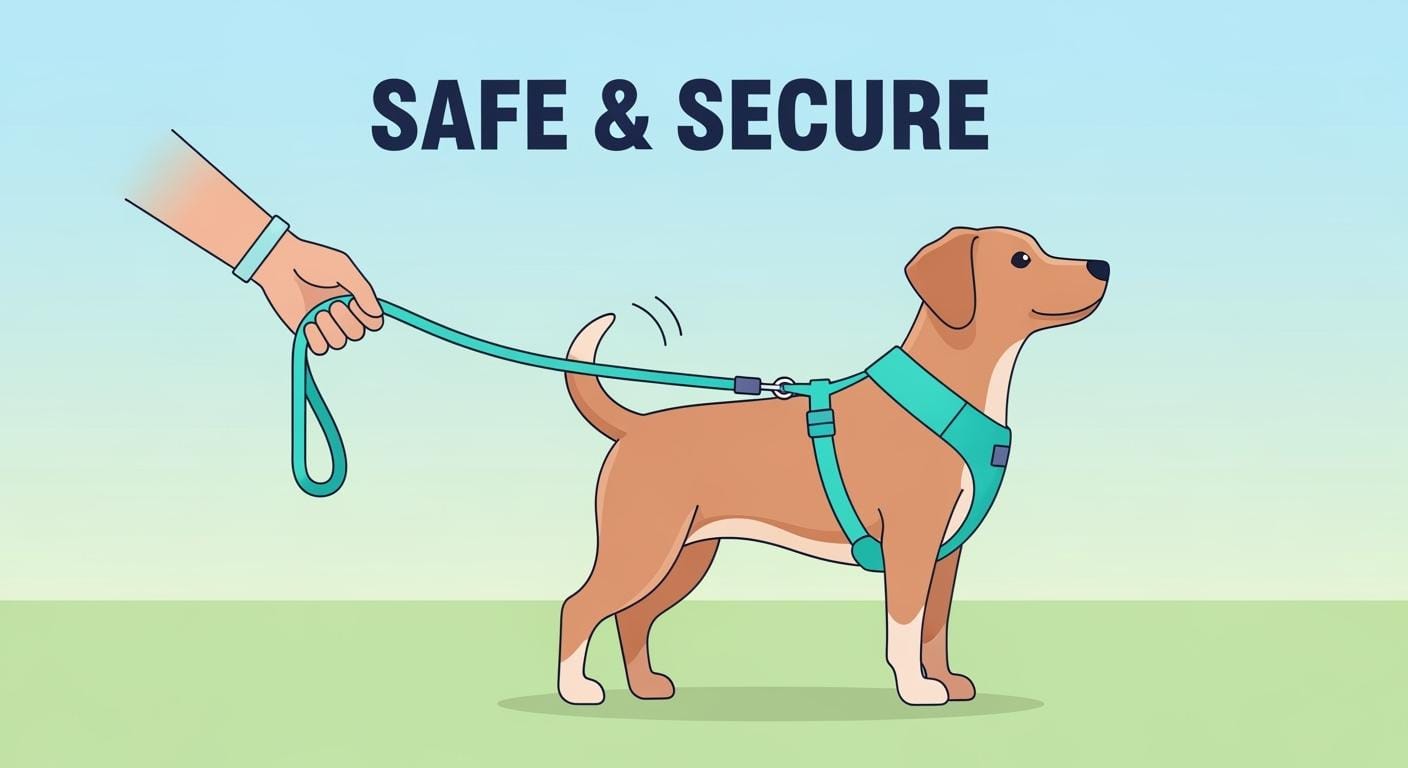
Secure Fastening | Stops the gear from moving and hurting |
Breathability | Keeps your dog cool and happy |
Accurate Sizing | Helps your dog stay safe and do better |
Tip: Always check mobility and coverage before each use. This helps you follow defined criteria and supports intended use in outdoor settings.
Common fit failure modes
You may see some common problems when fitting dog armor. Sometimes the gear slips or rotates, which can expose important areas. Loose straps may cause the armor to shift or fall off. Tight straps can create pressure points and limit movement. If the armor bunches up or pinches, your dog may feel uncomfortable or refuse to wear it. You should also watch for rubbing or redness on the skin. These signs mean you need to adjust the fit or stop using the gear until you fix the problem. Always use the adjustment order listed on your fit note card. If you cannot solve the issue, follow the stop-use trigger and inspect the armor for damage.
Note: Use defined criteria for fit checks. Do not promise perfect protection. Always explain the intended use and limitations to your customers.
Fit Note Card Checklist
You need a clear checklist for your fit note card. This helps you follow set rules and support professional buyers in the US and EU. Copy the list below into your dealer manual or training guide:
Mobility check (walk, run, turn)
Coverage check (chest, back, sides)
Pressure-point check (shoulders, hips, under straps)
Adjustment order (step-by-step fitting)
Stop-use triggers (rubbing, redness, gear shifting)
Inspection steps (look for damage, loose parts, wear)
Reference code (fit note code, revision/date/owner)
Always use the latest version of your fit note card. This keeps your records up to date and supports compliance with defined criteria.
Use-Case Disclaimers and Safety Labels
Claims to avoid and safer alternatives
Do not make promises about how well dog armor works. If you say it will always protect, you could get in trouble. People might complain or even take legal action. It is better to use general words that match the product’s defined criteria. You can say the armor is for supervised outdoor activity and meets certain standards. Always tell customers how to use it and what it cannot do. This helps people know what to expect and keeps your words clear and safe.
Tip: Use words like “intended use,” “limitations,” and “validated criteria” on your labels and manuals. This keeps your language safe and professional.
Night-use and visibility language
Be careful when you talk about night use and visibility. Do not say the armor will make a dog visible to every driver or stop all accidents. You can say the product has features that help with visibility, but you cannot promise it will always work. Always remind people to watch their dogs, especially when it is dark. Tell them to check the gear before every use. If the visibility parts are worn out or broken, they should get a new one. This helps people use the product safely and know its limits.
Say that visibility features help with awareness.
Remind users these features do not guarantee detection.
Tell people to check the gear before use and replace it if damaged.
Use-Case Disclaimer Copy Bank
You can use these short phrases on your labels, manuals, or dealer handbooks. These phrases help you talk about intended use, limits, and safety rules. Do not use brand names or make things sound better than they are. You can copy these phrases into your documents.
Use-Case Disclaimer Copy Bank:
“Intended for supervised outdoor activity. Not a substitute for training, control, or situational awareness.”
“Protection level varies with fit, movement, and conditions. Inspect before each use and discontinue if damaged.”
“Not designed for unsupervised use. Keep away from sharp hazards and extreme conditions.”
“Visibility features support awareness but do not guarantee detection by drivers or other road users.”
You should put these statements in your claims/disclaimer library. Make sure every label or manual has these things:
Intended use statement
Limitations
Supervision requirement
Inspection and replacement language
Always check that your words match the latest version and follow the defined criteria. This helps you meet professional standards and keeps your customers informed.
Verification Evidence for Professional Buyers
Documentation pack: material IDs and specs
You need clear paperwork to show what materials and specs are in your dog armor. This helps you meet what professional buyers in the US and EU want. You should gather technical needs, safety rules, ways to check, test reports, and safety papers. Each paper helps you control quality and explain what the product is for and what it cannot do.
Documentation Type | Description |
|---|---|
Technical Requirements | List important sizes, how much weight it holds, and weak spots. |
Compliance Standards | Name rules like ISO, ASTM, or DIN so suppliers do not get confused. |
Inspection Methods | Tell how you check materials, like looking or lab tests. |
Certificates of Analysis | Give test reports to help with quality checks. |
Safety Certifications | Add papers like REACH, RoHS, or ISO 9001 to show you follow safety rules. |
Tip: Always check that each paper has the right date and owner. This keeps your files up to date and helps you track them.
Testing references and supplier reports
You must check your products with good tests and reports from suppliers. These checks help you show buyers your dog armor meets the rules. You should use strength tests for fabric and check seams under stress. You also need to test buckles, D-rings, and electronics to see if they work. Before you ship, do a last check. Use rules like EN 388 and ISO 13997 for how long things last. Test everything at 20±2°C and 65±4% RH. This keeps tests the same and helps with reviews.
Testing Reference | Description |
|---|---|
Tensile strength testing of fabrics | Checks how strong the fabric is. |
Seam stress analysis under load | Checks if seams hold up under stress. |
Functional checks for components | Makes sure buckles, D-rings, and electronics work. |
Final pre-shipment inspection (PSI) | Last check before you send products. |
You should also keep papers that show you follow rules like REACH (EU), California Proposition 65 (USA), OEKO Tex Standard 100, EN 71 (EU), and CPSIA/ASTM F963 (USA). These reports help you answer buyer questions and back up what you say about what the product does and does not do.
Pass/Fail Rubric Table
You need an easy way to check product quality and know what to do next. Use the pass/fail table below to help you make choices. This table helps you spot problems and act fast.
Condition observed | Risk level | Required dealer action |
|---|---|---|
No visible defects, all specs met | Green | Approve and ship |
Minor deviation, non-critical | Amber | Fix or check again |
Major defect, safety risk | Red | Replace or report |
Note: Always use the rules from your paperwork. Do not promise perfect results. Tell every buyer what the product is for and what it cannot do.
You can copy these tables and lists into your dealer book or quality files. This helps you keep your steps clear and follow the rules for professional buyers.
Dealer Training Modules and Support
Training modules: fitting, handling, inspection
Your team needs good training to fit and check dog armor. Training modules show you each step in order. You learn to measure dogs while they stand still. You use a soft tape measure and follow the sizing chart. You practice checking fit and coverage. You learn how to handle the gear and adjust straps. You also learn to spot problems and check for damage. Each module has simple instructions and pictures. You get tips for checking how the dog moves and if the armor covers well. You learn to use defined criteria and follow intended use rules. Training helps you avoid mistakes and keeps your records right.
Tip: Always use the newest training materials. Check the revision and owner fields before you start each module.
Scorecards and feedback forms
You can use scorecards to see how training is going. Scorecards list the main steps for fitting, handling, and checking the gear. You mark each step when you finish it. You also use feedback forms to share ideas or report problems. Feedback helps you make your training better and update your process. You can put scorecards and feedback forms in your dealer manual. This makes it easy to train new staff and keep your team ready.
Training Step | Completed (✔/✗) | Notes |
|---|---|---|
Measurement demo | ||
Fit check | ||
Label language review | ||
Inspection practice | ||
Incident escalation |
Note: Use scorecards to check each training step. Use feedback forms to report problems or give ideas.
Dealer Training Module Outline
You need a clear outline for your training modules. This helps you cover all the main topics and follow the rules. You can copy the outline below into your dealer handbook or training guide.
Dealer Training Module Outline:
Module: Measurement and sizing demo
Module: Fit checks and mobility test
Module: Label language and claims control
Module: Inspection, maintenance, and replacement intake
Module: Incident escalation and traceability lookup
You should finish each module before you start selling or fitting dog armor. You need to check off each step on your scorecard. You must use the newest training materials. You should do re-certification if there are new product updates, changes in sizing charts, or after any incident report.
Checklist for Training Completion and Re-Certification Triggers:
Finish all modules in the outline
Mark each step on the scorecard
Use feedback forms to improve
Update training after product changes
Re-certify after any incident or big update
Always follow defined criteria and intended use in every training session. This helps you meet professional standards and keeps your team ready for US and EU buyers.
Replacement, Wear-Item Policy, and Support Workflow
Wear items vs defects
You need to know the difference between a defect and normal wear. This helps you decide if you should replace a product. Dealers get questions about damage and wear all the time. You must use clear rules to make fair choices. The table below shows what you should count or not count when you look at a replacement request:
Criteria | Included/Excluded |
|---|---|
Manufacturing defects | Included |
Material defects | Included |
Damage from improper use | Excluded |
Normal wear and tear | Excluded |
Damage from chewing or cleaning | Excluded |
Alterations or modifications | Excluded |
Damage from abuse or fire | Excluded |
You should only approve replacements for manufacturing or material defects. If you see damage from chewing, cleaning, or normal use, do not approve a replacement. Always check if the product was used the right way and if the damage matches the rules.
Tip: Put this table in your dealer manual. It helps you explain your policy to customers and keeps your choices fair.
RMA intake and decision tree
You must follow a clear process when you get a return or replacement request (RMA). This process helps you collect the right information and make quick choices. Start by asking for photos of the damaged item. Make sure the photos show the problem clearly. You need to write down the serial number, date of purchase, and dealer ID. Use a decision tree to help you decide what to do next:
Get the RMA request and photos.
Check if the damage matches the rules in the table.
If yes, approve the replacement and write down what you did.
If no, explain why and close the case.
Update your records with what happened.
Note: Always use the newest version of your intake form. This keeps your records right and helps you follow the rules.
Replacement Terms Template
You need simple words for your replacement terms in contracts and dealer portals. This helps you set fair rules and avoid confusion. Use the points below when you write your replacement terms:
The Replacement of Terms clause lets you change contract rules when needed.
You keep your contracts up to date by changing old or wrong rules.
You must get agreement or follow a set process for any changes.
You can copy this template into your dealer handbook or portal:
Replacement Terms Clause:
- This clause lets you change contract rules to keep them useful.
- Any change needs agreement or must follow the steps in this contract.
- All changes must be written down with the date and owner.
Always use clear rules and intended use in your replacement policy. This helps you meet standards and keeps your support process easy to follow.
Traceability and Incident Escalation for Dealers
Traceability dataset fields
You need strong traceability to track dog armor sales. Traceability lets you follow each product from making to delivery. You write down important details for every item. Start with the SKU or style number. Add the size, lot number, and production date window. Include component lot IDs, carton ID, and shipment ID. These details help you find problems fast. You also keep records for each incident. Write the contact person, what happened, photos, lot code, injury or near-miss flag, and quick actions taken. You follow traceability rules from EU GPSR and US CPSC. These rules help you meet standards and fix problems quickly.
Traceability Dataset Fields:
SKU or style number
Size
Lot or batch number
Production date window
Component lot IDs
Carton ID
Shipment ID
Incident Intake Fields:
Contact person
Scenario description
Photo documentation
Lot code
Injury or near-miss flag
Immediate containment actions
Tip: Always update your traceability records after each sale or incident. This helps you answer buyer questions and supports compliance.
Incident triage and response timing
You must act fast when an incident happens. First, collect all details. Use your incident intake form to write what happened and who was there. Take clear photos of the product and the scene. Mark the lot code and shipment ID. Flag any injury or near-miss. Start quick actions, like removing affected products from sale. You need to follow reporting timelines from EU GPSR and US CPSC. These rules say you must report incidents within a set number of days. Fast response helps you keep customers safe and follow the law.
Incident Triage Steps:
Get incident report and photos.
Write all traceability and incident intake fields.
Flag injury or near-miss.
Start containment actions.
Tell your supervisor or manager.
Prepare documents for reporting.
Note: Always check the latest rules for reporting timelines. Fast action keeps your records accurate and supports safety.
Incident Record Checklist
You need a full checklist for every incident record. This helps you write facts and take action. Use the table below to guide your process. Fill in each item to make a strong record.
Checklist Item | Description |
|---|---|
Details of the Incident | What happened, conditions, injuries, or damage. |
Individuals Involved | How many people were affected, including injured workers. |
Chronological Order | Timeline of events, focusing on main facts. |
Injury Details | Types of injuries, including time and date of any deaths. |
Witnesses | Names of people present and what they saw. |
Witness Statements | Stories from witnesses, focusing on facts. |
Supervisor/Manager on Duty | Info about the person in charge, including contact details. |
Photo Evidence | Pictures of injuries or damage. |
How the Incident was Handled | What you did and any actions taken. |
Injury Prevention Evaluation | Check for safety problems and possible causes. |
Corrective Measures | Actions taken after the incident to prevent it again. |
Always complete every item in your checklist. This supports defined criteria and intended use. You can copy this table into your dealer manual or quality control files.
SOP for Escalation Workflow and Traceability Lookup:
Collect incident intake and traceability data.
Fill out the incident record checklist.
Start containment and corrective actions.
Tell everyone who needs to know.
Report to regulators within the required time.
Check traceability dataset to find affected products.
Update records and training materials as needed.
Use this SOP to guide your team. Strong traceability and fast incident response help you protect customers and meet professional standards.
You get more accurate sizing when you use the enablement kit. You follow safety rules and meet the set criteria for dog armor. This helps customers feel sure and happy. You have fewer support problems and returns. Your dealer workflow gets better.
Use the enablement kit for each fitting and sale.
Use Stridepaw resources to keep your team trained and ready.
FAQ
How do you measure a dog for armor sizing?
Measure your dog while it stands up. Use a soft tape to check size. Write down neck, chest, back, and waist numbers. Use inches for US or centimeters for EU. Follow the rounding rule on the sizing chart.
What activities is dog armor intended for?
Dog armor is for outdoor work with supervision. Use it for working, hunting, or field jobs. Always follow the rules and limits in your dealer manual.
Can you guarantee complete protection with dog armor?
You cannot promise full protection. The armor meets set rules for coverage and fit. Check gear before each use and tell customers about limits.
What should you do if the armor does not fit well?
Check how your dog moves and if the armor covers well. Adjust straps or pick a new size. Use the fit note card for step-by-step checks. If problems stay, stop using it and look for damage.
How often should you inspect dog armor?
Check dog armor before every use. Look for damage, loose parts, or wear. Replace gear if you see defects. Follow the inspection steps in your training module.
What is the process for handling returns or replacements?
Collect photos and details about the problem. Check if it matches the rules for defects. Use the RMA intake form. Only approve replacements for manufacturing or material defects.
Are visibility features enough for night safety?
Visibility features help people notice your dog. You must watch your dog at night. These features do not promise drivers will see your dog. Always check gear before using it.
How do you track each product for traceability?
Write down SKU, size, lot number, production date, and shipment ID. Use the traceability dataset. Update records after each sale or incident. This helps you answer questions and follow the rules.