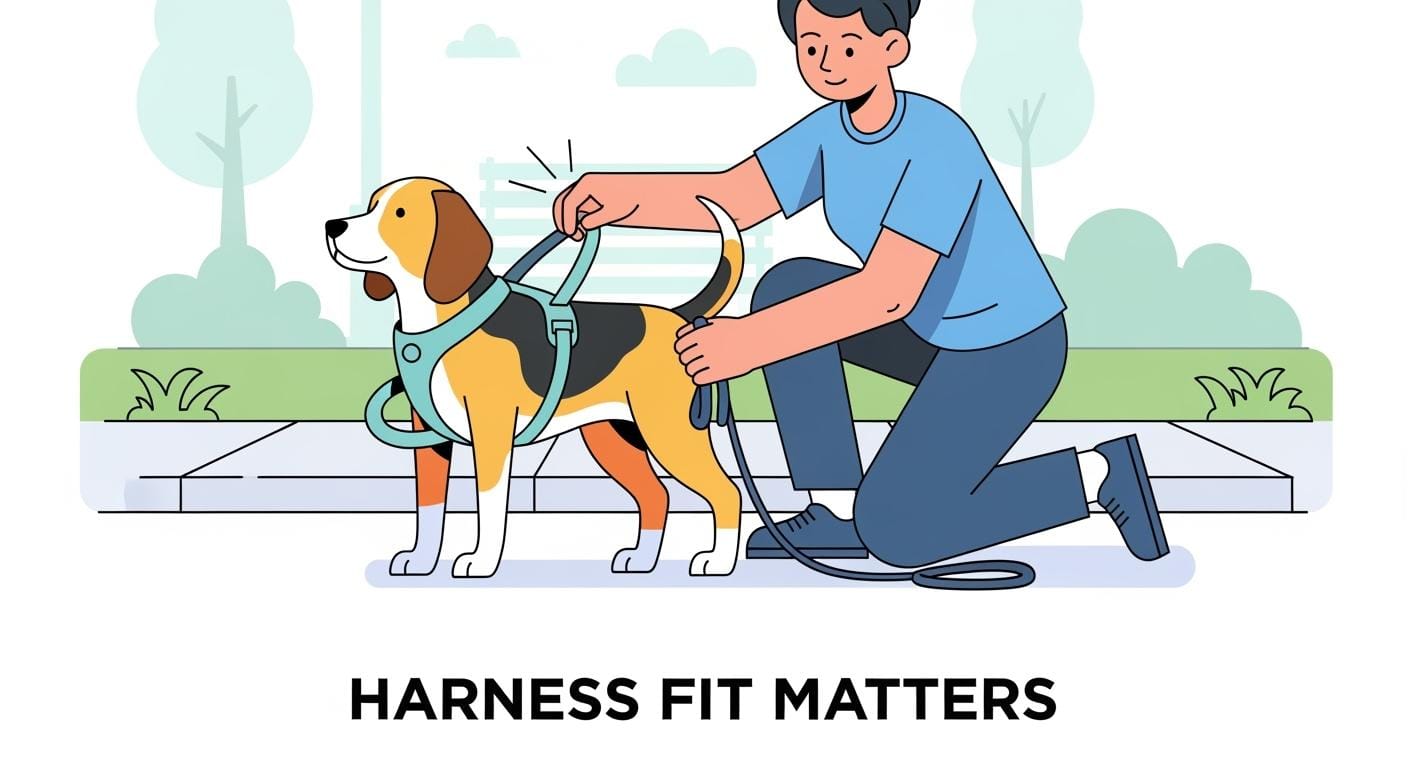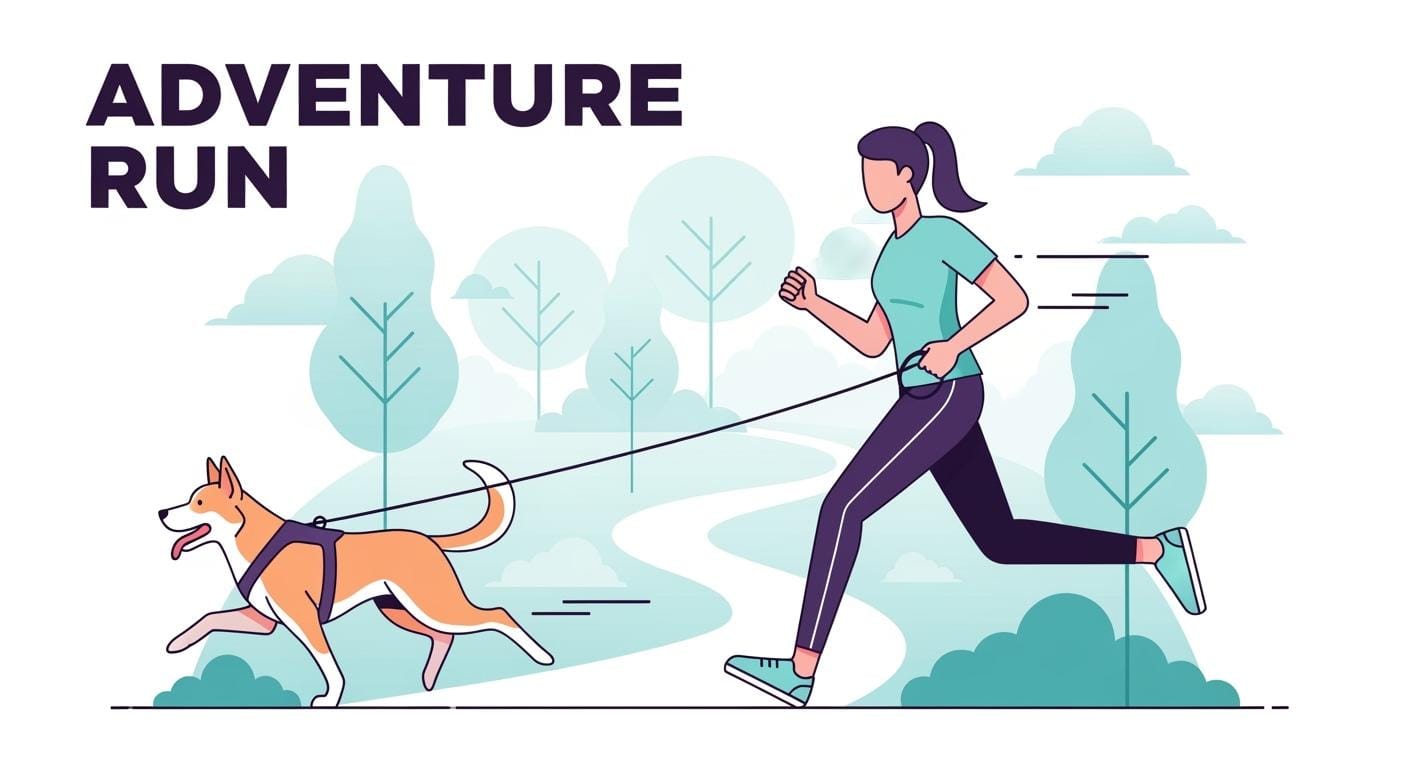
You might think a harness fits your dog perfectly when you test it indoors. Once you step outside, problems can show up fast. Imagine your big dog harness feels secure, but your dog starts pulling or seems uncomfortable after only a few minutes. The short walk test, which lasts about 10 minutes, helps you spot hidden harness issues before they cause trouble. You catch early signs of discomfort, rotation, or escape risk.
Tip: Make the short walk test a regular habit to keep your dog safe and comfortable every time you use a harness.
Key Takeaways
Do a 10-minute walk test often to find harness problems early. This keeps your dog safe and comfortable.
Watch for warning signs like rubbing, turning, or tightness after each walk. These signs mean the harness might not fit right.
Change the harness straps by 1-2 inches (3-5 cm) to make it fit better. Only change one thing at a time and test again to see if it helps.
Pick the best harness type for your dog’s behavior. Front-clip harnesses work well for dogs that pull hard. Back-clip harnesses are good for dogs that walk calmly.
If you see irritation, limping, or panic, stop using the harness right away. Ask a vet or trainer for help.
Key Takeaways for Big Dog Harness Fit
Main Red Flags After a 10-Minute Walk
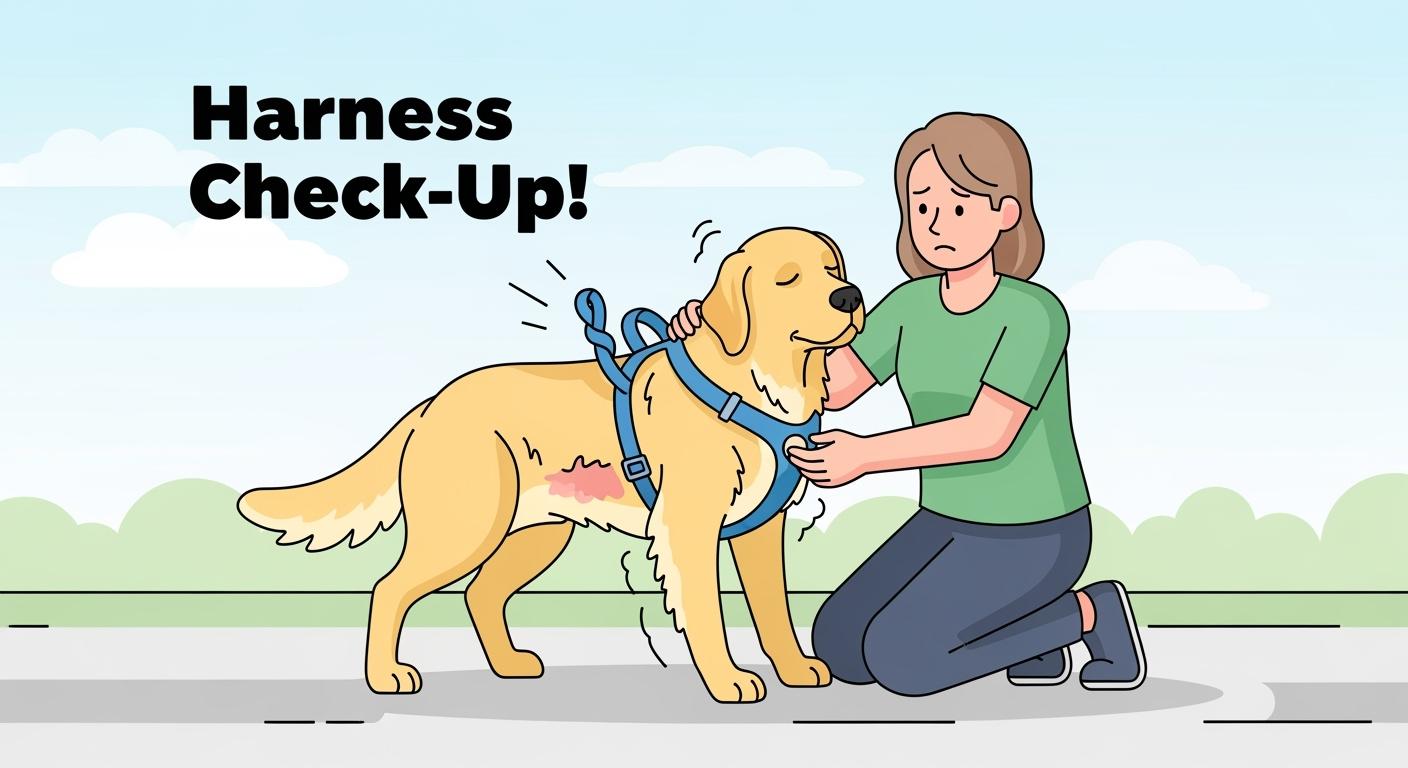
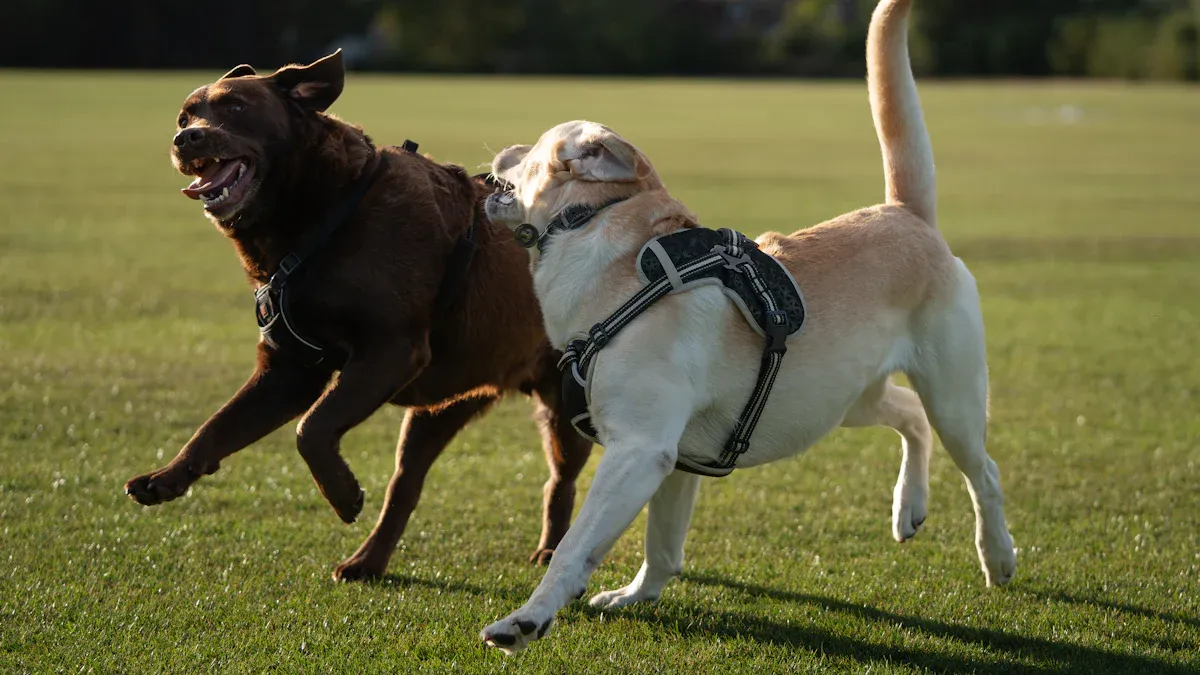
You want your big dog harness to keep your dog safe and comfortable. After a short walk, you may notice some red flags that signal poor harness fit. Watch for rubbing at the armpits, behind the elbows, or along the chest edges. If the harness rotates or shifts, comfort and control drop. Shortened stride or stiff posture can mean the harness restricts shoulder movement. If the neckline rides up or the back strap moves forward, escape prevention fails. These signs show that the harness does not match your dog’s size or chest shape.
Safety tip: Always check for skin marks, hot spots, or hardware heat after each walk. Address rubbing and escape risks first to protect your dog’s health.
A harness that fits well should stay centered on the chest, with straps adjusted to 1-2 in (3-5 cm) for a snug but not tight fit. The right harness will not interfere with movement or cause discomfort. You should see your dog walk with a normal stride and relaxed posture. If you spot any red flags, make one change at a time and re-test during your next walk.
Why Quick Checks Matter
Quick harness fit checks help you catch problems before they become serious. You protect your dog’s safety and comfort by acting early. When you check the harness after a 10-minute walk, you see how outdoor motion, pulling, and heat affect the fit. You prevent strain on the neck and chest by making sure the harness distributes pressure evenly.
A well-fitted harness spreads pressure, avoiding neck and trachea strain.
Proper fit lets your dog wear the harness longer without chafing.
Adjustable straps help the harness adapt to your dog’s size, supporting long-term health.
Fit tests should be part of your routine. You keep your dog training harness working well and avoid escape prevention failures. Quick checks let you spot issues with chest shape, size, and harness fit before they affect safety. You make sure your dog enjoys every walk with the right harness.
Why the Short Walk Test Matters for Harness Fit
Outdoor Changes: Pulling, Heat, and Motion
When you take your big dog harness outside, the environment changes quickly. Pulling, heat, and motion all affect harness fit. Your dog may pull harder on a walk than indoors, which can cause the harness to rotate or shift. If the harness twists, comfort and control both drop. Heat can build up under the harness, especially if the material does not breathe well. Some fabrics trap heat, while others help keep your dog cool. The table below shows how different harness materials respond to outdoor conditions:
Material | Properties | Suitability for Big Dogs |
|---|---|---|
Neoprene | Durable, hypoallergenic, quick-drying, soft cushioning | Ideal for active dogs, provides comfort without skin irritation. |
Polyester Mesh | Lightweight, breathable, promotes airflow, prone to stretching | Not recommended for strong dogs due to lack of durability. |
Ripstop Fabric | Durable, tear-resistant, but lacks breathability | Not suitable for heat-sensitive dogs; can cause overheating due to trapped heat. |
You want to choose the right harness material for your dog’s size, activity level, and heat tolerance. Always check harness fit after a 10-minute walk that includes straight paths, turns, and a brief stop. This route helps you see how motion and pulling affect the harness.
Immediate Post-Walk Checks: Skin, Straps, Hardware
After the short walk, you need to check the harness fit right away. These checks help you spot safety issues before they get worse. Follow this list:
Make sure the D-ring sits between your dog’s shoulder blades.
Check that shoulder straps cannot be pulled off the shoulders.
Confirm the subpelvic strap rests under the buttocks.
Keep four fingers’ width between leg straps and the leg, so straps do not pull away.
Look for twisted straps, loose leg straps, or any marks on the skin.
These steps help you find hotspots, restriction, or escape risks. If you see rubbing at the armpits, behind the elbows, or along the chest edges, adjust the harness by 1-2 in (3-5 cm) and re-test.
Normal Adjustment vs. True Red Flag
You may need to make small adjustments to improve harness fit. Not every change signals a problem. Use fit tests to tell the difference between normal adjustment and a true red flag. Watch for these signs:
The harness rotates or shifts out of place.
Hotspots or skin marks appear after a short walk.
Your dog shows a shortened stride or stiff posture, which means restriction.
The neckline rides up or the back strap moves forward, raising escape prevention concerns.
The harness does not match your dog’s chest size or shape, even after adjustment.
If you see these red flags, stop using the harness until you fix the fit. Always use your dog’s measurements to select the right harness and keep safety first.
Top Harness Fit Red Flags After a Short Walk
Rubbing Hotspots and Skin Marks
You want your big dog harness to protect your dog, not cause pain. After a short walk, check for rubbing at the armpits, behind the elbows, and along the chest edges. These spots often show the first signs of poor harness fit. If you see red marks, hair loss, or your dog scratches at the harness, you have a problem. Rubbing can happen when the harness straps are too tight or too loose. Sometimes, the harness material does not match your dog’s coat or skin type. You must adjust the straps by 1-2 in (3-5 cm) and re-test. Always use your dog’s measurements to pick the right harness size.
Safety note: If you see broken skin or swelling, stop using the harness and contact your vet.
Harness Rotation and Shifting
Harness rotation drops comfort and control. When your dog pulls or turns, the harness may twist or slide off-center. You might notice the chest strap moving sideways or the back strap riding forward. This means the harness fit is not secure. Rotation often happens when the harness is too loose or the straps are uneven. You need to check that the harness stays centered on your dog’s chest during the walk. If you see shifting, adjust the straps and make sure the clips are secure. Use fit tests on straight paths and turns to spot rotation early.
Tip: A harness that rotates can increase escape risk and reduce safety during walks.
Restriction and Escape Signs
Restriction shows up as a shortened stride, stiff posture, or reluctance to move. Your dog may slow down or stop walking. This means the harness interferes with shoulder movement or chest expansion. Escape risk increases if the neckline rides up or the back strap moves forward. You might see your dog try to back out of the harness or wiggle free. These are serious red flags. You must check the harness fit after every walk and adjust the straps by 1-2 in (3-5 cm) if needed. Always use the right harness for your dog’s chest size and shape.
Safety alert: If your dog escapes or shows panic, stop the walk and switch to a different harness.
Red Flag Table: Signs, Causes, Fixes
Below is a table that helps you spot and fix the most common harness fit red flags after a short walk. Use this guide to keep your dog safe and comfortable.
red flag | what it looks like | likely cause | quick fix | stop criteria |
|---|---|---|---|---|
Rubbing | Red marks at armpits, behind elbows, chest edges | Straps too tight/loose, wrong material | Adjust straps 1-2 in (3-5 cm), check material | Broken skin, swelling |
Rotation | Harness twists, chest strap moves sideways | Uneven straps, loose fit | Center harness, even straps, secure clips | Harness off-center |
Restriction | Shortened stride, stiff posture, reluctance to move | Straps restrict shoulders/chest | Loosen straps 1-2 in (3-5 cm), re-test | Limping, refusal |
Escape Risk | Neckline rides up, back strap moves forward | Harness too loose, wrong size | Tighten neckline, check size, re-test | Dog escapes, panic |
Scenario Walkthroughs
Imagine you finish a 10-minute walk with your dog training harness. You notice red marks behind the elbows. This means rubbing started at a contact point. You adjust the straps by 1-2 in (3-5 cm) and check the material. On your next walk, the harness rotates when your dog pulls. You center the harness and make sure the straps are even. If your dog shows a shortened stride, you loosen the chest straps and watch for normal movement. If the neckline rides up, you tighten it and check the harness size. Always use fit tests to confirm changes. Address red flags quickly to protect your dog’s safety and comfort.
Safety reminder: Always stop the walk if you see irritation, limping, or panic. Use your dog’s measurements to select the right harness and keep escape prevention strong.
Running the 10-Minute Short Walk Test
Pre-Walk Harness Setup Checklist
Start your big dog harness fit test with a careful setup. Use accurate measurements to select the right harness for your dog’s size and chest shape. Measure chest girth, neck girth, body length, rear thigh circumference, and forelimb circumference. Adjust each strap by 1-2 in (3-5 cm) for a snug fit. Make sure straps sit flat and clips are secure. The table below shows the most effective measurements for harness setup:
Measurement Type | Description |
|---|---|
Chest Girth | Measure around the broadest part of the chest. |
Neck Girth | Measure around the base of the neck. |
Body Length | Measure from 2 in (5 cm) above the shoulder joint to the base of the tail. |
Rear Thigh Circumference | Measure around the thickest part of the rear leg. |
Forelimb Circumference | Measure around the thickest part of the front leg. |
Check that straps are even and the harness is centered. This prevents false failures and supports escape prevention.
Walk Route: Straight, Turns, Stop, Incline
Plan a walk route that includes straight paths, turns, a brief stop, and an incline. This routine triggers rotation and pressure shifts, helping you spot harness fit issues. Walk for 10 minutes to reveal friction and drift quickly. Watch how the harness responds to your dog’s movement and pulling.
Post-Walk Inspection: Touch, Visual, Movement
After the walk, inspect the harness fit using touch and visual checks. Look for skin irritation, strap marks, and hardware heat. Check that the harness stays centered and straps remain secure. Use your hands to feel for hotspots at the armpits, behind the elbows, and along the chest edges. If you find loose straps or discomfort, adjust the harness by 1-2 in (3-5 cm).
Check your dog’s skin for irritation.
Look for loose straps or signs of discomfort.
Adjust the harness for comfort and safety.
If problems appear, change the strap length or try a different style for full range of motion.
Step-by-Step Fit Check
Follow these steps to ensure harness fit and safety:
Pre check: Make sure straps are even, harness is centered, and clips are secure.
Short walk test: Walk for 10 minutes on a route with straight paths, turns, stops, and inclines.
Post check: Inspect skin, coat, strap marks, and hardware heat.
Pick top red flag: Identify the most serious issue, such as rubbing or escape risk.
Apply one fix: Adjust one strap by 1-2 in (3-5 cm) or change harness position.
Re test: Repeat the same route to compare results.
Log results: Record changes and outcomes for future reference.
Use these fit checks to spot problems early. Watch for resistance to walking, fur loss, chafing, harness rotation, or signs of anxiety. If the harness fails any test, adjust or switch to a dog training harness that matches your dog’s size and chest shape.
Parameter | Target option or rule | Why it matters |
|---|---|---|
Test duration | 10 minutes | Reveals friction and drift fast |
Route elements | straight, turns, brief stop | Triggers rotation and pressure shifts |
Pre check | straps even, centered, clips secured | Prevents false failures |
Post check | skin, coat, strap marks, hardware heat | Finds hotspots early |
Red flag priority | address rubbing and escape first | Highest comfort and safety impact |
Adjustment method | one change at a time | Makes outcomes clear |
Re test | repeat the same route | Keeps comparison fair |
Stop criteria | irritation, limping, panic | Prevents escalation |
Safety note: Always stop the walk if you see irritation, limping, or panic. Use your dog’s measurements to select the right harness and keep escape prevention strong.
Quick Fixes for Harness Fit Issues
Adjusting Straps Safely
You want your harness to keep your dog secure and comfortable. Start by loosening all straps so you can position the harness correctly. Place the chest panel flat and centered behind the front legs. Adjust the neck and chest straps until they are snug but not tight. You should fit two fingers between the harness and your dog’s neck. Make sure the straps clear the shoulder point for free movement. Fasten all buckles and check for twists or bunching. Always use small adjustments, such as 1-2 in (3-5 cm), then re-test during a short walk. Regular checks help prevent escape prevention failures and lower injury risk.
Safety tip: Check for wear and tear before each walk. Replace damaged hardware to keep your harness working well.
Re-Centering and Anti-Rotation
If your harness rotates or shifts, comfort and control drop. You need to re-center the harness on your dog’s chest. Slide the harness forward or back until the straps clear the shoulder blade. Straighten any twisted webbing before you start your walk. Make sure the chest strap sits on the broadest part of your dog’s chest. Use the slip test by gently pulling to see if your dog stays in the harness. Adjust the fit if your dog can back out easily. Always re-test after making changes.
Padding: When It Helps or Hurts
Padding can protect your dog’s skin at contact points. Make sure padding covers the armpits, behind the elbows, and chest edges without being too bulky. A snug harness fit allows freedom of movement in the shoulders and legs. Too much padding can restrict movement or trap heat. Experts recommend checking the harness fit with seasonal coat changes and weight fluctuations. If you see signs of restriction, loosen the straps or switch to a harness style that matches your dog’s chest shape.
Note: If your dog shows limping or persistent chafing, consult a vet or trainer for advice.
Fix Table: Symptom, Change, Result
Apply the one change rule: adjust one variable, then re-test and log the outcome. Use small, testable fixes for each harness fit issue.
Symptom | Change to Try | Expected Improvement | What to Watch Next |
|---|---|---|---|
Straps crossing the scapula | Slide harness forward or back 1-2 in (3-5 cm) | Straps clear shoulder blade | Check for rotation or restriction |
Twisted straps | Straighten webbing before walk | Even pressure, less rubbing | Inspect for bunching after walk |
Inappropriate clip type | Switch to front-clip for pullers | Better control, less pulling | Watch for harness rotation |
Worn hardware | Replace damaged parts | Improved safety, secure fit | Inspect hardware regularly |
Seasonal coat changes | Re-check fit and adjust straps | Consistent comfort, no chafing | Monitor for skin marks |
Weight fluctuations | Adjust straps or switch harness size | Proper fit, escape prevention | Re-test after weight change |
Signs of restriction | Loosen straps 1-2 in (3-5 cm) | Free movement, normal stride | Observe gait and posture |
Persistent issues | Consult vet or trainer | Professional advice, long-term fix | Log changes and outcomes |
Safety reminder: Always re-test the harness fit after each adjustment. Log results to track improvements and keep your dog safe.
Big Dog Harness Fit for Strong Pullers
Clip Options: Front, Back, Dual
Choosing the right harness clip option helps you control strong-pulling dogs. You have three main choices:
Front-clip harnesses attach the leash at your dog’s chest. When your dog pulls, the harness redirects their movement toward you. This method discourages pulling and helps you enjoy walks more. Dr. Emily Thompson, a certified dog trainer, explains that front-clip harnesses gently shift your dog’s focus back to you.
Back-clip harnesses connect the leash at the dog’s shoulders. These harnesses work best for calm walkers. Strong pullers may find it easier to drag you forward with this style.
Dual-clip harnesses offer both front and back attachment points. You can switch between clips depending on your dog’s behavior and training needs.
Front-clip harnesses are often the best choice for escape prevention and humane control. They introduce slight discomfort when your dog pulls, redirecting their momentum sideways. You must manage the leash actively for best results.
Chest Shape and Shoulder Movement
Big dogs have different chest shapes. Deep-chested breeds need a harness that clears the shoulder point and sits low enough to avoid throat pressure. If the chest strap rides too high, your dog may cough or show discomfort. Straps over the shoulder point can restrict movement and cause soreness. Always check that the harness allows free stride and does not bunch up at the armpits. Adjust straps by 1-2 in (3-5 cm) to match your dog’s body.
Safety note: If you see restricted movement or signs of soreness, stop the walk and adjust the harness fit.
Leash Handling and False Red Flags
Leash handling affects harness fit. If you hold the leash too tight or at the wrong angle, the harness may rotate or shift. This can look like a fit problem, but it is a false red flag. Practice loose leash walking and keep the leash short but relaxed. Watch for harness rotation or bunching caused by leash tension. If you see these signs, check your leash handling before adjusting the harness.
Tip: Always check harness fit after a walk with normal leash tension to avoid false failures.
Dog Profile Table: Failures and Fixes
Use this table to diagnose harness fit issues for different dog profiles. Follow the best direction and avoid common mistakes.
Dog Profile | Common Failure Mode | Best Direction | Avoid List |
|---|---|---|---|
Deep-chested puller | Chest strap too high, coughing | Lower strap, use padded chest area | Thin straps, high chest fit |
Wide-shouldered dog | Straps over shoulder point | Adjust straps, try Y-front style | Bulky buckles, tight fit |
Lean, active dog | Side straps in armpit, chafing | Move straps back, smooth padding | Loose fit, rough material |
Heavyweight dog | Bulky buckle on spine, discomfort | Switch to low-profile buckle, check padding | Hard buckles, thick webbing |
Escape artist | Loose fit, harness shifts | Tighten straps, re-check after walk | Overly loose harness, missed checks |
Scenario Walkthroughs
Imagine your big dog harness rotates during a walk. You check the leash handling and adjust the chest strap by 1-2 in (3-5 cm). For a deep-chested puller, you lower the chest strap and add padding. If your dog shows coughing, you switch to a harness with a padded chest area. For a lean, active dog, you move the side straps back and choose smooth padding. Always re-test the harness fit after each change.
Safety reminder: Stop the walk if you see irritation, limping, or panic. Use the right harness for your dog’s chest shape and size to support escape prevention.
When to Stop or Seek Help for Harness Fit
Stop Criteria: Irritation, Limping, Panic
You must watch your dog closely during and after every walk. If you see irritation, limping, or panic, stop using the harness right away. Signs like red skin, swelling, or your dog biting at the harness mean the fit is wrong. Limping or a stiff walk shows that the harness may restrict movement. Panic can look like frantic pulling, whining, or trying to escape. These signs tell you to remove the harness and check for injuries.
Safety note: Harnesses that cause pain or distress should be adjusted or not used until you find the right harness. If you see broken skin, swelling, or your dog cannot walk normally, contact your veterinarian.
When to Switch Harness Types
Sometimes, small adjustments do not solve the problem. You may need to try a different harness style. Each type works best for certain needs:
Back clip harnesses give easy fitting and control for large dogs.
Front clip harnesses help with training and reduce pulling by turning your dog toward you.
Dual-clip harnesses let you switch between front and back clips for different situations.
If your dog keeps slipping out, shows discomfort, or pulls hard, switching harness types can improve escape prevention and comfort. Always check that the harness matches your dog’s chest shape and size.
Consulting a Trainer or Vet
You should ask for help if harness problems continue. A professional dog trainer can show you how to fit and use the harness for better results. A veterinarian can check for skin problems, pain, or injuries caused by poor fit. Remember, gear cannot replace supervision. Training and regular checks keep your dog safe. Retire any harness with damaged straps or hardware. Fit alone may not solve pulling or behavior issues, so work with experts for the best outcome.
Note: Always put your dog’s safety first. If you feel unsure, seek advice before your next walk.
Harness Fit Support for Retail and Wholesale
Support Script: Test, Log, Fix, Re-Test
You can help customers get a good harness fit by using a simple plan. First, guide them to do a 10-minute short walk test. Ask them to look for rubbing, rotation, or restriction after the walk. Tell them to write down any red flags, like skin marks or straps that move. Suggest they make one change at a time, such as tightening a strap by 1-2 in (3-5 cm). Then, have them repeat the walk test. Remind them to record each change and what happens. This way, you find the best fit and keep the dog safe.
Tip: Always tell customers to stop using the harness if they see irritation, limping, or panic. Safety is most important.
Listing Specs: Sizing, Adjustment, Hardware, Care
When you list harnesses for sale, clear specs help buyers pick the right one. Give all sizes, from XXS to L, with neck and chest measurements in inches and centimeters. Adjustable straps should let people change the fit by 1-2 in (3-5 cm). Custom-fit options help dogs with special body shapes.
You should also talk about the hardware. Use strong buckles and D-rings that last a long time. List care steps, like hand washing and air drying, to keep the harness nice.
Here is a table showing how OEM and ODM help harness fit for stores:
Aspect | Description |
|---|---|
Material Quality | Makes harnesses strong and comfy. |
Customizable Designs | Lets you offer special fits for different needs. |
Safety Standards | Following rules makes products safer. |
Fit Tolerance | Keeps harness comfy with a tolerance of ±0.2 in (±0.5 cm). |
Packaging | Good packaging keeps harnesses safe during shipping. |
You may see OEM and ODM when working with harness makers. OEM means the company makes products using your design and brand. ODM means the company designs the product and lets you sell it with your brand. Both OEM and ODM help harness fit by giving custom sizes, adjustable parts, and strong materials. This helps you serve both stores and big buyers.
Offer all sizes from XXS to L.
Give adjustable neck and chest sizes for better fit.
Add custom-fit choices for special markets.
Note: Always check that harness specs match what your customers need. Good sizing and clear care steps help stop fit problems and returns.
Regular 10-minute walk tests help you spot harness fit problems early. You keep your dog’s safety and comfort as your top priority. Act quickly when you see red flags. Seek help from a trainer or vet if you notice irritation or escape risk. Proactive harness fit checks support comfort and safety for your dog. Your attention makes every walk happier and healthier.
Tip: Always check your dog’s harness after each walk to prevent problems.
FAQ
How do you measure your dog for a harness?
You measure your dog by wrapping a soft tape around the broadest part of the chest and the base of the neck. Measuring chest and neck helps you choose the right harness size. Always check sizing guidelines before buying.
What is the best way to check harness fit after a walk?
You use a fit test checklist. Look for skin marks, harness rotation, and signs of restriction. Touch and inspect the harness after a 10-minute walk. If you see irritation or limping, stop and adjust the fit.
How often should you run a step by step fit guide?
You should run a step by step fit guide every time you change harnesses or notice discomfort. Regular checks keep your dog safe and comfortable. Make small adjustments and re-test after each walk.
What if the harness seems tight but matches sizing guidelines?
You loosen the straps by 1-2 in (3-5 cm) and re-test. Sizing guidelines help, but every dog has a unique shape. Watch for normal stride and relaxed posture. If problems continue, try a different harness style.
Can you use the same harness for different dogs?
You should not use the same harness for different dogs unless their measurements match. Each dog needs a harness that fits their chest and neck. Always measure before switching and follow the fit test checklist.