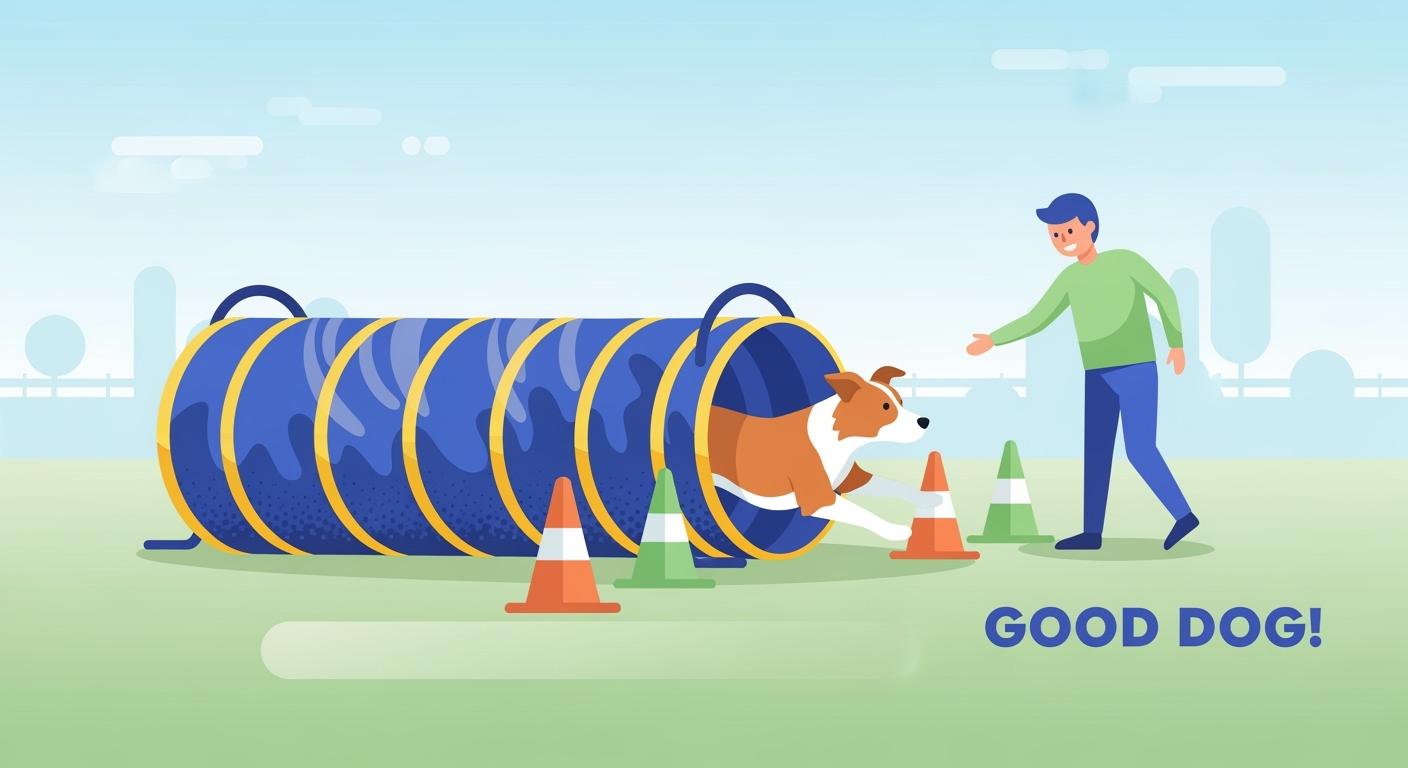
You want your dog tunnel to help your dog feel brave, not scared. Some owners see their dogs get nervous when a dog tunnel falls down or moves. A safe dog tunnel lets your dog run with courage every time. You should look at the size, length, material, how it stays in place, if you can move it, and if it is safe when picking a dog tunnel. The best agility gear helps you train and makes your dog more confident.
Key Takeaways
Choose a dog tunnel with a 24-25 inch opening for safety and comfort. This size suits most breeds and helps prevent hesitation.
Select the right tunnel based on your training needs. Use lighter tunnels for backyard fun and sturdier ones for agility training.
Ensure your tunnel is stable by using sandbags or water bags every 1 meter. This prevents shifting and builds your dog’s confidence.
Inspect your tunnel regularly for damage and clean it often. A well-maintained tunnel keeps your dog safe and happy.
Pick tunnels with bright colors and wide openings to help shy dogs feel secure. Start training with short, easy sessions to build their confidence.
Dog tunnel uses and feature priorities
Backyard games vs agility training
Some people use tunnels for fun in the backyard. Others use them for agility training. If you want to play, you can pick a lighter and shorter tunnel. These are good for easy games and help your dog learn about tunnels. For agility training, you need better equipment. Choose tunnels with a 24-25 inch opening and a length of 10-20 feet. These sizes help your dog move safely and feel brave. Agility training uses tunnels a lot, so you need strong material and good anchors. Training for agility is about speed, being correct, and staying safe. Pick a tunnel that fits your training style and your dog’s size. Agility training also needs tunnels that keep their shape and do not fall down when your dog runs fast.
Indoor vs outdoor tunnel needs
Think about where you will use the tunnel. Indoor tunnels do not get as dirty or face bad weather. You can use smaller and lighter tunnels inside. Outdoor tunnels need to handle sun, rain, and wind. Pick tunnels with tough fabric and strong anchors for outside. The table below shows the main differences in what you need:
Feature Requirement | Indoor Dog Tunnels | Outdoor Dog Tunnels |
|---|---|---|
Climate Control | Not as important because it is stable inside | Very important because of weather outside |
Security | Basic safety is usually enough | Strong safety is needed to keep dogs safe |
Size | Smaller tunnels can work | Bigger tunnels are better for moving around |
Maintenance Needs | Easier to clean because it is inside | Needs more cleaning because of dirt outside |
Pick a tunnel that matches your training and where you use it. Outdoor agility training needs stronger tunnels and better anchors.
When tunnels are not suitable
Some dogs or places are not good for tunnels. Dogs with joint pain or who are very shy should try other training first. Small spaces or slippery floors can make tunnels unsafe. If you cannot anchor the tunnel, it might move and scare your dog. Always check if the tunnel is right for your training and your dog. Agility training works best when you use the right obstacle for your dog.
Key safety specs for dog agility tunnel
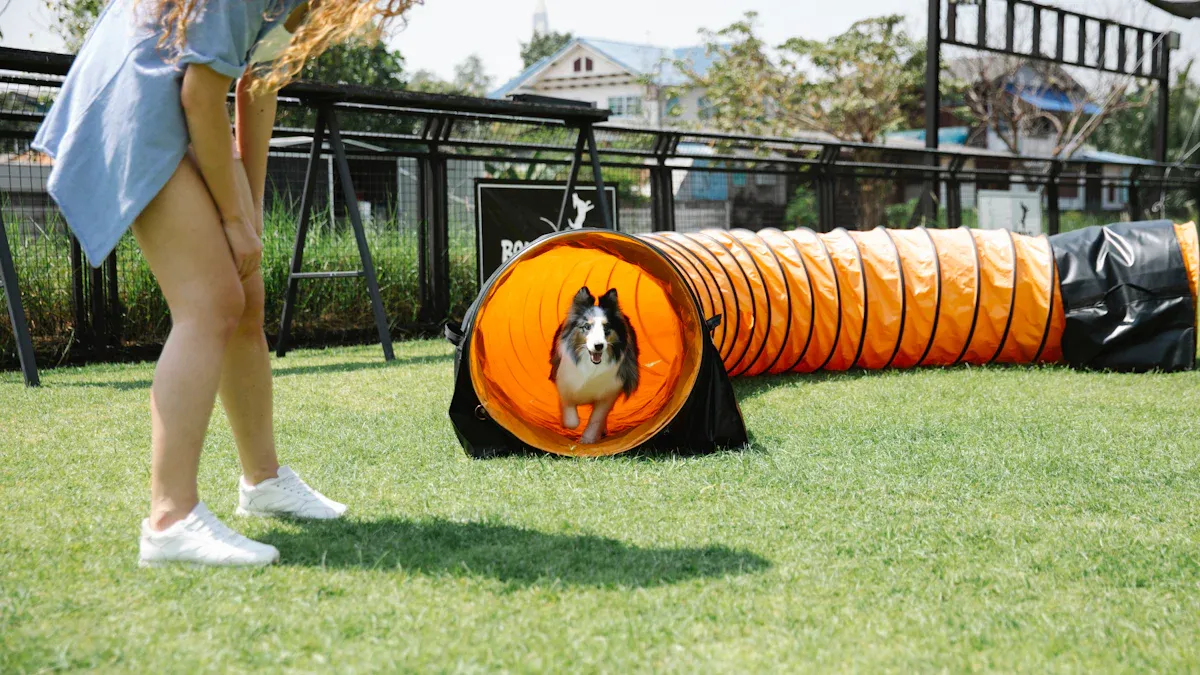
Diameter and movement safety
You want your dog to move through the tunnel with confidence. The diameter of a dog agility tunnel matters for safety and comfort. Most top-rated dog agility tunnels have an opening size of 24-25 in (61-64 cm). This size works well for most breeds and lets your dog run without bumping into the sides. If you have a larger dog, you should always check that the tunnel meets the minimum diameter of 600 mm (23.6 in). Smaller tunnels can make movement harder and may cause hesitation or fear.
Here is a quick guide for diameter:
Dog Size | Minimum Diameter (mm) | Minimum Diameter (in) |
|---|---|---|
All sizes | 600 | 23.6 |
A tunnel with the right diameter helps your dog feel safe and keeps training fun. If your dog is new to agility, start with a tunnel that has a wide and stable opening. This helps build trust and encourages your dog to enter without worry.
Length and anchoring needs
The length of a dog agility tunnel affects how you anchor it and keep it safe. Longer tunnels, such as those 10-20 ft (3.0-6.1 m), need more support to stay in place. If you use a longer tunnel, you should add more anchoring bags or weights. Place one set of bags every 1 m (3.3 ft) along the tunnel. Each bag should hold about 20 lb (9.1 kg) of sand or 3 gal (11.4 L) of water. This keeps the tunnel from tipping or sliding when your dog runs fast.
You should also look for tunnels with finished edges and non-slip surfaces. These features help prevent accidents and keep your dog safe. Dogs new to agility benefit from a tunnel with a stable opening and strong anchors. If you train outside, use extra bags for curved tunnels or slick surfaces.
Tip: Always check the tunnel before each session. Make sure anchors are secure and the tunnel does not move when touched.
Rib spacing and tunnel stability
Rib spacing, or pitch, is the distance between the support ribs inside the tunnel. Most top-rated dog agility tunnels use a pitch of about 4 in (10 cm). Closer rib spacing helps the tunnel keep its shape, even when your dog runs fast or bumps into the sides. Wider spacing can make the tunnel feel flexible, which may cause it to collapse or shift.
If you want the best agility gear, choose a tunnel with strong ribs and tight spacing. This reduces the risk of collapse and keeps your dog safe. Stable tunnels help timid dogs feel more confident and encourage them to run through without stopping.
Common causes and fixes table
Dog agility tunnel failures can happen for many reasons. You should know the common causes and how to fix them. The table below shows what can go wrong and what you can do:
Common Cause | What It Leads To | What To Do Next |
|---|---|---|
Wear and tear from regular use | Holes, tears, or weak spots | Use patch kits for small damage |
Damage from UV exposure | Fading, cracking, or brittle material | Apply UV-resistant spray |
Broken connectors or ribs | Tunnel collapse or instability | Replace connectors or ribs immediately |
Shifting or sliding on slick surface | Timid dog hesitates, loss of confidence | Add more anchors, use non-slip mats |
Protruding parts or sharp edges | Injury risk | Remove or cover sharp parts |
Scenario A:
If you notice your timid dog hesitating because the tunnel shifts or slides, you can fix this by adding extra anchors and placing the tunnel on a non-slip surface. Stable placement helps your dog feel safe and builds confidence. You should always check for sharp edges or loose parts before training.
Safety Disclaimer: Always inspect your dog agility tunnel before use. Tunnel collapse, shifting, or protruding parts can cause injury or loss of confidence. Make sure all parts are secure and the tunnel is stable.
You can solve most problems with regular checks and quick fixes. This keeps your tunnels safe and helps your dog enjoy agility training.
Dog agility gear materials and build details
Vinyl vs collapsible fabric tunnels
Pick dog agility gear that fits your training needs. Vinyl tunnels and collapsible fabric tunnels are different. Vinyl tunnels use strong PVC coated vinyl. These tunnels can weigh from 14 oz per sq yd (475 gsm) to 67 lbs (30.4 kg). Collapsible fabric tunnels use lighter PVC or laminated materials. They usually weigh about 470 gsm. Heavier vinyl tunnels last longer and stay in place better. Lighter fabric tunnels are easier to move and adjust.
Here is a table to help you choose:
Option | Pros | Cons | Best For |
|---|---|---|---|
Vinyl Tunnel | Very strong, good in bad weather | Heavy, not easy to carry | Outdoor agility, strong dogs |
Collapsible Fabric Tunnel | Light, simple to move | Not as strong, can slide more | Indoor play, puppies |
Medium-Duty Vinyl Tunnel | Good mix of strong and easy to move | Might need more anchors | Backyard agility |
Heavy Duty Agility Tunnel | Super strong, keeps its shape | Big, hard to store | Organized agility training |
Choose gear that matches your dog’s size and your space. Strong vinyl is best for outside. Lighter fabric works well for indoor games.
Interior opacity and visibility
Dogs feel braver in tunnels that are not see-through. Very dark tunnels can make dogs stop or worry. Opaque tunnels block things outside and help dogs focus. Bright colors inside help dogs see better and feel safe. If your dog is shy, pick a tunnel with a clear color and no dark spots. This helps your dog trust the tunnel and go through it.
Tip: Look inside the tunnel before each use. Make sure the color and how much you can see help your dog find the way out.
Seams and joint safety
Good gear has strong seams and joints. Always check tunnels for loose threads, holes, or worn spots. Weak seams can make the tunnel fall or have sharp edges. Taking care of the tunnel keeps your dog safe and makes it last longer. Before every training, look at all seams and joints. Check for damage that could hurt the tunnel. Fix any problems before your dog uses it.
Always check seams for loose threads or holes.
Fix or change broken joints right away.
Clean tunnels often to find problems early.
Dog agility gear with strong seams and joints keeps your dog safe and helps you feel calm.
Feature checklist to prevent tunnel failures
You want your tunnels to last and keep your dog safe. Use this checklist to help you choose the best agility gear and avoid common problems.
Anchoring options and when to avoid stakes
You need strong anchors to keep your tunnel from moving. Many people use sandbags or water bags along the tunnel. Place one set of bags every 1 m (3.3 ft) for the best stability. If you use your tunnel on loose soil or grass, rock bolts can give extra hold. Always check the ground before using stakes. Avoid mechanical anchors if the surface is too hard or if you cannot drive them in safely. Do a quick risk check before each session. This helps you pick the right anchor for your setting and keeps your agility tunnel steady.
Use sandbags or water bags for most surfaces.
Try rock bolts for loose soil or grass.
Avoid mechanical anchors on hard or unsafe ground.
Check the ground and anchor type before each use.
Handles, straps, and snag risks
Handles and straps make tunnels easy to move. You should check that all handles lie flat and do not stick out. Loose straps can catch on your dog’s paws or collar. Pick tunnels with covered or low-profile handles. This reduces the chance of snags and keeps your dog safe during agility runs.
Tip: Run your hand along the tunnel before each session. Make sure nothing sticks out or feels sharp.
Cleaning and odor control
Clean tunnels help your dog stay healthy and happy. Spot clean high-traffic areas every day. Deep clean all surfaces once a week. Scrub and disinfect the tunnel every month. Remove waste right away to stop smells. Use enzymatic cleaners to break down odors at the source. Open windows or use fans to keep air moving and prevent odor buildup.
Spot clean daily.
Deep clean weekly.
Scrub and disinfect monthly.
Remove waste often.
Use enzymatic cleaners for odor.
Keep air moving with fans or open windows.
Parameter and value table
Use this table to compare features and pick the right tunnel for your needs:
Parameter | Target range or option | Why it matters |
|---|---|---|
Opening size | 24-25 in (61-64 cm) | Comfort and safer movement |
Length | 10-20 ft (3.0-6.1 m) | Longer needs more anchoring |
Rib spacing | about 4 in (10 cm) | Shape stability and reduced collapse risk |
Material weight | 14-20 oz per sq yd (475-670 gsm) | Durability signals for abrasion and scuffs |
Opacity | opaque body | Fewer surprises inside the tunnel |
Color cue | avoid very dark interiors | Confidence and visibility |
Anchoring method | bags, holders, or weights | Prevents shifting and collapse |
Bag spacing | 1 set per 1 m (3.3 ft) | More consistent run and fewer surprises |
Bag load | 20 lb (9.1 kg) sand or 3 gal (11.4 L) water | Typical stability guidance |
Safety check | no protrusions, no sharp edges | Reduces injury risk |
You can use this checklist to find the best agility gear for your dog. Safe, clean, and stable tunnels help your dog build confidence and enjoy agility training.
Choosing the right dog agility equipment for your dog
Puppies and shy dogs
You want your puppy or shy dog to feel safe and happy when using dog agility equipment. Start with gentle, short sessions. This helps prevent stress on young joints and muscles. Pick a tunnel with dimensions larger than your dog’s height. This gives your dog plenty of space to move and turn. Choose a tunnel based on your dog’s size and the type of training you plan. A wide opening and soft, flexible material help your dog feel comfortable. Always supervise your puppy and offer praise for every small success.
Introduce tunnels slowly.
Use short sessions.
Pick a tunnel larger than your dog’s height.
Match tunnel size to your dog’s needs.
Fast or strong dogs
Fast or strong dogs need sturdy dog agility equipment. Look for heavy-duty materials that can handle rough play. A 24-inch (61 cm) opening works well for most breeds. Choose tunnels that expand up to 20 feet (6.1 m) for more challenge. Make sure the tunnel has sandbag tie-downs for stability. For dogs over 30 lbs (13.6 kg), pick super heavy-duty tunnels. Materials like mildew-resistant, UV-stabilized vinyl last longer outdoors. A heavy-duty hoop helps the tunnel keep its shape. Always check that the tunnel stays stable during use.
Use heavy-duty, flexible materials.
Pick waterproof options for outdoor use.
Make sure the tunnel fits your dog’s size.
Multi-dog households
If you have more than one dog, you need dog agility equipment that works for all sizes and energy levels. Choose tunnels with adjustable anchors and strong seams. Look for easy-to-clean materials. Set up the tunnel in a space where all dogs can play safely. Rotate dogs through the tunnel one at a time to prevent accidents. Supervise play to keep everyone safe.
Note: Persistent chewers need extra supervision. Offer training support and redirect chewing to safe toys.
Decision table: dog, setting, must-haves, avoid
Here is a quick guide to help you choose the best agility gear for your situation:
Dog or Setting | Best Tunnel Features | What to Avoid |
|---|---|---|
Puppy or shy dog | Wide opening, soft material, gentle intro, short sessions | Small, dark, or stiff tunnels |
Fast or strong dog | Heavy-duty vinyl, 24-25 in (61-64 cm) opening, strong anchors | Light fabric, weak seams |
Multi-dog household | Adjustable anchors, easy-clean, fits all sizes | Fixed anchors, hard-to-clean fabric |
Outdoor, windy, uneven | Tight rib pitch, extra bag spacing, secure anchoring | Sparse ribs, loose anchors |
Scenario B:
If you set up your tunnel outdoors and face wind or uneven ground, you may see the tunnel collapse or shift. You can solve this by choosing a tunnel with a tight rib pitch, using more anchoring bags, and spacing them every 1 m (3.3 ft). This setup keeps the tunnel steady and reduces surprises for your dog.
Tip: Always match your dog agility equipment to your dog’s needs and your training space. This helps build confidence and keeps training safe.
Step-by-step tunnel setup and training
Placement and surface checklist
You want your tunnel to stay steady and safe. Place the tunnel on a flat, non-slip surface. Grass, rubber mats, or packed dirt work well. Avoid slick floors or uneven ground. Check for rocks, sticks, or anything sharp under the tunnel. Use tunnel bags filled with sand or heavy material to keep the tunnel from shifting. Space the bags evenly, about every 1 m (3.3 ft), for best stability. Make sure the tunnel has a wide opening and sits flat on the ground.
Tip: Walk around the tunnel and press on it gently. If it moves or rolls, add more weight or adjust the surface.
Introducing the tunnel safely
You can help your dog feel confident with these steps:
Place the tunnel on the ground and let your dog sniff it. This helps your dog get used to the new object.
Get down on all fours and look into the tunnel. Show your dog that it is safe.
Ask a friend to sit at one end while you sit at the other. Call your dog through the tunnel.
Use a treat to encourage your dog to go through. Give praise and a reward when your dog exits.
Start with short, easy runs. Keep the tunnel straight and the exits clear. Repeat until your dog moves through with confidence.
Maintenance routine
Regular care keeps your tunnel safe and long-lasting. Use this table to guide your routine:
Maintenance Routine | Description |
|---|---|
Inspection Routines | Check for damage, loose parts, and hazards. Do this every few months. |
Cleaning Protocols | Clean with mild soap and water every two weeks. This prevents mold and dirt. |
Repair Procedures | Fix damage right away. Replace worn or broken parts as soon as possible. |
Store the tunnel out of reach when not in use. This prevents chewing and weather damage.
Copyable setup checklist
You can use this checklist for every training session:
Choose tunnel diameter and length to fit your dog and space.
Pick a tunnel that holds its shape with your anchoring method.
Secure the tunnel with bags or weights. Check for sharp edges.
Introduce the tunnel with short, easy runs and calm exits.
Inspect the tunnel after each session. Store it safely.
Reminder: A steady, clean tunnel helps your dog build confidence and enjoy training.
Retail and wholesale notes for tunnels
Assortment by length and material
You should have many dog tunnels for different needs. Offer tunnels in lengths like 10 ft, 15 ft, and 20 ft. This gives buyers choices for play or training. Stock heavy vinyl tunnels for outdoor or busy use. Lighter fabric tunnels are good for indoor play or travel. When you sell many sizes and materials, customers can pick what works best for their dogs.
Tip: Put tunnels together by length and material in your store or catalog. This helps buyers compare and choose what they need.
Product page tips to reduce returns
Clear product pages help buyers pick the right tunnel and return less. Try these ideas:
Write simple and honest descriptions. Tell the tunnel size, material, and how to anchor it.
Show customer reviews. These help buyers know what to expect.
Add good photos. Show the tunnel in use, from different sides, and with dogs of all sizes.
When you give clear details, buyers feel sure and happy with what they buy.
Spec questions for suppliers
Ask suppliers important questions about tunnel quality and safety before you buy or sell. Use this table to help you talk to them:
Specification Aspect | Description |
|---|---|
Material Quality | Ask about UV-resistant plastics, strong stitching, and rust-proof metals. |
Adjustability | Check if the tunnel or hurdles can change for different users. |
Portability | Find out if the tunnel folds and is light for travel. |
Surface Compatibility | Ask about feet that do not mark or anchors for different surfaces. |
Safety Design | Look for round edges and bright markers to stop tripping. |
Spacing Standards | Make sure the tunnel meets spacing rules for training. |
These questions help you offer safe and strong tunnels that fit what customers want.
You want your dog to feel brave in the tunnel. Picking the right tunnel helps your dog feel safe. A tunnel with a straight entrance is best. This makes it easier for your dog to run through. Your dog will feel safer and more sure each time.
Dog tunnels should have straight entrances. This stops dogs from turning too much and getting hurt. Gentle curves are okay, but you must think about how your dog goes in and out. This keeps your dog safe every time.
You should pick a tunnel that fits your dog’s needs. This helps your dog feel better and keeps training fun. Use the lists and tables in this guide to help you choose. Every time you set up the tunnel, your dog gets braver. Clean and steady tunnels help your dog feel good. When your dog runs with courage, you know you picked well. Your dog’s confidence will grow with each safe run. Always check the tunnel before you start. As you train, your dog will get even braver. Confidence is very important for happy agility training.
FAQ
What size tunnel should I choose for my dog?
You should pick a tunnel with a 24-25 in (61-64 cm) opening. This size fits most breeds and helps your dog move safely. Always check your dog’s height and width before buying.
How do I keep my dog tunnel from moving during use?
You can use sandbags or water bags. Place one set every 1 m (3.3 ft) along the tunnel. This keeps the tunnel steady and helps your dog feel confident.
Can I use a dog tunnel indoors?
Yes, you can use a tunnel indoors. Choose a lighter, shorter tunnel for inside play. Make sure the floor is not slippery. Always check for enough space before setting up.
How do I clean and maintain my dog tunnel?
Clean high-traffic spots daily. Deep clean every week with mild soap and water. Inspect for damage often. Fix any problems right away to keep your tunnel safe.
What features help shy or nervous dogs use tunnels?
You should pick a tunnel with a wide opening and bright interior. Avoid very dark tunnels. Start with short, easy runs. Give praise and treats to build your dog’s confidence.