You make a plan for a large dog harness. The plan checks control, comfort, and safety. In B2B pet product buying, most buyers look online first. 89% of buyers do their own research online. 67% check suppliers online before talking to them. You need to use trial design and crash testing. You also use canine gait analysis. These help you check harness fit and how it affects walking for every dog. The plan makes sure each harness is safe. You collect handler feedback. You write down changes in how dogs walk for all sizes. You use facts to make choices, not guesses.
Key Takeaways
Make clear fit-test goals. Focus on safety and comfort for dogs and handlers.
Use trial design and crash testing. This helps check harness safety and how well it works.
Get handler feedback. Watch for changes in the dog’s walk to find fit problems.
Keep testing conditions the same. This helps get results that match for all dogs.
Write down all measurements, what you see, and feedback. This helps track how the harness works.
Use a pass or fail system. This helps check harness fit and safety in a good way.
Test harnesses on many dog breeds and sizes. This makes sure the harness works for lots of dogs.
Keep making harness designs better. Use feedback and walk analysis to help improve them.
Large Dog Harness Fit-Test Goals
Fit Objectives for Large Breeds
You need to set clear goals for your harness fit-test. Leading animal safety groups say you must focus on safety and comfort for both the dog and the handler. You want the harness to fit well so you can control the dog without causing pain. A good harness spreads pressure across the body. This reduces neck strain and helps prevent injuries.
Safety for the dog and handler
Comfort during all activities
Even pressure distribution to protect the neck
Enhanced control for the handler
Reduced risk of escape
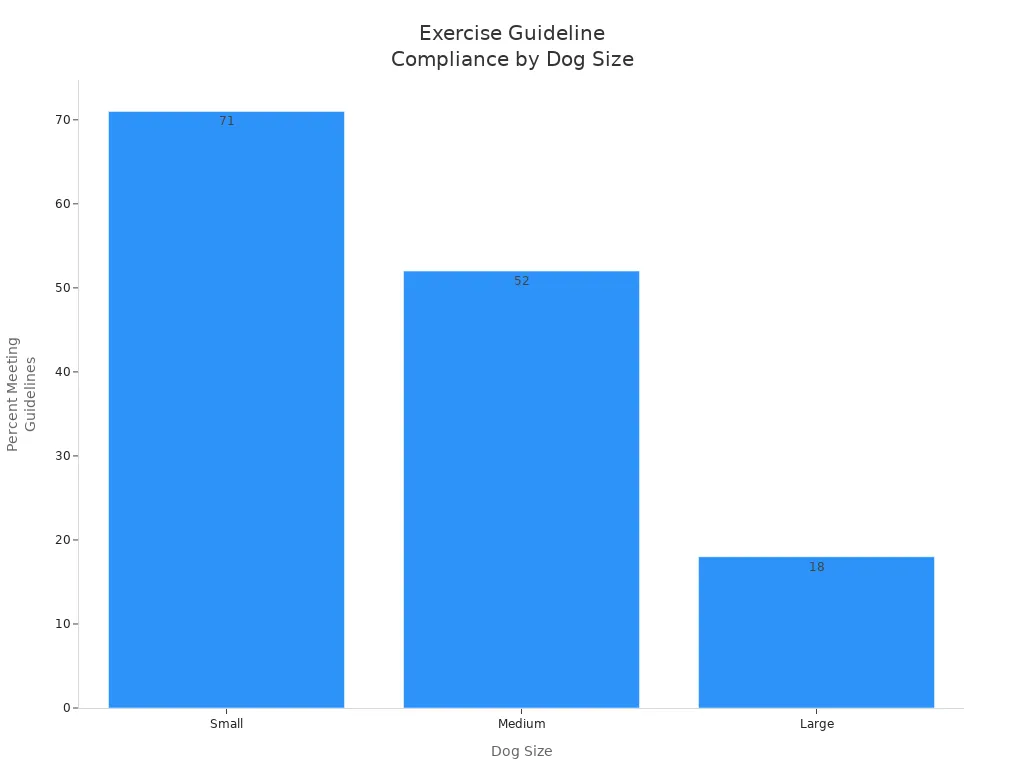
Large breeds have special needs. They often need more exercise and have different body shapes than small or medium dogs. Research shows that only 18% of large dogs meet exercise guidelines, compared to 71% of small dogs. This means your harness must support longer walks and more movement. The harness must not rub, pinch, or shift during use.
Dog Size | Recommended Exercise Duration | Percentage Meeting Guidelines |
|---|---|---|
Small | Up to 1 hour | 71% |
Medium | More than 2 hours or up to 1 hour | 52% |
Large | More than 2 hours or up to 1 hour | 18% |
Early Failure Modes
You must watch for early failure modes during your protocol. These include harnesses that slip, pinch, or allow the dog to escape. You may also see harnesses that cause the dog to limp or change its gait. If you see red marks, fur loss, or the dog stops walking, you need to record these problems. Early detection helps you fix design issues before you move to mass production.
Repeatable Results
You want your protocol to give the same results every time. Repeatable results show that your harness design works for many dogs, not just one. You should use the same steps for each fit-test. This includes measuring the dog, checking the harness position, and watching the dog walk. You should use canine gait analysis to see how the harness affects movement. You need to record all data and photos for each test.
Fit-Test Deliverables Checklist
Measure girth, neck, and back length
Fit harness and check for even pressure
Watch and record the dog’s gait before and after fitting
Take photos from front, side, and top
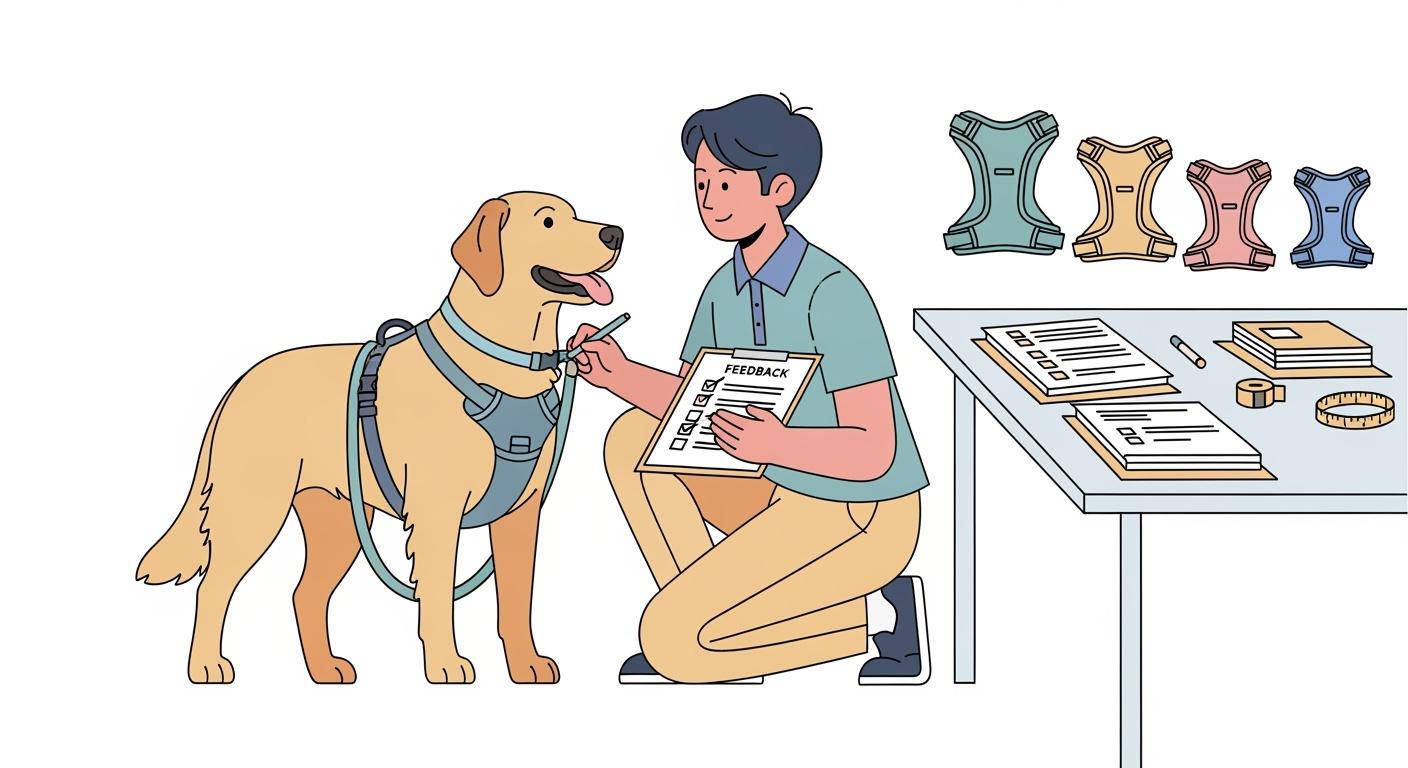
Log handler feedback and any adjustments
Evidence Requirements
You must collect clear evidence for each test. This includes photos, videos, and written notes. You need to show that the harness fits well and does not harm the dog. You should keep all records in one place for easy review.
Pass/Fail and Rework Loop
You need a clear pass/fail rule for your protocol. If the harness fits well, does not cause pain, and keeps the dog safe, you mark it as pass. If you see problems, you mark it as fail and note what to fix. You must test again after making changes. This loop helps you improve your harness design and reach your goals.
Large Dog Harness Trial Design
Use Scenarios
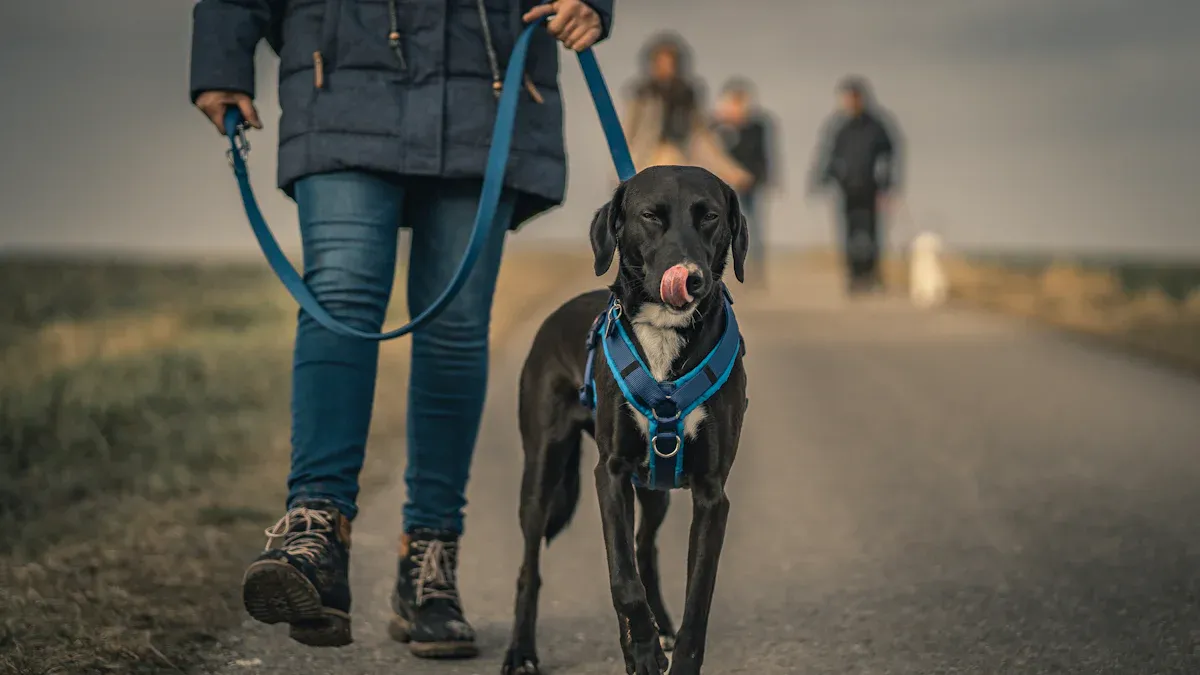
You need to test the harness in real-world situations. Start by thinking about where handlers will use the harness. Common use scenarios include daily walks, training sessions, and car travel. You should also consider busy sidewalks, parks, and uneven ground. Each scenario helps you see how the harness supports control and comfort for the dog. You want to know if the harness stays in place when the dog pulls or changes direction. You also need to check if the harness affects the dog’s gait during different activities.
Tip: Record each use scenario in your protocol. This helps you compare results and spot patterns in dog movement.
Standardized Conditions
You must keep test conditions the same for every dog. This means you use the same leash, walking route, and handler instructions. You should test the harness at the same time of day and in similar weather. Standardized conditions help you see if the harness works well for all dogs, not just a few. You also need to include crash testing and canine gait analysis in your protocol. These steps show how the harness performs under stress and how it affects the dog’s gait.
Use the same handler for each test
Walk each dog for the same distance and time
Record the dog’s gait before and after using the harness
Use video to capture gait changes
Size Coverage Strategy
You need to test the harness on a wide range of dogs. Start with core sizes, then test boundary sizes and dogs that fall between standard sizes. This strategy helps you find fit issues before production. You want to see how the harness fits dogs with different chest shapes, neck lengths, and weights. You should also check if the harness causes rubbing or restricts the dog’s gait.
Trial Variables Checklist
Dog breed, weight, and age
Girth, neck, and back measurements
Coat type and length
Handler experience level
Gait changes before and after harness use
Handler Script
Give each handler a script to follow. This keeps the test fair and repeatable. The script should include:
Measure the dog and record data
Fit the harness and check for even pressure
Walk the dog for five minutes
Observe and record gait changes
Note any harness adjustments
Re-fit Rules
Set clear rules for re-fitting the harness. If the harness shifts, pinches, or restricts the dog’s gait, stop the test. Adjust the harness and record what you changed. If the harness cannot fit without causing problems, mark it for rework. This process helps you improve the design and meet your protocol goals.
Harness Recruit Plan and Screening
Recruit Matrix
You need a good recruit matrix to check your harness fit-test. Start by picking many different dog breeds, sizes, and body shapes. Add large breeds like Great Danes, Retrievers, and Mastiffs. Include dogs with special body shapes, like Greyhounds and Dachshunds. This helps you see how the harness fits on different chest widths, neck lengths, and back shapes. You should also use dogs with thick fur and short hair. Having many types of dogs gives you strong data for harness fit and gait changes.
Breed Type | Body Shape | Coat Type | Age Range | Activity Level |
|---|---|---|---|---|
Great Dane | Deep-chested | Short | Adult | High |
Retriever | Broad-chested | Medium | Senior | Moderate |
Mastiff | Stocky | Short | Adult | Low |
Greyhound | Narrow | Short | Adult | High |
Dachshund | Long-bodied | Medium | Adult | Moderate |
Tip: Try to have at least one dog from each group. This helps you find harness fit problems early.
Screening Criteria
You must make clear rules for picking your harness recruits. Look for dogs that match your target users. Pick healthy dogs with no injuries or walking problems. Choose dogs with calm behavior for safe testing. For large breeds, check that the harness gives strong support and covers the body well. Measure each dog to find the right harness size. Stay away from harnesses that slip or pinch, especially on special body shapes. Good screening stops wrong results and makes sure your harness works for real dogs.
Pick healthy dogs with no walking problems
Use large breeds and special body shapes
Measure girth, neck, and back length
Check harness coverage and strength
Avoid harnesses that slip or pinch
Sample Size Logic
You need enough dogs to make your fit-test results strong. Use power analysis to pick your sample size, like in clinical trials. Set your effect size by the smallest change you want to see in harness fit or gait. Use standard deviation from old studies or a small test. Set your type 1 error at 5% to lower false results. Aim for 80% power to find real changes in harness performance. Change your sample size if you think some dogs will drop out. For example, if you think 10% will leave, divide your number by 0.9. This way, you get strong data for harness fit and gait checks.
Recruit Log Checklist
Keep a careful log for every dog in your harness fit-test. Write down breed, age, weight, and body size. Note coat type and any special body parts. Track harness size, fit changes, and gait changes. Add handler notes and photos for each test.
Dog breed, age, and weight
Girth, neck, and back length
Coat type and body shape
Harness size and changes
Gait notes before and after harness use
Handler feedback and photos
Anatomy Notes
Write anatomy notes for every dog in your recruit matrix. Describe chest width, neck length, and back shape. Note any features that change harness fit, like deep chests or long bodies. Write how the harness works with the dog’s body during gait checks. These notes help you see patterns and make the harness better for all dogs.
Note: Good anatomy notes help with canine gait analysis and make harness fit better for every dog.
Fit Procedure and Measurement SOP
Measurement Map
You need to start every fit-test with accurate measurements. Use a soft, flexible tape measure and keep treats nearby to help the dog stay calm. Measure the neck by wrapping the tape around the base, making sure you can slide a finger underneath. For the chest girth, place the tape around the widest part of the dog’s rib cage, just behind the front legs. If the harness style requires it, measure from the base of the neck to the chest strap position. Always compare your numbers to the size chart for the harness. This step helps you pick the right harness for each dog and reduces the risk of poor fit.
Harness Positioning
Place the harness on the dog with care. Make sure the harness sits evenly on both sides. Check that the buckles line up and the straps do not twist. The harness should not press into the dog’s armpits or neck. You should see even spacing and be able to fit two fingers under every strap. This helps prevent rubbing and lets the dog move freely. Good harness positioning supports the dog’s gait and keeps the harness from shifting during walks.
Quick Fit Checks
Before you start the walk test, do a quick fit check. Watch the dog stand, sit, and turn. Look for signs of pinching or slipping. Check that the harness does not block the dog’s shoulder or chest movement. If you see the dog hesitate or change its gait, adjust the harness. You want the dog to move with a natural gait and show no signs of discomfort.
Measurement & Fit SOP Template
Gather your tools and treats.
Measure the dog’s neck, chest girth, and back length.
Select the harness size using the size chart.
Place the harness on the dog and check for symmetry.
Confirm finger clearance and armpit spacing.
Watch the dog’s gait before and after fitting the harness.
Take photos from the front, side, and top.
Walk the dog for five minutes and observe gait changes.
Repeat measurements after the walk. Note any strap movement or pressure points.
Log all adjustments and handler observations.
Safety Stop-Test Checklist
Stop the test if the harness shifts or pinches.
Remove the harness if the dog shows pain or limps.
Record any red marks, fur loss, or changes in gait.
Do not continue if the harness restricts the dog’s movement.
Always keep the dog’s safety as your top priority.
Tip: Use canine gait analysis to track how the harness affects the dog’s movement. Video clips and notes help you spot small changes in gait that may signal a fit problem.
By following this fit procedure, you can collect clear data on harness fit, comfort, and gait. This process helps you validate each large dog harness design before moving to the next stage.
Walk Test and Canine Gait Analysis
Walk-Test Sequence
You need to follow a clear walk-test sequence to evaluate harness performance for every dog. Start with pre-measurement training. Train each dog to walk on a treadmill for four to six weeks. This step helps you collect consistent gait data. Next, give each dog a 20-minute accommodation session. Let the dog get familiar with the treadmill and the test environment. You should record three types of gait measurements: without the harness, with the harness but no leash, and with the harness and leash attached. This sequence helps you see how the harness affects canine movement and control.
Walk-Test Steps:
Train each dog for treadmill walking.
Allow a 20-minute accommodation session.
Record gait without harness.
Record gait with harness, no leash.
Record gait with harness and leash.
Note: Use video to capture each gait session. This helps you compare canine movement before and after harness use.
Post-Wear Inspection
After the walk test, inspect the harness and the dog for any issues. Look for signs of chafing or skin irritation. Check if the harness restricts movement or presses against the armpits or shoulders. Make sure the harness did not slip off or become loose. Watch for pinching or tight spots. You might see excessive scratching or biting at the harness area. If the dog shows reluctance to move or limps, this could mean discomfort. Look for red marks, hair loss, or resistance when you try to put the harness on again.
Common Post-Wear Issues:
Chafing and skin irritation
Restricted gait or movement
Loose harness slipping off
Pinching or tight spots
Excessive scratching or biting
Reluctance to move or limp
Slipping out of the harness
Red marks or hair loss
Resistance during harness fitting
Tip: Document all post-wear findings with photos and notes. This helps you track canine comfort and harness fit over time.
Escape-Risk Checks
You must check for escape risk during every fit-test. Make sure the harness has adjustable straps for safety. Verify that the harness fits well across the chest and shoulders. Test any no-pull features to see if they help control the dog. Examine all safety features designed to reduce escape risk. After each use, check the harness fit again to account for wear and stretching.
Evidence Capture Checklist
Take photos of harness fit before and after the walk.
Record video clips of canine gait in all test conditions.
Log any signs of discomfort or escape attempts.
Note all harness adjustments and canine reactions.
Motion Clips
Capture short motion clips of each dog during the walk-test. Record gait without the harness, with the harness, and with the harness and leash. Use these clips to analyze canine gait changes and spot any problems with harness fit or control.
Callout: Canine gait analysis helps you validate harness design and reduce escape risk for every dog.
Harness Feedback Forms and Scoring
Feedback Form Structure
You need a simple feedback form for each fit-test. This form helps you get information from handlers and people watching. Fill it out after every dog finishes the test. Use both number ratings and questions that need longer answers. Numbers help you compare results. Longer answers explain problems in more detail. The form lets you check harness fit, comfort, control, and safety for every dog. You also see how the harness changes the dog’s walk.
Key Questions and Rating Scales
Use easy rating scales for the main questions. Ask handlers to rate fit, comfort, control, safety, and how easy it is to use. Use a scale from 1 to 5. One means poor and five means excellent. This helps you spot patterns in how the harness works for different dogs. You can use these numbers to see if the harness meets your goals. Always ask about changes in the dog’s walk. This shows how the harness affects movement.
Sample Rating Scale Table:
Question | 1 (Poor) | 2 | 3 | 4 | 5 (Excellent) |
|---|---|---|---|---|---|
Fit | ☐ | ☐ | ☐ | ☐ | ☐ |
Comfort | ☐ | ☐ | ☐ | ☐ | ☐ |
Control | ☐ | ☐ | ☐ | ☐ | ☐ |
Safety | ☐ | ☐ | ☐ | ☐ | ☐ |
Ease of Use | ☐ | ☐ | ☐ | ☐ | ☐ |
Tip: Use the same scale for every dog. This keeps your results fair.
Open-Ended Prompts
Add open-ended questions to get more details. Ask handlers to write about any pain, harness moving, or escape tries. Tell them to note if the dog’s walk or behavior changes. These answers help you learn why a harness might not fit. They also help you see why a dog moves in a new way. This feedback helps you with canine gait analysis and makes your harness better.
Handler/Observer Feedback Form Template
Dog ID: ___________   Handler: ___________   Date: ___________

1. Fit (1–5): _____
2. Comfort (1–5): _____
3. Control (1–5): _____
4. Safety (1–5): _____
5. Ease of Use (1–5): _____

Open Comments:
- Any signs of discomfort or chafing? _______________________
- Did the harness shift or loosen during use? ________________
- Any escape attempts or slippage? __________________________
- Did you notice changes in gait? ___________________________
- Suggestions for improvement: _____________________________

Signature: ______________________
Feedback Essentials Checklist
Rate fit, comfort, control, safety, and ease of use for each dog
Write down any changes in the dog’s walk before and after use
Note harness changes and what handlers saw
Add comments about pain, harness moving, or escape risk
Get signatures from handlers and observers
Data Storage Rules
Keep all feedback forms safe and easy to find. Use digital folders with clear names for each dog and test date. Store photos, videos, and notes with each feedback form. This makes it easy to find what you need later. Good storage helps you check harness results and make smart choices.
Note: Keeping feedback and data in order helps you check harness fit and keep making it better.
Pass/Fail Criteria and Decision Process
Pass/Fail Rubric
You need a simple way to decide if a harness passes or fails. The rubric uses set rules for fit, comfort, safety, usability, and proof. You score each test with handler feedback and gait checks. You also use canine gait analysis. You want average scores of 4 or higher for fit, comfort, and usability. Safety means the dog does not escape during testing. You must collect all proof, like photos and videos of the dog and harness during gait checks.
The pass/fail rubric helps you make fair choices. You do not guess. You use facts from each test. If any score is below 3, or if the dog escapes or you miss proof, you mark the harness as fail. You use this process for every dog and harness size. This keeps your tests fair and the same each time.
Tip: Use the same rubric for every test. This helps you compare results and see patterns in harness fit and gait changes.
Aggregating Feedback
You must collect feedback from all handlers and people watching after each test. You get ratings for fit, comfort, control, safety, and ease of use. You also collect comments about gait changes, harness movement, and escape risk. You keep all feedback forms, photos, and videos in one place. You check the data for each dog and harness. You look for trends in gait checks and harness fit.
You use tables to organize feedback. You check if most dogs walk well and feel good during testing. You look for common problems, like harness slipping or pinching. You use this feedback to make your harness and testing better. You make sure every handler follows the same steps.
Criteria | Pass Threshold | Fail Condition |
|---|---|---|
Fit | Avg. ≥ 4/5 | Any < 3/5 |
Comfort | Avg. ≥ 4/5 | Any < 3/5 |
Safety | No escapes | Any escape |
Usability | Avg. ≥ 4/5 | Any < 3/5 |
Evidence | All required | Missing photos/videos |
You use this table to check each harness after testing. You mark the harness as pass, fail, or rework needed.
Rework and Retest Loop
If a harness fails any test, you must start the rework and retest loop. You look at the feedback and gait checks for the failed harness. You look for problems with fit, comfort, or safety. You check the paperwork for each harness. You make sure the ID tag is easy to read. You check all straps for good shape. You look at the hardware for problems. You make sure the webbing is not damaged. You remove any harness that does not pass these checks.
You fix the design or adjust the harness. You test it again with the same dog and handler. You collect new feedback and gait check data. You repeat this loop until the harness meets all rules. You keep records of each rework and retest. This process helps you make harnesses better and safer for every dog.
Pass/Fail Rubric Template
Criteria                | Pass Threshold | Fail Condition
------------------------|---------------|---------------
Fit                     | Avg. ≥ 4/5    | Any < 3/5
Comfort                 | Avg. ≥ 4/5    | Any < 3/5
Safety                  | No escapes    | Any escape
Usability               | Avg. ≥ 4/5    | Any < 3/5
Evidence                | All required  | Missing key photos/videos

Decision: [Pass] [Fail] [Rework Required]
Decision Documentation Checklist
You need good paperwork for every pass/fail choice. You follow these steps for each harness test:
Make sure the ID tag is easy to read and not broken.
Check all straps for good shape and no damage.
Look at hardware for any problems or damage.
Check the nylon webbing for good shape.
Look for any signs of wear or damage on all parts.
Remove any harness that does not pass these checks.
You also write down these details for each harness:
Documentation Requirement | Description |
|---|---|
Manufacturer Name | Must be easy to read on the harness tag |
Serial Number | Special number for the harness |
Model Number | Model name or number |
Date of Manufacture | Shows when the harness was made |
Size | Size of the harness |
You keep all paperwork with the test results, feedback forms, and gait check videos. This helps you track harness quality and test results for every dog.
Go/No-Go Agenda
You use a go/no-go agenda to make final choices after testing. You look at all test data, feedback, and paperwork. You check if the harness meets all rules for fit, comfort, safety, usability, and proof. You look for good gait checks and no escape risk. You decide if the harness passes, fails, or needs rework. You write down the choice and the reason for each outcome.
Note: A clear go/no-go agenda helps you move forward with harness production only when you meet all rules. You lower risk and make safety better for every dog.
By following this pass/fail criteria and decision process, you check harness fit, comfort, and safety for large dogs. You use fair tests, good paperwork, and repeatable steps for every choice. You make harnesses better and lower risk for every dog before you start making many harnesses.
You make large dog harnesses safer and more comfortable by using a clear plan. You do crash testing, gait analysis, and ask handlers for feedback each time. You take photos, videos, and write notes for every test. You always check if the harness fits well, feels good, and keeps the dog from escaping. You use set rules to judge each harness before making many of them. You write down every step to keep quality high. You tell your team to use what they learn to keep getting better. Stridepaw helps with harness testing by using strong materials and proven safety parts.
Criteria | Description |
|---|---|
Safety Standards | Adapted from FMVSS 213 for Child Restraint Systems |
Excursion Limits | <= 32 in. for dogs up to 50 lbs.; <= 36 in. for 51–75 lbs. |
Structural Integrity | Hardware and webbing did not break post-crash |
Crash tested with fake dogs weighing up to 108 lbs.
Made with extra-strong bar tacking and steel parts.
Four places to adjust for a better fit test.
Works fully with your car’s seatbelt system.
FAQ
What is the purpose of a guide dog training fit-test protocol?
A guide dog training fit-test protocol checks if the harness fits well. It also checks if the harness is comfortable and safe. This protocol helps you measure how the dog walks. You collect feedback from handlers. Using these steps helps more dogs succeed in training.
How do gait parameters affect guide dog training?
Gait parameters show how the harness changes how a dog moves. You watch how long each step is and how often the dog steps. You also check if the dog walks evenly. These measurements help you fix the harness. This makes training better for guide dogs.
Why do you need a behavioral evaluation protocol in guide dog training?
A behavioral evaluation protocol checks how dogs act with the harness. It helps you see if the dog feels bad or tries to escape. You also see if the dog walks differently. Feedback from these checks helps more dogs do well in training.
How do you measure training success rates in guide dog training?
You measure training success by counting how many dogs pass the fit-test. You also count how many pass the behavior check. You use gait parameters and handler feedback to see if the harness works. Success means dogs walk well and stay safe.
What evidence do you collect during guide dog training fit-tests?
You collect photos, videos, and notes during fit-tests. You record how the dog walks before and after training. This evidence helps you check training and make the harness better for guide dogs.
How does a training program help improve guide dog training outcomes?
A training program gives you clear steps for fitting the harness. It also tells you how to check the dog’s walk and behavior. Using the same steps helps all dogs get the same training. This makes training results more even.
What role does training evaluation play in guide dog training?
Training evaluation lets you look at handler feedback and how the dog walks. You also check how the dog acts with the harness. You use this information to make training better and safer. You make changes based on what you learn from each test.
Can gait parameters predict guide dog training success?
Gait parameters help you guess if training will work. You watch for changes in how the dog moves. If the dog walks naturally and feels good, training is more likely to work. You use these results to make the harness fit better and help guide dogs succeed.