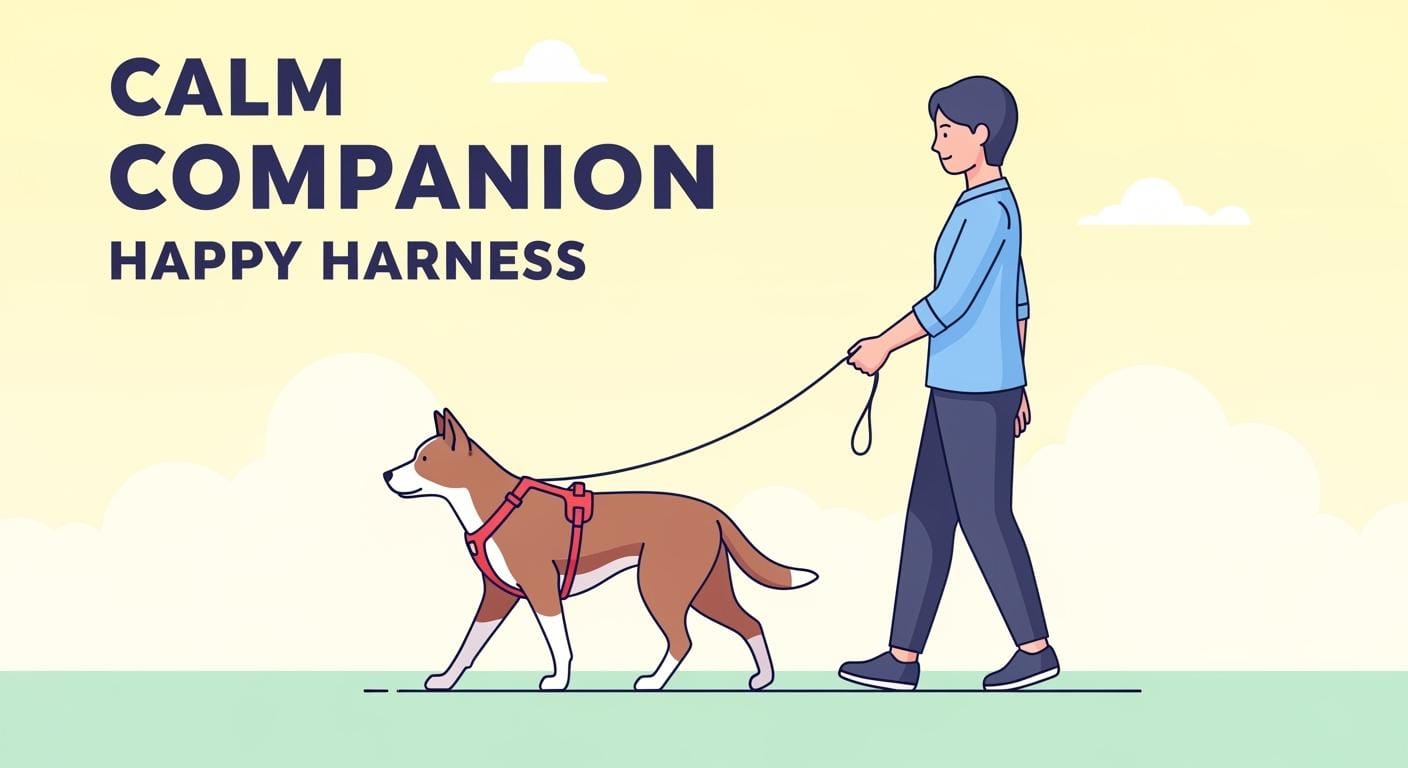
How to Put a Harness on a Dog Step by Step for All Harness Types

How to Put a Harness on a Dog Step by Step for All Harness Types

Many owners feel frustrated when a harness slips, pinches, or simply refuses to fit their dog. You can avoid these problems by learning how to put a harness on a dog correctly. Four main harness styles appear most often on store shelves:

  1. No Pull Dog Harness (Dual-Clip Harness)

  2. Roman Style Dog Harness

  3. Step-In Dog Harness

  4. Norwegian Style Harness

Before you start, check which harness type you have. Fit checks and troubleshooting steps help you keep your dog safe and comfortable. If your dog shows pain, limping, or skin injury, stop using the harness. For fear, reactivity, or handling issues, ask a qualified trainer or veterinarian.

Key Takeaways

  • Identify the type of harness you have. Each style has specific fitting and adjustment methods.

  • Ensure the harness fits snugly but comfortably. Use the two-finger rule to check for pinching or rubbing.

  • Keep the harness centered on your dog’s chest. Adjust straps to prevent twisting or shifting during movement.

  • Test the harness fit before every walk. Look for signs of discomfort or irritation after each outing.

  • Be patient and use treats to help your dog accept the harness. A calm approach builds trust and makes fitting easier.

Key Takeaways

When you use a dog harness, you help your dog stay safe and comfortable during walks. You need to choose the right harness for your dog and make sure it fits well. Here are the main points you should remember before you start:

  • Always check which dog harness type you have. Each style has its own way to put on and adjust.

  • Make sure the harness fits your dog’s body. The straps should not pinch, rub, or slide out of place.

  • Use the two finger rule at all contact points. You should fit two fingers between the dog harness and your dog’s skin without pressing hard.

  • Center the chest area. The harness should not drift to one side when your dog moves.

  • Keep straps clear of the throat, armpits, and shoulders. This helps your dog move freely and prevents rubbing.

  • Test the harness by walking, sitting, and turning with your dog. Watch for strap movement or signs of discomfort.

  • If your dog harness slips or your dog tries to back out, check the belly strap and adjust for a snug fit.

Tip: If you notice your dog licking, scratching, or pulling at the harness, stop and check for rubbing or tight spots.

Choosing the right dog harness size depends on your dog’s weight, age, and breed. Use the table below to guide your selection:

Factor

Description

Total Weight

Your dog’s weight helps you pick the correct dog harness size. If your dog is between sizes, choose the smaller size for a better fit.

Age/Condition

Older dogs may need a smaller rear harness, especially if they have trouble moving.

Breed

Some breeds, like barrel-chested dogs, may need a larger front harness for comfort.

Remember, a well-fitted dog harness keeps your dog secure and happy. Take your time with each step, and check the fit before every walk.

Dog Harness Fit Basics

Centered Chest and Stable Straps

When you put a dog harness on your dog, always check that the chest area stays centered. The harness should not slide toward one shoulder or twist as your dog moves. You want the straps to stay stable and flat against your dog’s body. If the harness shifts or rotates, your dog may feel uncomfortable or try to escape. A centered chest helps your dog harness work as designed and keeps your dog safe during walks.

Tip: After you buckle the harness, walk your dog in a straight line. Watch the chest strap. If it drifts off center, adjust the straps until it stays in place.

Pressure Distribution vs Overtightening

A good dog harness spreads pressure across your dog’s chest and shoulders. You should avoid overtightening the harness. If you pull the straps too tight, your dog may have trouble breathing or moving. Use the two finger rule at every contact point. You should fit two fingers between the harness and your dog’s skin without pressing hard. This helps prevent rubbing and pinching.

Here are some risks if you do not fit the dog harness correctly:

  • Restricted movement can limit your dog’s shoulder extension.

  • Tracheal pressure may irritate the throat and cause long-term damage.

  • Escape risk increases if the harness is too loose.

  • Poor fit encourages pulling and discomfort.

  • Chafing can develop under the arms.

  • Durability issues may appear if the harness wears out faster.

Shoulder and Armpit Clearance

Check the harness straps near your dog’s shoulders and armpits. The side straps should sit behind the front legs, not cut into the soft armpit area. Avoid strap paths that cross the point of the shoulder. Your dog needs freedom to swing its front legs forward. If the harness presses into the throat or armpit, adjust the straps or try a different style. Always look for signs of rubbing, pink skin, or flattened fur after each walk.

Note: A well-fitted dog harness lets your dog move, breathe, and enjoy walks without discomfort.

Identify Your Dog Harness Type

Identify Your Dog Harness Type

Choosing the right dog harness starts with knowing which type you have. Each harness style has unique features and works best for certain dogs and situations. When you learn how to make a dog harness fit well, you help your dog stay comfortable and safe. Let’s look at the main types so you can spot yours quickly.

Overhead Harness Features

You put an overhead harness on by slipping it over your dog’s head and then buckling it around the chest. This harness often has a padded chest panel and sometimes two leash attachment points. Many people use this style when they want to make a dog harness that controls pulling. Overhead harnesses work well for most dogs, especially if you want a secure fit. If you want to know how to make a dog harness easy to use, start with this type.

Step-In Harness Features

A step-in harness lets your dog step into two loops. You then pull the harness up and buckle it on the back. This style works well for small dogs or dogs that do not like things going over their heads. If you want to make a dog harness that is quick to put on, try a step-in design. Many people choose this style for diy dog harness projects because it is simple and gentle.

Multi Buckle and Dual Clip Harnesses

Multi buckle harnesses have more than one buckle. This makes them easier for dogs that dislike overhead motion. Dual clip harnesses have leash attachment points on both the front and back. These harnesses help you control pulling and give you more options. If you want to know how to make a dog harness that is versatile, look for these features. Many diy dog harness guides show how to add extra buckles or clips for comfort.

Harness Type Comparison Table

Here is a quick table to help you compare the main harness types. Use this as a checkpoint before you start to make a dog harness fit your dog.

Harness Type

Easiest For

Common Setup Mistake

Quick Fix

Overhead harness

Most dogs

Chest panel off-center

Adjust straps for symmetry

Step in harness

Small or head-shy dogs

Loops twisted or reversed

Lay flat and check sides

Multi buckle harness

Dogs with handling issues

Missed buckle or loose fit

Double-check all buckles

Dual clip harness

Training and pull control

Wrong leash clip used

Attach leash to correct point

Tip: Always check the harness before each walk. A quick look at the straps and buckles can prevent most problems.

When you know your harness type, you can follow the right steps for how to make a dog harness fit well. This helps you avoid common mistakes and keeps your dog happy. If you want to try a diy dog harness, start with a simple design and test the fit often.

Step-by-Step Guide: How to Put a Harness on a Dog (Overhead Method)

Step-by-Step Guide: How to Put a Harness on a Dog (Overhead Method)

Putting an overhead harness on your dog can feel easy when you follow a clear step-by-step guide. You want your dog to feel safe and comfortable. This method works well for most dogs, but some may freeze or resist. You can use these steps to help your dog accept the harness and enjoy walks together.

Prep: Untwist Straps and Open Buckles

Start by laying the dog harness flat on the floor. Check that all straps are untwisted. Open every buckle so you do not have to fumble when your dog is ready. Hold the harness up and look for the chest panel. Make sure the leash attachment point faces up. This helps you know which part goes over your dog’s head.

Tip: Practice opening and closing the buckles before you approach your dog. This helps you move quickly and keeps your dog calm.

If your dog feels nervous or backs away, pause and let your dog sniff the harness. Hold the harness in one hand and offer a treat with the other. Speak in a calm voice. Wait until your dog shows interest before you move to the next step.

Sequence: Slip Overhead and Buckle

You want to know how to put a harness on a dog without stress. Stand or kneel beside your dog. Hold the harness by the side straps. Gently slip the opening over your dog’s head. The chest panel should rest on the front of your dog’s chest.

If your dog freezes or resists, try this low-pressure routine:

  1. Hold the harness near your dog’s chest.

  2. Let your dog sniff or touch the harness.

  3. Give a treat and praise your dog for calm behavior.

  4. Slowly lift the harness and touch it to your dog’s neck.

  5. If your dog stays relaxed, slip the harness over the head in one smooth motion.

  6. If your dog pulls away, stop and try again later with more treats and gentle words.

Once the harness is over your dog’s head, reach under the chest and bring the side straps behind the front legs. Snap the buckles closed on each side. Make sure you do not pinch your dog’s skin or fur.

Note: Some dogs need extra time to get used to the harness. Go slow and use treats to build trust.

Adjust and Check Symmetry

After you buckle the harness, check the fit. Use the two finger rule at every contact point. You should fit two fingers between the harness and your dog’s body without pressing hard. Look at the chest panel. It should stay centered and not slide to one side.

Walk your dog a few steps. Watch for twisting or shifting. If the harness moves, adjust the straps until everything sits flat and even. The side straps should rest behind the front legs, not in the armpit area. The chest strap should not press into the throat.

Here is a quick checklist for your final fit:

  • Chest panel stays centered

  • Straps do not twist or bunch

  • Two finger space at all contact points

  • No straps pressing into the throat, armpit, or shoulder

  • Buckles snap securely

If you see your dog licking, scratching, or trying to back out, stop and check the harness again. Repeat these steps before every walk. This step-by-step guide helps you learn how to put a harness on a dog the right way. You keep your dog safe and make walks more enjoyable.

Remember: Patience and gentle handling help your dog accept the harness. Practice often and reward calm behavior.

Step-by-Step Guide: How to Put a Harness on a Dog (Step-In Method)

Prep: Create Leg Loops and Confirm Sides

Start by laying the dog harness flat on the ground. You want to see two open loops for your dog’s front legs. Check that the straps are not twisted. Make sure the buckles are open and ready. Look for the side with the leash attachment point. This side should face up. Confirm which loop is for the left leg and which is for the right leg. Some harnesses have color-coded straps or small tags to help you. If your harness does not, hold it up and match the shape to your dog’s body.

Tip: Practice opening and closing the buckles before you bring your dog over. This helps you move smoothly and keeps your dog calm.

If your dog feels nervous, let them sniff the harness first. Hold the harness in one hand and offer a treat with the other. Speak in a gentle voice. Wait until your dog shows interest before you move to the next step.

Sequence: Step In and Buckle

You want your dog to feel safe and relaxed during this process. If your dog resists or freezes, use a low-pressure introduction routine:

  1. Place the dog harness on the floor in front of your dog.

  2. Encourage your dog to sniff or touch the harness.

  3. Give a treat and praise your dog for calm behavior.

  4. Gently guide one front paw into the first loop.

  5. Pause and offer another treat.

  6. Guide the second paw into the other loop.

  7. If your dog pulls away or seems unsure, stop and try again later with more treats and gentle words.

Once both front legs are in the loops, lift the harness up along your dog’s chest. Bring the side straps up and over the shoulders. Snap the buckles together on your dog’s back. Make sure you do not pinch fur or skin. The harness should sit flat against your dog’s body.

Note: Some dogs need extra time to get used to the harness. Go slow and reward calm behavior.

Adjust and Check Symmetry

After you buckle the harness, check the fit and symmetry. You want the dog harness to sit evenly and securely. Use these checkpoints:

  • Use the two-finger test at all contact points. You should fit two fingers between the harness and your dog’s skin without pressing hard.

  • Watch your dog walk a few steps. The harness should not restrict movement or cause rubbing.

  • Make sure the harness is symmetrical. The chest plate should stay centered and not drift to one side.

  • Secure all straps to prevent slipping. If the harness rotates or shifts, adjust the straps until everything sits flat.

  • A wide, rigid chest plate helps keep the harness stable and in position.

Tip: If you see your dog licking, scratching, or trying to back out, stop and check the harness again.

Here is a quick fit check table for your step-in dog harness:

Checkpoint

What to Look For

Two-finger test

Snug but not tight or loose

Movement observation

No restriction or rubbing

Symmetry

Chest plate centered, straps even

Strap security

No slipping or rotation

Chest plate stability

Wide, rigid plate stays in place

A well-fitted dog harness helps your dog enjoy walks safely and comfortably. Repeat these steps before every walk. You keep your dog secure and happy by checking the harness each time.

Dog Harness Fit Checks Before Every Walk

Two Finger Fit at Contact Points

You want your dog to feel comfortable in its harness every time you go for a walk. Start by using the two-finger fit rule at all contact points. Place two fingers between the harness and your dog’s skin. The harness should feel snug but not tight. If you cannot fit two fingers, loosen the straps. If you can fit more than two fingers, tighten the harness slightly. This rule helps prevent pinching and rubbing, but you should not rely on it alone. Always check for signs of discomfort after a walk.

  • The two-finger fit rule gives you a quick way to check harness tightness.

  • It helps you avoid spots that are too tight or too loose.

  • You should also use other tests to confirm the harness fits well.

Movement and Rotation Test

After you adjust the harness, ask your dog to walk, sit, lie down, and turn. Watch how the harness moves. The chest area should stay centered and not drift to one side. You should check for rotation by gently moving the leash attachment point in different directions. Use the table below to guide your movement and rotation tests.

Test Type

Description

Horizontal Movement

Move the leash clip forward, backward, right, and left.

Horizontal Rotation

Rotate the leash clip in a circle on the horizontal plane.

Vertical Rotation (Hook Axis)

Rotate the leash clip up and down around its own axis.

Vertical Rotation (Attachment Axis)

Rotate the leash clip up and down around the attachment point axis.

If the harness rotates or shifts quickly, adjust the straps or check the layout. You want the harness to stay stable during all movements.

Backward Pressure and Hotspot Check

Gently apply backward pressure to the harness and watch if your dog can slip its shoulders through. This test helps you spot escape risks. After your walk, check for hotspots. Look for flattened fur, pink skin, or your dog licking one spot. If you see these signs, adjust the harness or try a different style. Scenario B: Sometimes the harness looks fine indoors but rubs after a walk. In this case, check strap placement and adjust the order. Make sure straps sit behind the front legs and do not press into the throat or armpit.

Tip: Run fit tests and do a short practice walk before heading out for a longer walk.

Fit Check Parameter Table

Use this table to guide your fit checks and adjustments. These parameters help you measure a dog for a harness and improve dog harness comfort.

Parameter

Target range or option

Why it matters

Chest measurement

widest chest, behind front legs

Sizing accuracy and comfort

Neck measurement

where collar sits

Escape risk and comfort

Fit check

two fingers at contact points

Prevents tight spots and rubbing

Adjustment buffer

1-3 in (2.5-7.5 cm)

Micro sizing flexibility

Strap width

0.3-0.6 in (0.8-1.5 cm)

Comfort for petite bodies

Style

step in, over head, vest, strap

Ease of use and pressure points

Escape control

second belly strap optional

Reduces backing out risk

Hardware size

lightweight buckles and clips

Less rotation and better balance

Edge finishing

soft edges or padded zones

Reduces rubbing

Fit Test Checklist Table

Test

Pass Sign

What to Adjust

Two-finger fit

Fingers slide in

Loosen or tighten straps

Movement test

Harness stays centered

Adjust strap layout

Rotation test

Leash clip stays in place

Check buckle position

Backward pressure

Dog cannot slip out

Tighten belly strap

Hotspot check

No pink skin or licking

Move straps, try new style

When you measure a dog for a harness, use these checkpoints before every walk. You help your dog stay safe and comfortable by checking fit and making small adjustments. Repeat these steps often to prevent rubbing and escape risks.

Troubleshooting Dog Harness Problems

When you use a harness, you may notice some common problems. Knowing what to look for helps you fix issues quickly and keep your dog comfortable. Here are the main trouble spots and how to address them.

Twisting or Shifting Harness

A harness that twists or shifts can make walks stressful for both you and your dog. This often happens when straps are not adjusted evenly or the harness is not centered. You should check that all straps lie flat and the chest panel stays in the middle. If the harness keeps moving, try tightening the belly strap or adjusting the chest strap so it sits behind the front legs. For some harnesses, a swivel action or a tether with the right length can help reduce twisting.

Rubbing and Chafing

Rubbing and chafing usually show up as redness or hair loss near the armpits or shoulders. This can happen if the harness straps sit too close to the armpits or if the fit is too tight. Look for harnesses with an extended chest plate or adjustable neck and waist straps. Make sure the straps stay clear of the armpits. If you see signs of irritation, add a soft lining or switch to a padded harness.

Resistance or Discomfort

If your dog resists wearing the harness or seems uncomfortable, check for restricted movement or pressure on the throat. A harness that limits shoulder extension or presses on the neck can cause a stiff gait or reluctance to walk. Adjust the chest panel for a looser fit or try a harness with flexible mesh panels. Watch for signs like head tucking or your dog trying to back out.

Tip: Always check for proper fit before each walk. Small adjustments can prevent most problems.

Problem and Solution Table

Problem

Likely Cause

Fastest Fix

When to Switch Style

Harness twists

Uneven straps, poor alignment

Adjust straps, check chest panel position

If twisting repeats, try a Y-style harness

Chafing or rubbing

Straps near armpits, tight fit

Add padding, adjust straps

Switch to padded or extended chest harness

Dog slips out

Loose straps, wrong size

Tighten straps, check fit

Try a harness with a second belly strap

Limited mobility

Tight chest panel, wrong design

Loosen chest panel, use flexible material

Choose a harness with stretch panels

Common Cause Table

Common Cause

What It Leads To

What to Do Next

Poor fit

Escape risk, discomfort

Re-measure and adjust fit

Strap misplacement

Rubbing, restricted move

Reposition straps, check layout

Over-tightening

Chafing, limited motion

Loosen straps, use two-finger rule

A well-fitted harness keeps your dog safe and happy. Regular checks and small changes make a big difference.

Harness Education for Retail and Wholesale

Product Page Copy for Harness Setup

When you make a product page for a harness, you help buyers use it the right way. Give clear steps and show safety features. This helps every dog owner know how to use the harness for walks and car rides. Add these points to your product page:

  • Crash tested for dogs up to 75lbs (34kg).

  • Comes with a 10in (25cm) seatbelt tether and an all-steel carabiner.

  • For best crash safety, clip the carabiner to your car seat belt.

  • Step-by-step use instructions are in the “3 Steps to Buckle Up Your Pup” guide.

  • A size chart shows how to measure chest and neck for the right harness.

Tip: Remind buyers to check the harness fit before every walk and after car rides. This keeps all dogs safe and comfy.

Size Chart Guidance

You want to stop sizing mistakes when people pick a harness for their dog. A simple size chart helps buyers get the right fit. Suppliers should give breed-specific choices and harnesses that adjust. Good measuring is very important. Use a soft tape and have the dog stand up straight. Measure more than once and write down the dog’s weight and breed. Here is a sample size chart guidance table:

Evidence

Description

Clear Size Guides

Suppliers should give easy-to-read size guides for harnesses to lower sizing mistakes.

Breed-Specific Options

Good suppliers offer sizes for certain breeds or adjustable harnesses for different dog shapes.

Proper Measurement Techniques

Use a soft tape and measure the dog while standing. Write down weight and breed for best results.

Note: A good harness size chart helps you avoid returns and keeps every dog comfy.

Supplier Spec Checklist

You want every harness to meet quality rules before you sell it. Use a checklist to make sure it has all the right features. Check for crash testing, strong hardware, and clear instructions. Make sure the harness has a seatbelt tether and a strong carabiner. Look at the size chart for correct info and breed choices. Check that the harness has soft edges or padding to stop rubbing. Test if it adjusts easily and the buckles stay closed.

  • Crash tested for safety

  • All-steel carabiner and seatbelt tether included

  • Clear step-by-step instructions

  • Correct size chart with breed choices

  • Soft edges or padded spots

  • Easy to adjust and secure buckles

Reminder: You help every dog owner by selling harnesses that meet these rules. Check often to keep your harnesses safe and trusted.

When you use the right harness and follow each step, your dog stays safe and comfortable. A harness that fits well lets your dog move easily and stops strain. Always check the harness before every walk to keep it stable and stop escapes. If the harness sits evenly, it will last longer and help with training. Use gentle hands and rewards to build trust with your dog. If you see any harness problems, look at the troubleshooting tips and make changes.

  • A good harness fit keeps your dog safe.

  • Even harness pressure protects sensitive spots.

  • Checking the harness often stops shifting and discomfort.

  • A snug harness helps prevent escapes.

  • Taking care of the harness makes it last longer.

Being patient and kind helps your dog get used to the harness. Check the fit often to keep your dog safe and comfortable.

FAQ

How do you know if a harness fits your dog correctly?

You should check that you can fit two fingers between the harness and your dog’s body at every contact point. The chest panel should stay centered. Straps should not press into the throat, armpit, or shoulder.

What should you do if your dog tries to back out of the harness?

Tighten the belly strap slightly. Make sure the harness sits behind the front legs. Test with gentle backward pressure. If your dog still slips out, try a harness with a second belly strap for extra security.

Can puppies wear harnesses?

Yes, puppies can wear harnesses. Choose a lightweight, adjustable harness. Check the fit often as your puppy grows. Look for signs of rubbing or discomfort after each walk. Adjust the harness as needed.

How often should you check the harness fit?

Check the harness fit before every walk. Use the two-finger rule and look for strap movement. After each walk, check for pink skin, flattened fur, or licking. Adjust the harness if you see any signs of discomfort.

What is the best way to clean a dog harness?

Hand wash the harness with mild soap and cool water. Rinse thoroughly. Air dry the harness away from direct sunlight. Check for wear or damage before using it again.

Get A Free Quote Now !

Table of Contents

Blog

Canine Pulling Harness How to Spot Wear Before a Hard Pull Turns Risky

Spot wear on your canine pulling harness by checking stitching and hardware before each hard pull to ensure durability and keep your dog safe.

Puppy Collars Custom: How to Check Tightness and Prevent Slipping Safely

Puppy collars custom should fit snugly with two fingers under the collar. Use the slip test to prevent loss and keep your puppy safe and comfortable.

Dog Running Leash: How to Select Hands-free or Standard Based on Real Pulling Patterns

Choose the right dog running leash by matching hands-free or standard setups to your dog's pulling and walking style for safety and control.

Dog Carry Bike Risk Checklist: Body Language Warnings and When to Stop Immediately

Spot stress or danger in your dog during dog carry bike rides. Learn body language warnings and when to stop for your dog's safety on hikes or rainy walks.

Which Waterproof Dog Bed Stays Dry on Wet Ground?

A waterproof dog bed with sealed seams, strong base, and high hydrostatic head value keeps your dog dry on wet ground during outdoor use.

Dog Leashes: How to Spot Wear Before a Leash Fails on a Walk

Check dog leashes for fraying, weak stitching, and hardware issues before walks. Spot stress points early to prevent leash failure and keep your dog safe.
Scroll to Top

If You Have Any Questions, Please Do Not Hesitate To Contatct With Us.

Get A Free Quote Now !

Welsh corgi wearing a dog harness on a walk outdoors