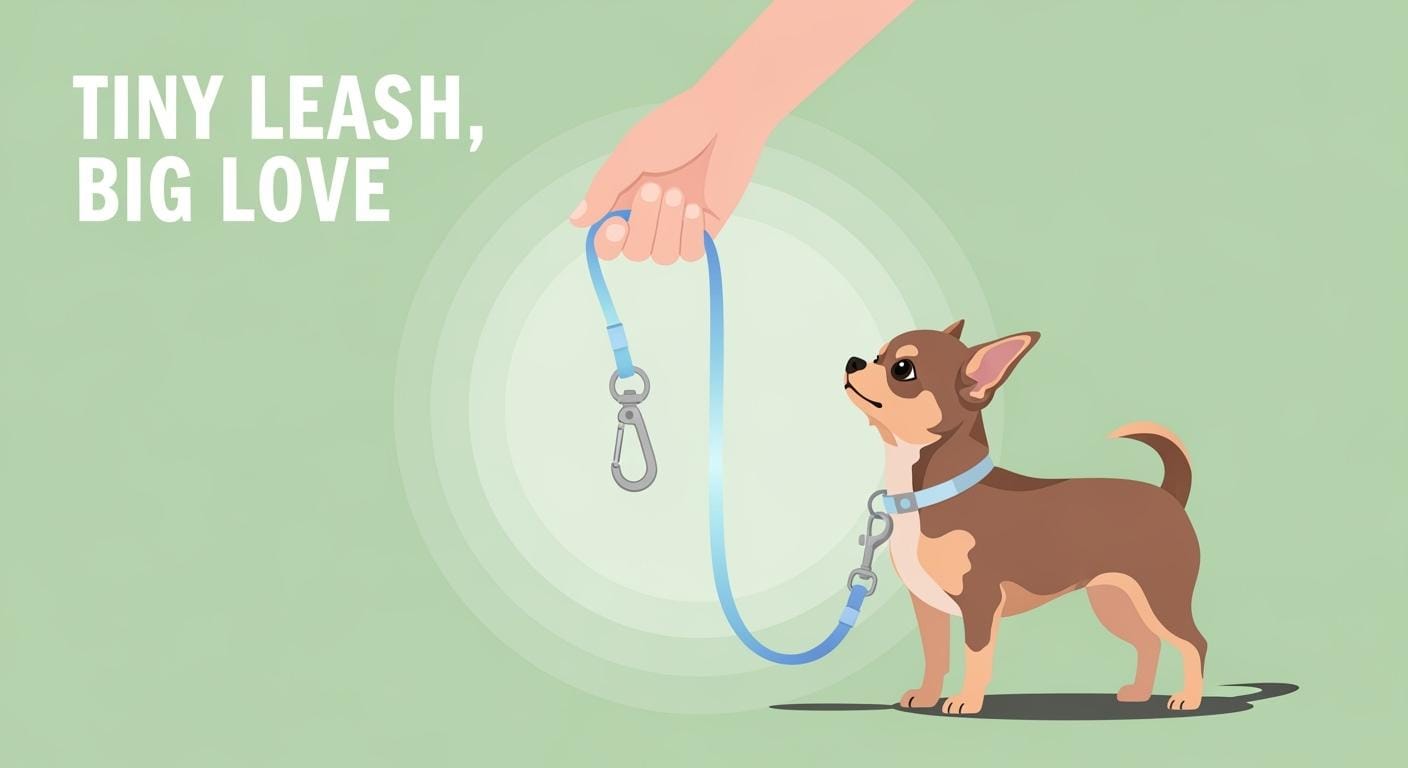
You have a hard time picking a harness for car for dog that fits your car’s seat-belt receiver. You do not want to pay for returns. Receiver-insert tethers and mounting points cause the most returns for dog car harness products. This is true when you look at US and EU/UK cars. You should not believe “universal fit” claims. For pet safety and fewer problems, always check if each harness for car for dog and dog car carrier will fit. When you travel with pets, you need safe pet restraints. Crash-tested dog car harness models and pet travel harnesses help keep your dog safe in the car. Watch the StridePaw video to see how to install a harness for car for dog and use the rest-stop clip-leash.
Key Takeaways
Always check if your car’s seat-belt receiver works with the harness before you buy. This helps you avoid sending it back and keeps your dog safe.
Use crash-tested dog harnesses to keep your dog safe in the car. Pick harnesses that are tested for strength and last a long time.
Train your staff to help customers check if the harness fits right. This means measuring the dog and making sure the harness does not rub.
Teach buyers why a harness is better than a collar in the car. Using a harness can help stop injuries if the car stops fast.
Use the StridePaw video and guides to show how to install and use the harness safely. These tools help people use the harness right and return less stuff.
Do not make big promises about harness safety. Use simple words and follow the rules to stop confusion and complaints.
Check harnesses often for damage or worn spots. Get new ones if you see any problems to keep your dog safe.
Make sure packaging and labels are easy to read and helpful. Add info about what cars the harness fits and safety warnings so buyers can choose well.
Seat-Belt Receiver Fit and Safety Risks
Buyer Complaints and Return Causes
If you sell crash-tested dog harnesses, you want fewer returns. Most buyers have trouble with the receiver fit. These problems happen in the U.S. and EU/UK. The main reasons are:
The tether will not click into the seat-belt receiver.
The harness for car for dog gets stuck in the receiver.
The receiver-insert tether does not fit the car’s shape.
The belt-loop tether gets in the way of the seat-belt webbing.
You need to pick the right compatibility profile for each area. Use Profile_US_ReceiverInsert for U.S. cars. Use Profile_EU_ReceiverInsert for EU/UK cars. If you want less risk with receiver shapes, pick Profile_BeltLoop_Universal. Always check the fit before you sell a harness for car for dog.
Tip: Watch the StridePaw video to see how to check the receiver and install the belt-loop.
Failure Points in Dog Car Harness Systems
You should know where crash-tested dog harnesses can break. Most breaks happen at the connection spots. These are the receiver-insert, the belt-loop, and the ISOFIX/LATCH anchor. You must check each spot for strength and how long it lasts.
Use these words when you talk to suppliers:
Term | Meaning |
|---|---|
WL (Working Load) | How much weight the path can hold in normal use |
PL (Proof Load) | A test load that is higher than WL but does not break it |
UT (Ultimate Tensile) | The most weight the weakest part can take before breaking |
You need to ask for test results that use Card’s numbers. For example, ask for proof at CrashPulseReference_DeltaV. Also, check that the buckle release force is not more than BuckleReleaseForceCeiling. This makes sure the harness for car for dog can open in an emergency.
Note: Do not say your crash-tested dog harnesses work in all cars. You must follow Card’s rules and do not make big claims.
Tether Types: Receiver-Insert, Belt-Loop, ISOFIX/LATCH
There are three main tether types for crash-tested dog harnesses:
Receiver-Insert Tether
Use Profile_US_ReceiverInsert for U.S. cars.
Use Profile_EU_ReceiverInsert for EU/UK cars.
Always check the receiver shape before you sell a harness for car for dog.
Belt-Loop Tether
Use Profile_BeltLoop_Universal to go around the seat-belt webbing.
Make sure the webbing is the right width for SeatBeltWebbingApproxWidth.
Check if it gets in the way of the seat-belt.
ISOFIX/LATCH Tether
Use Profile_ISOFIX_LATCH if the car has ISOFIX/LATCH anchors.
Make sure the anchor spacing is the same as ISOFIX_LATCH_StandardSpacing.
Check the bar size and length.
You must check each tether type in the car. Write down what you find and teach your team to spot problems. This lowers Return_Compatibility and keeps buyers safer.
Callout: Always use crash-tested dog harnesses with the right tether type for your car and region. This keeps pets safe and lowers the chance of problems in a crash.
You can learn more in the StridePaw video and the guide “Dog Car Harness: Matching Types to Buyer Needs and Return Reduction.”
Avoiding Over-Claims in Crash-Tested Dog Harnesses
You want to sell the best crash-tested dog harnesses. You also want fewer returns and to protect your business. Do not make big promises about crash or safety performance. Many buyers want crash-tested dog harnesses that are safe in every crash. You cannot promise this. Use clear words and follow Card’s rules.
Alert: Never say a harness is “crash-proof,” “escape-proof,” or “certified for all vehicles.” These claims are not true for all crashes. They can cause complaints and returns.
Always use the right compatibility profile name. Use Profile_US_ReceiverInsert for U.S. cars. Use Profile_EU_ReceiverInsert for EU/UK cars. Do not say your crash-tested dog harnesses fit every car. Each car has a different receiver shape. Check the fit before you sell.
Talk about crash testing in a careful way. You can say your harnesses use tests at CrashPulseReference_DeltaV. You can say you check buckle release force at BuckleReleaseForceCeiling. Do not say your harnesses are certified for all crash types. Do not say they meet vehicle occupant restraint standards.
Here is a table to help you avoid risky claims:
Claim Type | Allowed? | Safer Alternative Statement |
|---|---|---|
“Crash-proof” | ❌ | “Crash-tested to Card’s reference values” |
“Certified for all cars” | ❌ | “Check compatibility profile before use” |
“Escape-proof” | ❌ | “Use only with harness, not collar” |
“Guaranteed safe” | ❌ | “Follow all install and safety instructions” |
You must give all needed warnings and instructions. Tell buyers to keep the dog in the back seat. Tell them to stay away from airbag zones. Remind them to get a new harness after a bad crash. These steps help keep pets safe and lower risk.
Tip: Use the StridePaw video and install guides to show how to use crash-tested dog harnesses. This helps your team and buyers learn safety steps.
You can lower risk by training your staff. Teach them to talk about crash-tested dog harnesses without making big promises. Give them a script about safety, crash testing, and fit checks. This keeps your message clear and honest.
Focus on real crash risks. Only use Card’s reference values. Do not say more than your harnesses can prove. This keeps your business safe and helps dogs in every crash.
US vs EU Compatibility for Dog Car Harness
Receiver Geometry and SKU Management
You have to match each crash-tested dog harness to the right car market. US and EU/UK cars have different seat-belt receiver shapes. One harness will not fit every region. If you use the wrong receiver-insert, the crash-tested dog harnesses might not lock or unlock. This can make things unsafe for the dog and people in the car.
You should pick Profile_US_ReceiverInsert for US cars. This profile fits most US seat-belt receivers. For EU and UK cars, you must use Profile_EU_ReceiverInsert. This profile matches the receiver shape in those places. If you want fewer SKUs, you can add Profile_BeltLoop_Universal. This profile goes around the seat-belt webbing. It does not need a certain receiver shape. You can also use Profile_ISOFIX_LATCH for cars with ISOFIX/LATCH anchors. Always check that the anchor spacing is the same as ISOFIX_LATCH_StandardSpacing.
Tip: Keep your SKUs sorted by region. This helps you avoid mistakes and lowers returns.
Compatibility Profiles and Packaging
You must put the right compatibility profile on each crash-tested dog harness. This helps buyers choose the right harness for their car. Use clear packaging with region codes. For example, put “US Receiver Insert” or “EU Receiver Insert” on the box. Add the compatibility profile name on the hangtag and instructions. This makes it easy for staff and buyers to know which crash-tested dog harnesses fit which cars.
Here is a table to help you compare the profiles:
Profile Name | Region/Use Case | Key Feature |
|---|---|---|
Profile_US_ReceiverInsert | US | Fits US seat-belt receiver shape |
Profile_EU_ReceiverInsert | EU/UK | Fits EU/UK receiver geometry |
Profile_BeltLoop_Universal | US/EU/UK (all) | Loops around seat-belt webbing |
Profile_ISOFIX_LATCH | US/EU/UK (with anchor) | Uses ISOFIX/LATCH anchor points |
Alert: Never say crash-tested dog harnesses fit all cars. Always check the profile and region before you sell.
Install Instructions for Retailers
You must give clear install instructions with every crash-tested dog harness. Use sheets and hangtags with region codes. Show how to check the receiver shape and pick the right profile. Add a step-by-step guide for each install method: receiver-insert, belt-loop, and ISOFIX/LATCH. Remind staff to check the anchor spacing and bar size for ISOFIX/LATCH.
You can train your team with the StridePaw video. The video shows how to check US and EU receivers, install a belt-loop tether, and use the clip-leash at rest stops. This helps your staff explain crash-tested dog harnesses to buyers and lowers crash risk.
Callout: Always use the right profile and follow the install steps. This keeps pets safe and lowers crash risk for every dog in the car.
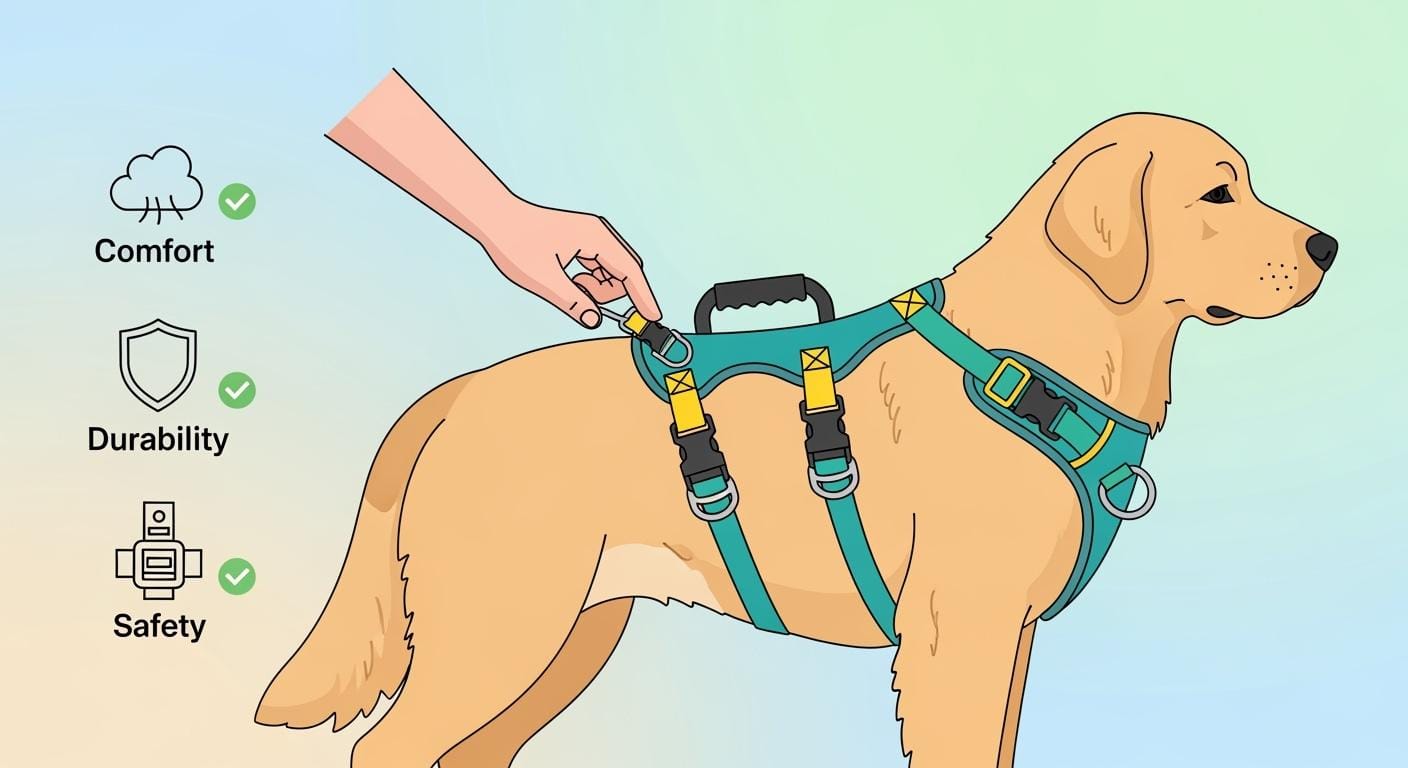
Fit Checks for Harness for Car for Dog
Sizing, Adjustment, and Rub Points
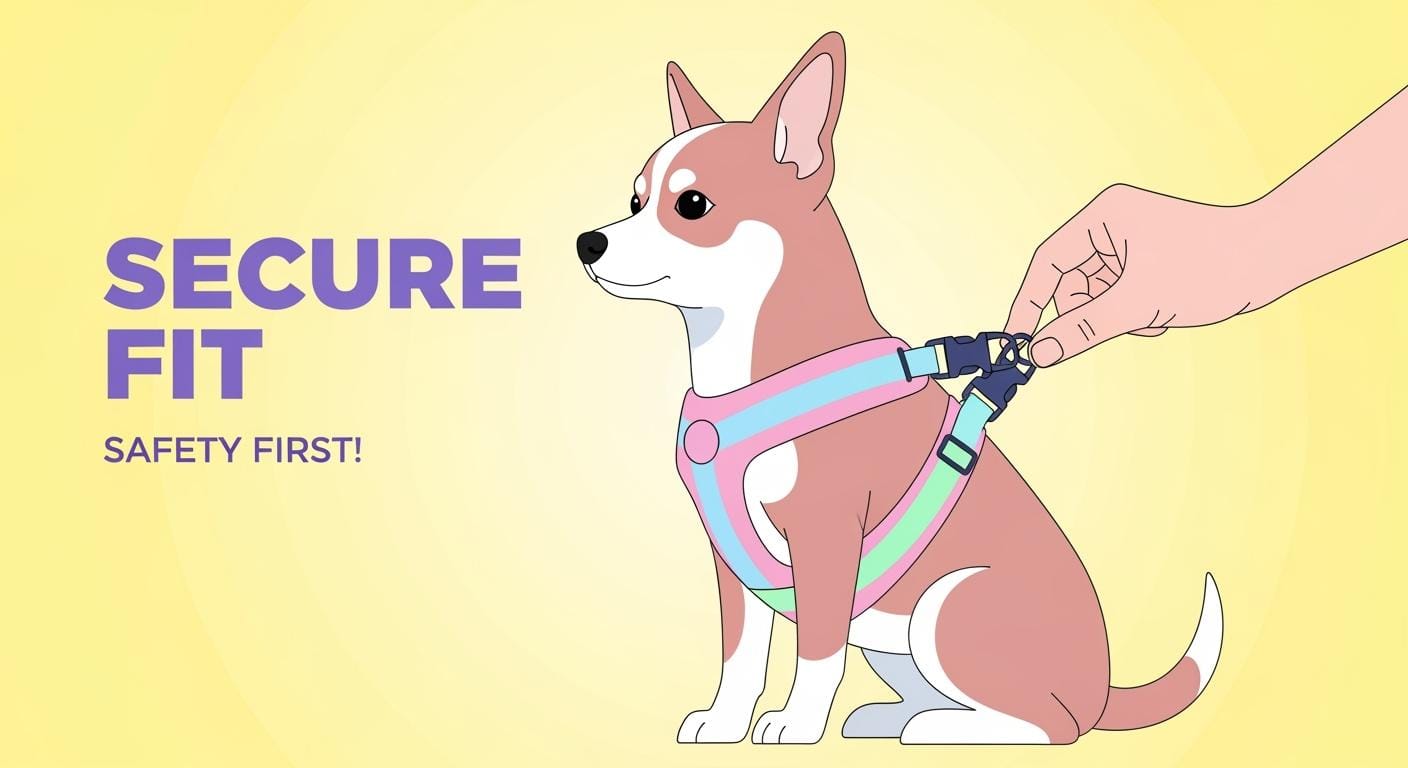
You need to check the fit of every harness for car for dog before you sell it. Start by measuring the dog’s chest and neck. Use the harness sizing chart from your supplier. Make sure the harness sits snug but does not pinch or rub. Adjust the straps so you can fit two fingers between the harness and the dog’s body. Look for rub points near the armpits, chest, and belly. If you see red marks or hair loss, the harness does not fit right.
Check the adjusters for slippage. Pull on each strap to see if it holds tight. If the adjuster slips, the harness can loosen during travel. This can lead to returns and complaints. Always test the buckle release. It should open with force below the BuckleReleaseForceCeiling. If it sticks or jams, do not use the harness.
Tip: Use a retail-facing fit card at the point of sale. This helps staff and buyers check sizing and adjustment before purchase.
In-Car Reach and Rest-Stop Control
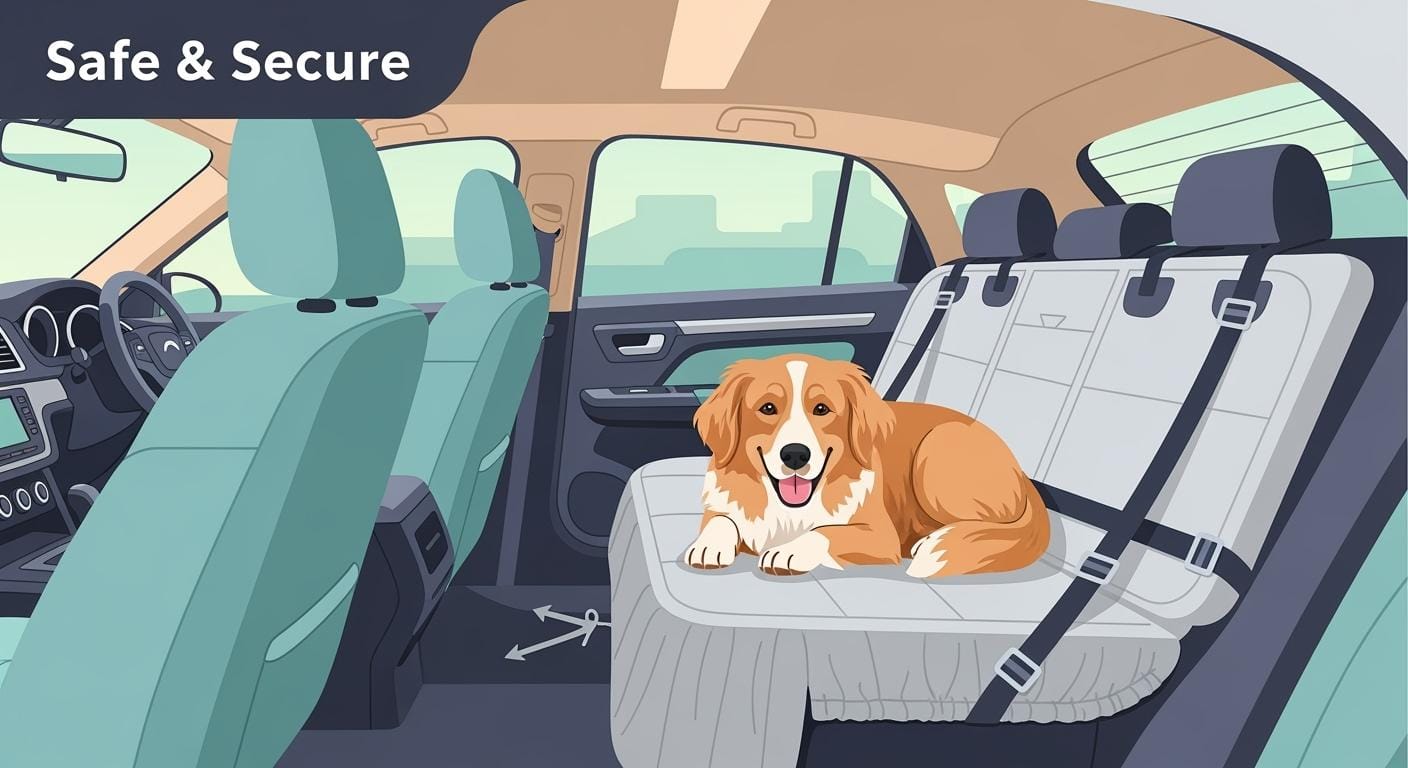
You must check how far the dog can move when clipped in. Attach the harness for car for dog to the seat-belt receiver, belt-loop, or ISOFIX/LATCH anchor, based on the compatibility profile. The dog should sit, lie down, and turn around without reaching the front seat or window. If the tether is too long, the dog can get tangled or reach unsafe areas. If it is too short, the dog cannot move or rest.
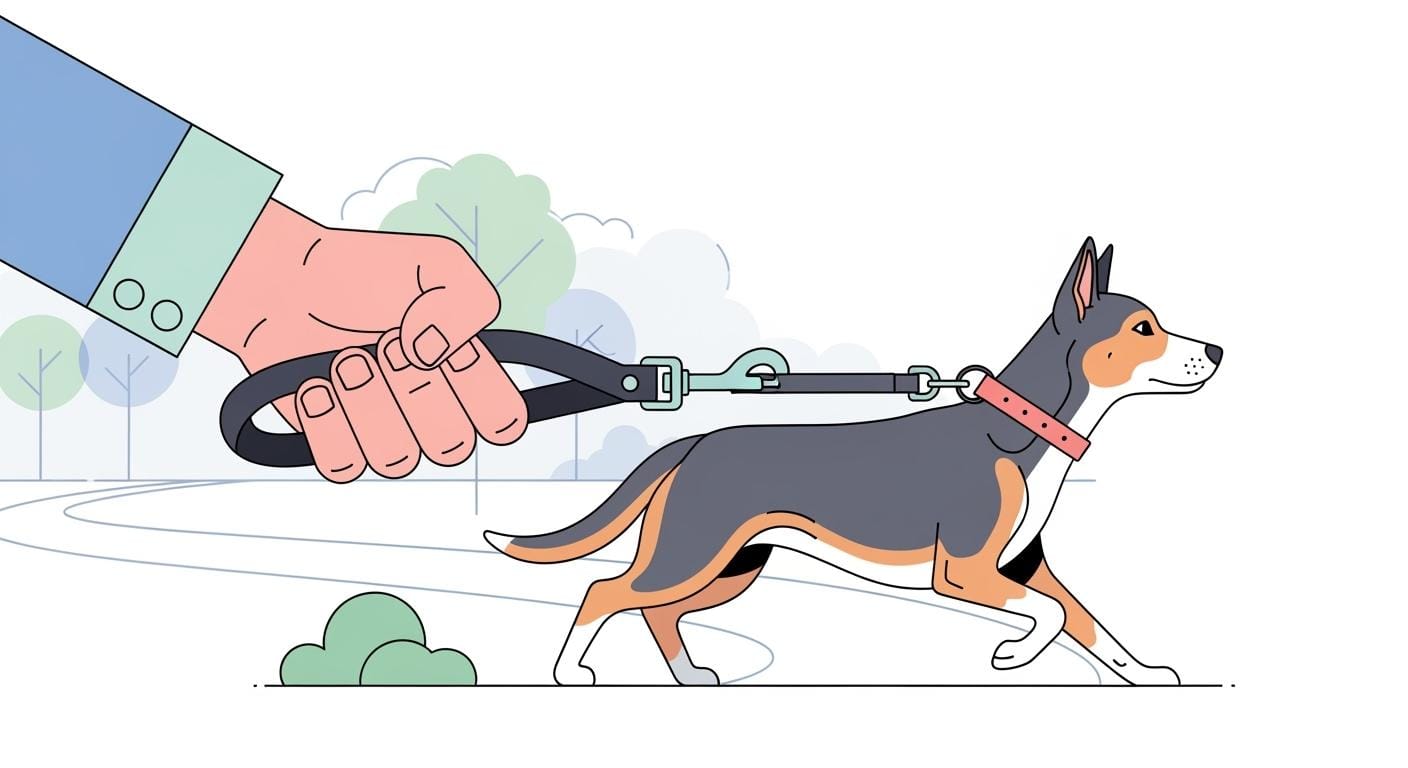
For rest stops, use the clip-leash system. Unclip the harness from the car and attach the leash before opening the door. This keeps the dog under control and prevents escapes. Always remind buyers to use the harness, not a collar, for restraint. This supports pet safety and reduces misuse.
Fit Checkpoint | What to Look For |
|---|---|
Sizing | Snug fit, no pinching |
Adjustment | No strap slippage |
Rub Points | No red marks or hair loss |
In-Car Reach | Dog cannot reach front seat |
Rest-Stop Control | Leash clipped before exit |
Staff and Customer Training Script
Train your staff to guide buyers through these fit checks. Use clear steps:
Measure the dog and select the right harness size.
Adjust straps and check for rub points.
Test the harness in a demo car seat or with a display.
Show how to attach the harness for car for dog to the seat-belt receiver, belt-loop, or ISOFIX/LATCH anchor.
Demonstrate the rest-stop clip-leash workflow.
Callout: Remind buyers to keep the dog in the rear seat, away from airbags, and to replace the harness after any severe incident.
You can use the StridePaw video asset for visual training. This helps staff and buyers understand each step and lowers the risk of misuse.
Download the Fit Check Checklist to support your team and reduce returns.
Internal Link: Dog Car Harness: Matching Types to Buyer Needs and Return Reduction
You want to match each dog car harness to the right buyer and vehicle. This step helps you reduce returns and improve customer satisfaction. You should use the internal guide, “Dog Car Harness: Matching Types to Buyer Needs and Return Reduction,” to help your team. This guide explains how to choose the best harness for each dog and car type.
You can follow these steps:
Identify the vehicle’s seat-belt receiver type.
Select the correct compatibility profile for the region.
Measure the dog and check the harness size.
Review the harness features, such as tether type and adjusters.
Confirm that the harness supports rest-stop control with a clip-leash.
Tip: Use the guide to train your staff. This will help them answer questions and recommend the right harness for each dog.
The guide also includes a table that links common buyer needs to the best harness type. For example, if a buyer wants easy installation, you can suggest a belt-loop or ISOFIX/LATCH harness. If a buyer needs a harness for a large dog, you can check the load rating and fit. This process helps you lower Return_Compatibility and Return_Fit rates.
You can find more details in the StridePaw resource page, “Dog Car Harness: Matching Types to Buyer Needs and Return Reduction.”
Internal Link: Dog Car Tether Safety: Installation, Fit Checks, and Customer Instructions
You must teach your team how to install and check every dog car tether. The StridePaw page, “Dog Car Tether Safety: Installation, Fit Checks, and Customer Instructions,” gives you step-by-step instructions. This resource helps you improve pet safety and reduce misuse.
Here is a checklist you can use:
Check the compatibility profile before installation.
Attach the harness to the correct anchor point.
Adjust the tether length so the dog cannot reach the front seat.
Inspect the harness for signs of wear or damage.
Remind buyers to use the harness, not a collar, for restraint.
Alert: Always keep the dog in the rear seat and away from airbag zones.
The StridePaw page also provides sample scripts for staff. These scripts help you explain installation steps and safety warnings to buyers. You can use the scripts during staff training or at the point of sale. This approach helps you lower Return_Misuse and Return_Defect rates.
You can access the full instructions and training materials on the StridePaw page, “Dog Car Tether Safety: Installation, Fit Checks, and Customer Instructions.”
Validation and Testing for Safety
Working Load, Proof Load, Ultimate Tensile (WL/PL/UT)
You need to check how much force each harness for car for dog can handle. You do this by testing three things: Working Load (WL), Proof Load (PL), and Ultimate Tensile (UT). These tests help you know if the harness will hold during a crash. You ask your supplier to show results for each test. You want to see that the harness can handle normal use, extra force, and the highest force before breaking.
You should use Card’s reference values when you talk about crash testing. For example, ask for test data at CrashPulseReference_DeltaV. This shows how the harness works in a crash. You do not say the harness is crash certified. You only show that you checked the numbers. This helps you keep safety high and lower risk for every dog.
Tip: Always ask for test reports that use Card’s values. This keeps your records clear and helps with pet safety.
Buckle and Adjuster Cycling Test
You must test the buckle and adjusters on every harness for car for dog. These parts get used many times. You want to know they will not break or jam during a crash. Use the BuckleReleaseForceCeiling as your guide. The buckle should open with less force than this value. You also want to see that the buckle works after many uses. Ask for cycling tests at the BuckleReleaseCyclingTarget.
You check the adjusters for slippage. Pull on the straps and see if they hold tight. If the adjuster slips, the harness can fail in a crash. You want to see test results that show the adjusters stay strong. This keeps safety high for every dog in the car.
Test Name | What to Check | Reference Value |
|---|---|---|
Buckle Release Force | Opens below max force | BuckleReleaseForceCeiling |
Buckle Cycling | Works after many uses | BuckleReleaseCyclingTarget |
Adjuster Slippage | Straps stay tight | Card’s reference values |
Alert: Do not claim the harness is escape-proof or crash-proof. Only show that you tested for safety.
Abrasion and Corrosion Exposure
You need to check how the harness for car for dog holds up over time. Test the webbing for wear using the WebbingAbrasionTarget. This shows if the harness can last through many trips and still work in a crash. You also test the metal parts for rust. Use a simple corrosion test to see if the hardware stays strong.
You ask your supplier for reports on these tests. You want to see that the harness can handle rough use and bad weather. This keeps safety high and lowers the chance of failure for every dog.
Note: Always keep records of these tests. This helps you answer questions from buyers and supports your safety claims.
You can find more details and training on the StridePaw page, “Dog Car Tether Safety: Installation, Fit Checks, and Customer Instructions.”
Labeling and Packaging for Dog Car Seats and Harnesses
Load-Rating Labels and Warnings
All dog car seats and harnesses need clear labels. Labels help buyers and workers use the product safely. Each label must show the max dog mass rating in pounds and kilograms. The label should also list the compatibility profile name, like Profile_US_ReceiverInsert or Profile_BeltLoop_Universal. Say how to install it, such as receiver-insert or belt-loop. Every label needs important warnings. These warnings tell buyers not to use the harness with a collar. Remind them to keep the dog in the back seat and away from airbags. Tell buyers to watch their dog and get a new harness after a bad crash. Always put a traceability lot code on the label for quality checks.
Alert: Never use words like escape-proof, crash-proof, or guaranteed safe. These words are not allowed and can confuse people.
Here is a checklist for what to put on the label:
Max dog mass rating (lb + kg)
Compatibility profile name
Install method
Key warnings
Traceability lot code
Instruction Sheets, Hangtags, Carton Marks
Instruction sheets and hangtags are important for pet safety. You should give easy install steps for each dog car seat and harness. Use simple words and pictures. Show how to attach the harness to the seat-belt receiver, belt-loop, or ISOFIX/LATCH anchor. Remind buyers to check the anchor spacing and bar size. Put the compatibility profile name and region code on every hangtag and instruction sheet.
Carton marks help with shipping and storage. Mark each carton with the product name, compatibility profile, and lot code. This helps your team track and sort products. You can also add a quick fit check guide on the carton for staff.
Packaging Element | Required Content |
|---|---|
Hangtag | Profile name, region code, install method, warnings |
Instruction Sheet | Step-by-step install, fit check, safety reminders |
Carton Mark | Product name, profile, lot code, quick fit guide |
Tip: Use the StridePaw install guide for sample sheets and hangtags.
Barcode and Channel Packaging
Every dog car seat and dog booster car seat needs a barcode. Barcodes help you keep track of products and sales. Put the barcode on the hangtag and carton. Make sure the barcode matches the SKU and compatibility profile. For channel packaging, use boxes with region codes. This stops mix-ups between US and EU/UK profiles.
You should also add a QR code that links to the StridePaw install video. This lets buyers and staff see how to use the product. Always check that the packaging does not have claims you should not use. Give clear and honest information to help keep pets safe.
Callout: Good labels and packaging help stop mistakes, returns, and safety problems for every dog.
Receiving QC and Retail SOP for Dog Car Harness
Incoming Inspection and AQL
You have to check every shipment of dog car harnesses before accepting it. Use Card’s AQL_Critical, AQL_Major, and AQL_Minor to plan your checks. AQL_Critical means problems that could hurt a dog or make the harness unsafe. AQL_Major covers issues that affect how the harness works or fits but are not dangerous. AQL_Minor is for small things like scratches or mistakes in packaging.
Set up your inspection area with bright lights and enough room. Open the boxes and pick samples using your AQL plan. Look for missing parts, wrong compatibility profiles, or broken hardware. Make sure each harness matches the profile on its label, like Profile_US_ReceiverInsert or Profile_BeltLoop_Universal. Write down what you find on the Receiving QC Checklist.
Tip: Always save your inspection records. This helps you see patterns and keep pets safer.
Assembly Checkpoints and Rework
You need to check important assembly spots on every dog car harness. Start by pulling on the seams to see if the stitching is strong. Check the buckles and adjusters to make sure they work and do not stick. Test the tether attachment and see if it matches the install method on the label.
If you find a problem, decide if you can fix it or must reject the harness. For example, you can cut off loose threads or add a missing hangtag. You cannot fix broken buckles or the wrong compatibility profile. Put a special tag on any harness you fix. Keep rejected harnesses away from the ones you can sell.
Checkpoint | Action if Failed |
|---|---|
Stitching | Fix if small, reject if open seam |
Buckle/Adjuster | Reject if broken |
Tether Attachment | Reject if wrong profile |
Label/Tag | Fix if missing |
Alert: Never send out a harness with a big safety problem. This keeps your business and all dogs safe.
Return Triage: Compatibility, Fit, Defect, Misuse
You need a simple way to handle returns. Sort each return into one of four groups:
Return_Compatibility: The harness will not latch, does not fit the receiver, or gets stuck.
Return_Fit: The harness cannot adjust, rubs the dog, or lets the dog move too much.
Return_Defect: The harness has broken seams, bad hardware, or is damaged right out of the box.
Return_Misuse: The harness was put on wrong, clipped to a collar, or used in the front seat.
Write down the reason for every return. Use this information to find patterns and make your next order better. Share common problems with your supplier. This helps you lower returns and keep pets safer.
Callout: Download the Receiving QC Checklist to help your team with every step of checking new shipments and sorting returns.
You can find more tips and training in the StridePaw resource, “Dog Car Tether Safety: Installation, Fit Checks, and Customer Instructions.”
RFQ Template and Supplier Scorecard
If you want to buy harnesses for car for dog, you need a simple plan. You have to make sure every product is safe and good quality. Use a Request for Quotation (RFQ) checklist to help your supplier know what you want. This helps you stop mistakes and keeps your team thinking about safety.
RFQ Checklist: Compatibility, Tests, Labels, Packaging
You should give your supplier a checklist with each RFQ. This list covers the most important things for harnesses for car for dog. You want to be sure each harness fits the right car, passes safety tests, and has the right labels and packaging.
Here is an example RFQ checklist you can use:
RFQ Checklist for Dog Car Harness

1. Compatibility Profile
   - List the profile you need: Profile_US_ReceiverInsert, Profile_EU_ReceiverInsert, Profile_BeltLoop_Universal, Profile_ISOFIX_LATCH
   - Make sure it fits the car’s receiver or anchor

2. Validation Tests (Card Reference Values)
   - Ask for test reports for: CrashPulseReference_DeltaV, BuckleReleaseForceCeiling, BuckleReleaseCyclingTarget, WebbingAbrasionTarget
   - Tell the supplier to show WL, PL, UT for all load paths

3. Labeling and Packaging
   - The label must show: max dog mass rating (lb + kg), compatibility profile name, install method, key warnings, traceability lot code
   - Warnings must say: not for use with collar, rear seat only, avoid airbag zones, supervise, replace after a bad crash, follow instructions
   - No ClaimsToAvoid on any packaging or instructions

4. QC Sampling and Inspection
   - Use Card’s AQL_Critical, AQL_Major, AQL_Minor for checking new shipments
   - Ask the supplier for lot traceability and inspection records

5. Lead Time and Traceability
   - Check how long it takes to make and ship the harnesses
   - Make sure every unit and box has a traceability lot code

6. Documentation
   - Give instruction sheets and hangtags with region code and install steps
   - Put carton marks with product name, profile, and lot code

7. Internal Links
   - Add StridePaw install video and training pages by title
Tip: Always go over the checklist with your supplier before you order. This helps you stop delays and returns.
Supplier Scorecard: Durability, Corrosion, Communication
You need a way to check how well your supplier does. A supplier scorecard helps you track quality, safety, and service. Use this scorecard after each shipment of harnesses for car for dog. Share the results with your supplier so they can get better.
Evaluation Area | What to Check | Rating (1-5) |
|---|---|---|
Durability | Passed all WL, PL, UT, and cycling tests | |
Corrosion Resistance | Hardware passed corrosion exposure tests | |
Labeling Accuracy | All labels match LoadLabelMustInclude and WarningMustInclude | |
Packaging Quality | Cartons, hangtags, and instructions match requirements | |
QC and Traceability | Lot codes and inspection records provided | |
Communication | Supplier responds quickly and clearly | |
Problem Resolution | Issues fixed on time and with clear action steps |
You can use this table to score each shipment. If you see low scores, talk to your supplier right away. This helps keep your dog car harness program safe and working well.
Callout: Use the StridePaw training pages for more tips on supplier management and quality checks.
Failure Mode Table for Dog Car Harness
Table: Buyer Symptom | Root Cause | Spec/Test
You want to stop problems before buyers see them. You need to know what can go wrong with harnesses for car for dog. This table helps you find issues, figure out why they happen, and pick the right test or spec to fix them. Use this table when you check new products and review harnesses.
Buyer Symptom | Likely Root Cause | Spec/Test to Prevent Issue |
|---|---|---|
Harness will not latch in receiver | Wrong compatibility profile selected | Confirm Profile_US_ReceiverInsert or Profile_EU_ReceiverInsert fit using sample receivers |
Harness jams or cannot release | Receiver-insert geometry mismatch | Test buckle release force at BuckleReleaseForceCeiling; verify receiver shape during QC |
Dog moves too far in car | Tether length too long or wrong install method | Check in-car reach using fit checklist; verify install method matches profile |
Harness rubs or pinches dog | Incorrect sizing or poor adjustment | Use sizing chart; perform fit check for rub points and adjustment |
Buckle or adjuster fails | Hardware not tested for cycling or load | Require buckle cycling test at BuckleReleaseCyclingTarget; check WL/PL/UT for all load paths |
Webbing frays or wears out quickly | Insufficient abrasion resistance | Test webbing at WebbingAbrasionTarget; inspect for early wear during incoming QC |
Metal parts rust or corrode | Poor corrosion resistance | Request corrosion exposure test; inspect hardware during receiving |
Label missing key warnings | Incomplete labeling or packaging | Audit labels for LoadLabelMustInclude and WarningMustInclude requirements |
Harness used with collar | Buyer misuse or unclear instructions | Include clear warnings on hangtag and instruction sheet; train staff with StridePaw guide |
Dog escapes at rest stop | Leash not clipped before exit | Demonstrate rest-stop clip-leash workflow; use StridePaw training video |
Tip: Staff can use this table for training and supplier checks. It helps lower returns and keeps dogs safer in cars.
You should always write down failure modes and share them with your supplier. This helps you get better and reach safety goals. For more help, look at the StridePaw page, “Dog Car Tether Safety: Installation, Fit Checks, and Customer Instructions.”
Spec Request Checklist Table for Dog Car Harness
Table: Requirement | Supplier Request | Receiving Verification
When you order new harnesses, you need a simple checklist. This helps you make sure each dog harness meets your rules. You want to stop mistakes and keep every dog safe in the car. Use this table to help your team and your suppliers.
Requirement | Supplier Request | Receiving Verification |
|---|---|---|
Compatibility Profile | Specify Profile_US_ReceiverInsert, Profile_EU_ReceiverInsert, Profile_BeltLoop_Universal, or Profile_ISOFIX_LATCH | Check label and physical fit with sample receiver or anchor |
Max Dog Mass Rating | State max dog mass in lb and kg on label | Confirm label matches LoadLabelMustInclude |
Install Method | List install method (receiver-insert, belt-loop, ISOFIX/LATCH) | Inspect hangtag and instruction sheet for correct method |
Key Warnings | Include all warnings from WarningMustInclude | Review label and instructions for required warnings |
Traceability Lot Code | Print lot code on each harness and carton | Verify lot code is present and matches records |
Validation Test Reports | Provide test data for CrashPulseReference_DeltaV, BuckleReleaseForceCeiling, BuckleReleaseCyclingTarget, WebbingAbrasionTarget, and show WL/PL/UT | Review test reports and cross-check with Card’s reference values |
Buckle and Adjuster Function | Confirm buckle opens below BuckleReleaseForceCeiling and passes cycling test | Test buckle release and cycle sample harnesses |
Webbing and Hardware Quality | Show webbing meets WebbingAbrasionTarget and hardware passes corrosion test | Inspect webbing for wear and hardware for corrosion |
Label and Packaging Accuracy | Ensure all labels, hangtags, and cartons meet LoadLabelMustInclude and WarningMustInclude | Audit packaging for correct information and absence of ClaimsToAvoid |
Instruction Sheets and Hangtags | Supply clear install steps, fit check, and region code | Check for presence and clarity of instructions and region code |
Barcode and SKU | Assign barcode matching SKU and compatibility profile | Scan barcode and verify against SKU and profile |
Internal Training Resources | Link to StridePaw install video and training pages by title | Confirm QR code or reference to StridePaw resources is included |
Tip: Use this checklist for every order. This will help you lower returns and keep dogs safer. Train your team to follow each step. For more help, look at the StridePaw resource, “Dog Car Tether Safety: Installation, Fit Checks, and Customer Instructions.”
You can change this table to fit your own process. Always put safety and clear communication first. When you use this checklist, you help every dog travel safer and make your supply chain better.
You make your dog car harness program better by using compatibility profiles, fit checks, and validation tests. You use checklists and tables to help lower returns and keep your pet safe. You watch the StridePaw video and look at guides before installing each dog harness. You talk to suppliers with the RFQ template. You train your team with Card’s AQL rules and Return_* groups. You look at RetailPrice, LandedCost, ReturnRate, and ReturnHandlingCost. You explain why stronger mounting hardware is needed by using WL, PL, and UT. You make travel safer for every dog.
FAQ
What is the most common reason for returns with a harness for car for dog?
You often see returns when the harness does not fit the seat-belt receiver. Always check the compatibility profile before you buy. This step helps you avoid Return_Compatibility issues and keeps every dog safer during travel.
How do I choose the right harness for my region?
You need to match the harness to your market. Use Profile_US_ReceiverInsert for US vehicles and Profile_EU_ReceiverInsert for EU/UK vehicles. For more flexibility, consider Profile_BeltLoop_Universal or Profile_ISOFIX_LATCH. This ensures the harness fits and secures the dog properly.
Why should I avoid using a collar with a car harness system?
You must use a harness, not a collar, for restraint. Collars can injure the dog during sudden stops. The harness spreads force safely. Always follow the warnings on the label and instructions to protect the dog in every situation.
How do I check if the harness fits my dog correctly?
You should measure the dog’s chest and neck. Adjust the harness so it fits snug but does not pinch. Check for rub points and test the buckle release. A proper fit keeps the dog comfortable and reduces Return_Fit complaints.
What is the best way to control the dog at rest stops?
You should use the clip-leash system before opening the car door. Attach the leash to the harness, not the collar. This step prevents escapes and keeps the dog under control. Review the StridePaw video for a full rest-stop workflow.
Where can I find installation and training resources?
You can access install guides and training scripts on StridePaw pages. Look for “Dog Car Tether Safety: Installation, Fit Checks, and Customer Instructions” and the StridePaw video asset. These resources help you train staff and support buyers.
What should I do if the harness hardware shows wear or corrosion?
You need to inspect the harness regularly. If you see frayed webbing or rusted hardware, remove the harness from use. Request test reports from suppliers for WebbingAbrasionTarget and corrosion exposure. This keeps every dog safer and supports your quality program.